Quick update guys! Sorry, no pics! I got my seat cover and base valves today, too bad I'm working 14 hour days until Tuesday! Then on Tuesday I'll go nuts, put the forks back together, get the whole front end on, basically get the entire chassis done and ready for the engine to be dropped in.
I'm only waiting on ONE more package from RB designs, then I have everything and can get to riding this whore again! :D
Project KDX 220R - The Rebuild
-
Slick_Nick

- Supporting Member
- Posts: 1675
- Joined: 10:06 pm Oct 22 2009
- Country: Canada
- Location: Calgary, Alberta
- Contact:
-
frankenschwinn

- Supporting Member II

- Posts: 482
- Joined: 01:20 pm Nov 28 2009
- Country:
I wondered if you had gotten those yet...Slick_Nick wrote:Quick update guys! Sorry, no pics! I got my seat cover and base valves today, too bad I'm working 14 hour days until Tuesday! Then on Tuesday I'll go nuts, put the forks back together, get the whole front end on, basically get the entire chassis done and ready for the engine to be dropped in.
I'm only waiting on ONE more package from RB designs, then I have everything and can get to riding this whore again! :D
-
Slick_Nick
- Supporting Member
- Posts: 1675
- Joined: 10:06 pm Oct 22 2009
- Country: Canada
- Location: Calgary, Alberta
- Contact:
Well, got ALOT done today! :D First day off in 13 days!
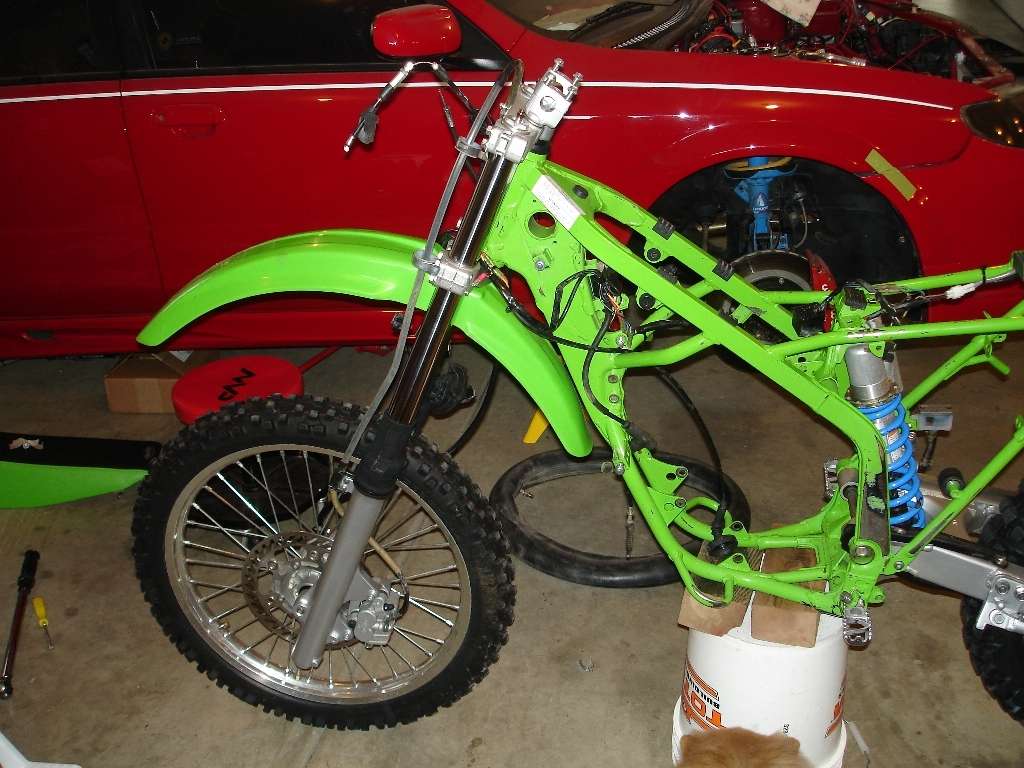
Got my new fork base valves installed, then toop the fork tops off (again) and modified the preload spacers. Now I have 10mm of preload. The forks were looking like shiz, so I took off the clear protective film and drysprayed them like the swingarm.

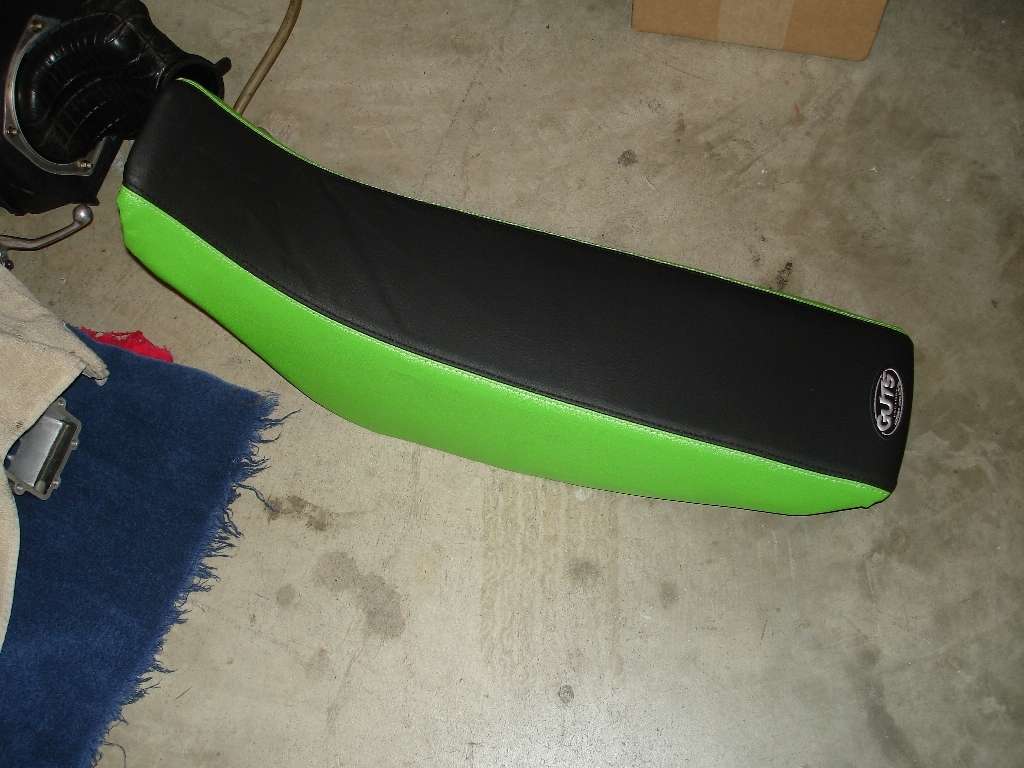
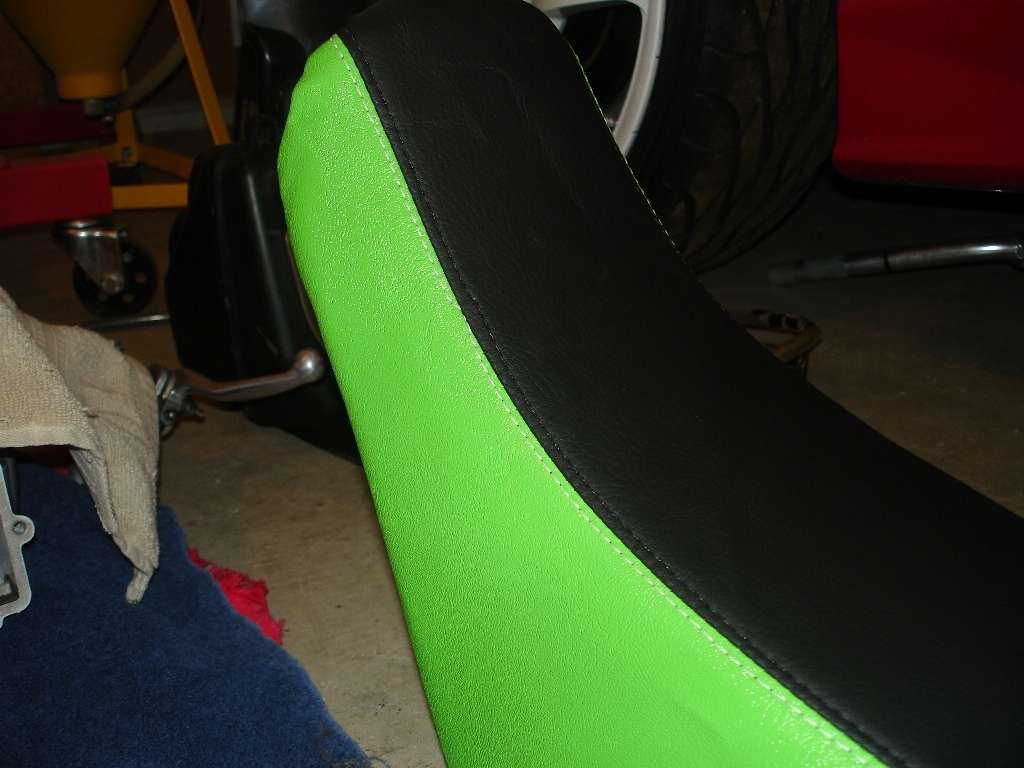
While I was into the forks, my Dad did the seat cover for me. He has a knack for stuff liek this, looks like it came from the factory that way! New GUTS seat cover with green sides.
While he was working on that, I finished up the forks with new push button bleeders.

Next, I installed the SealSavers, mounted the forks, torqued everything down, mounted the wheel, connected the tripmeter, mounted the caliper, changed the front pads, bled the front brake with fresh fluid, and then had some lunch!
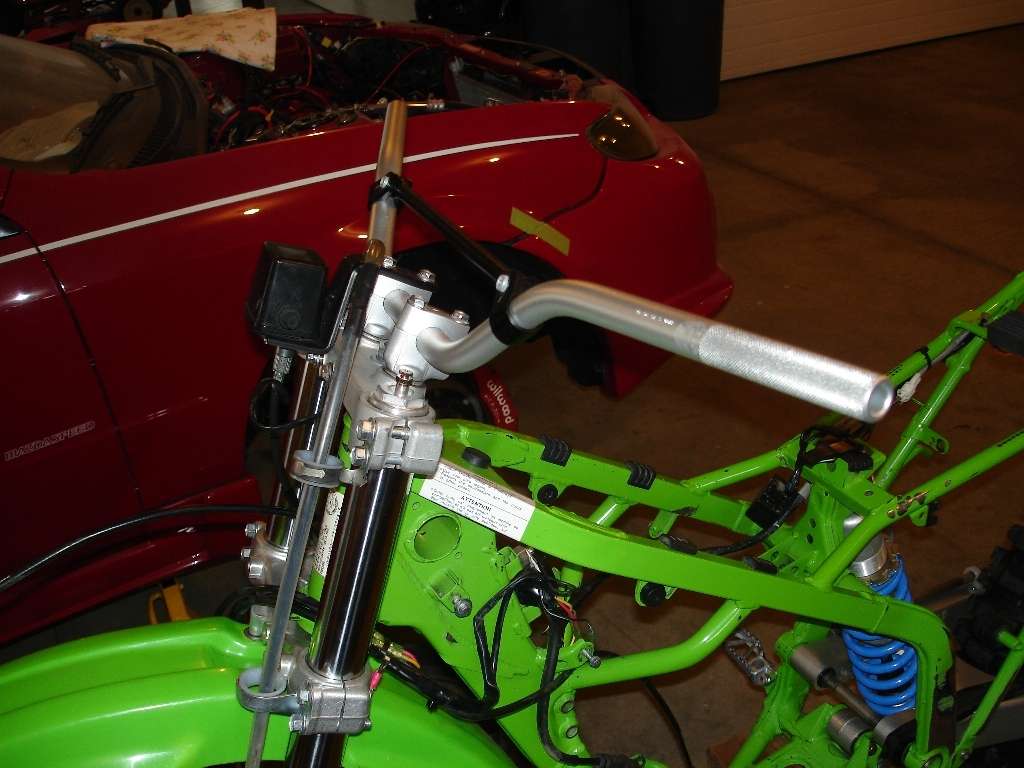
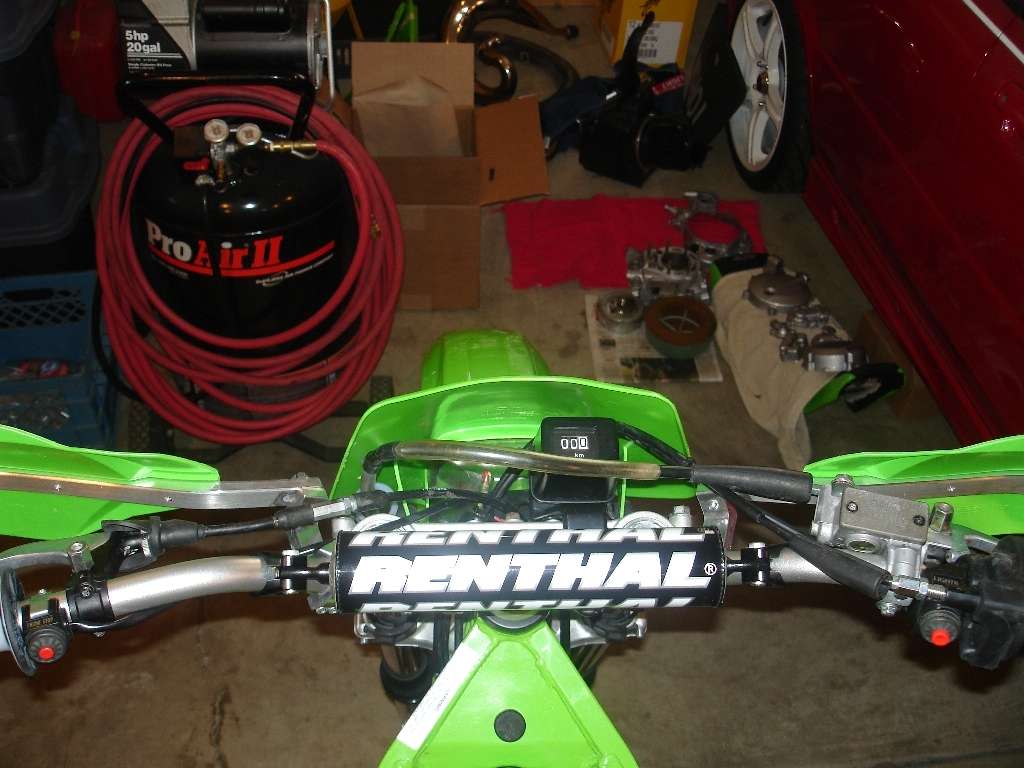
Then, I mounted the new bars. Renthal CR High's, nice bars. Quite a bit wider than the old Azonics that were on there. From what I could tell, I really like the bend.
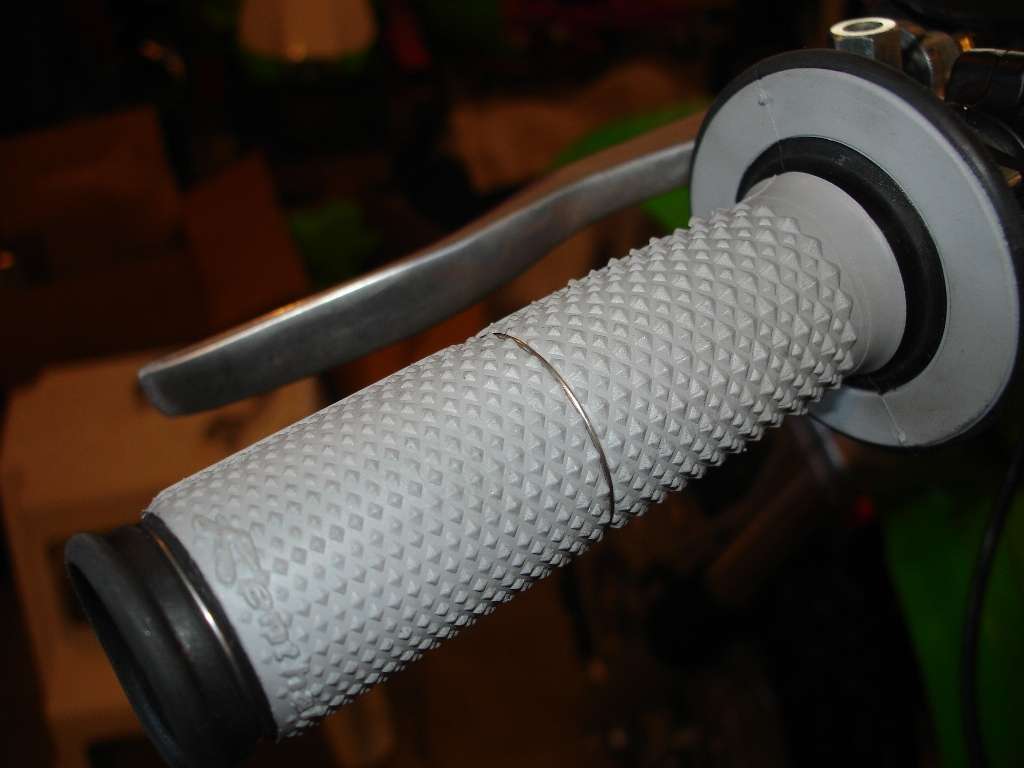
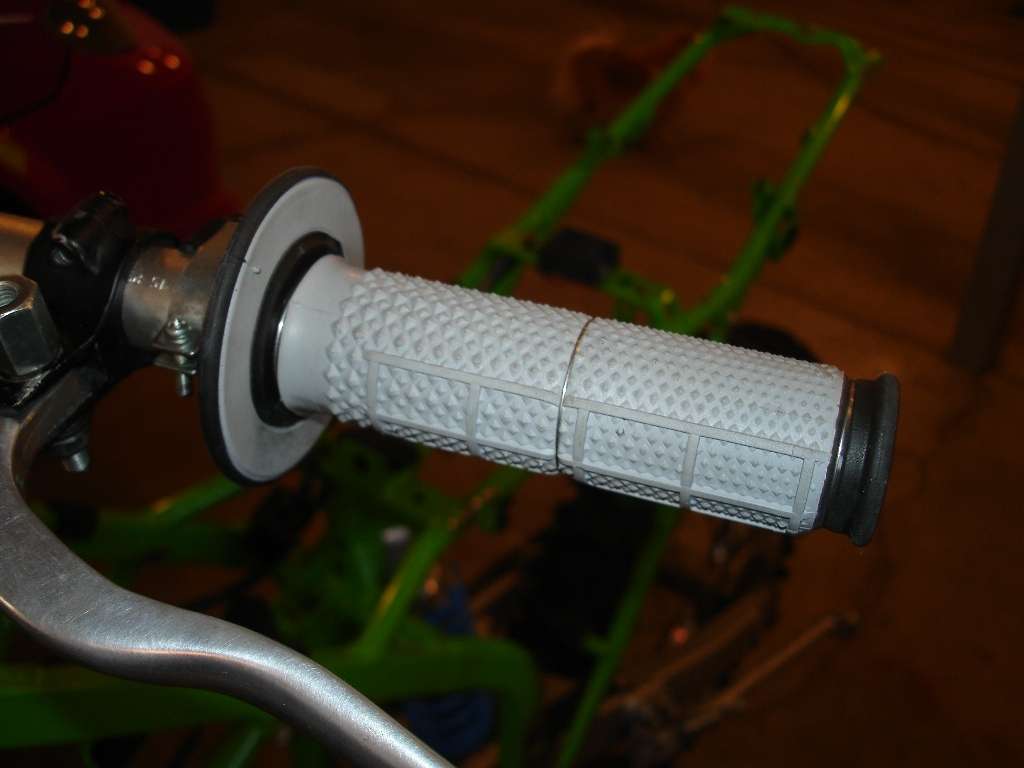
Renthal Dual Layer grips, used golf club grip tape, slid the grips on with Varsol, then safety wired them in addition. These things ain't coming off! :D
Got all the controls on and mounted, (you'd be surprised how long that can take) and got everything hooked up and torqued down. The clutch and throttle cables need to be adjusted once the engine is back in, for now they're backed off as far as they go.
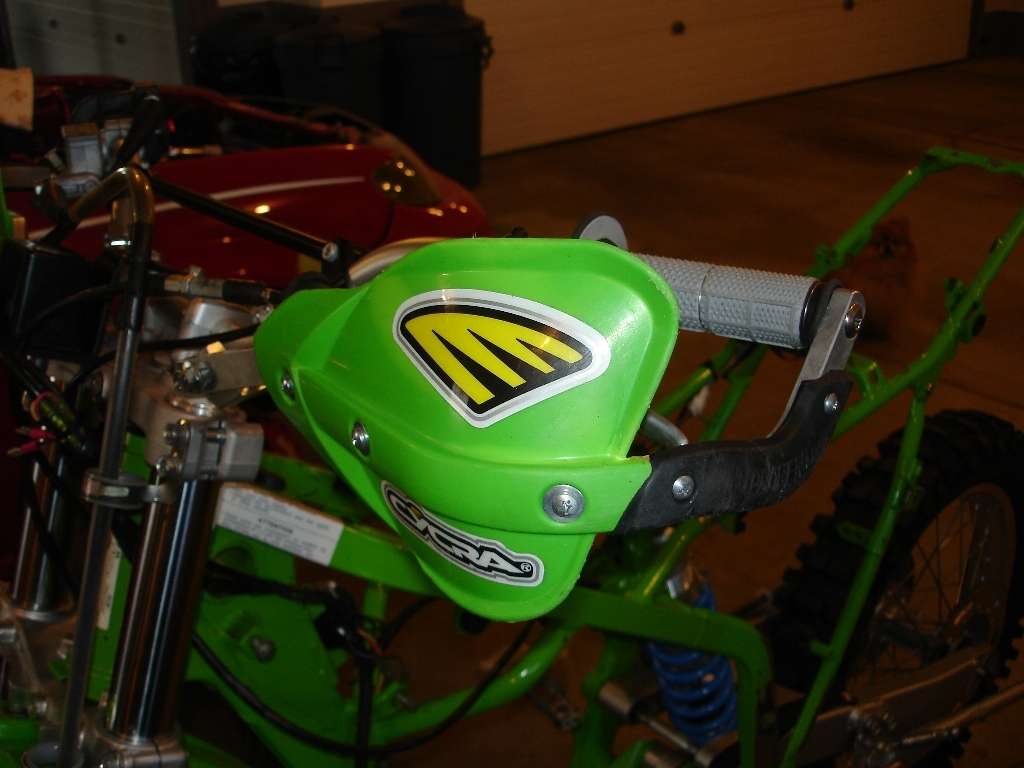
Got the ProBend's back on, anyone who has them knows how rock solid these things are.
And that takes care of the front end! I just have to adust cables and install the headlight. I re-installed the read wheel again today, with the tire flipped. Should get LOTS more bite out of it.
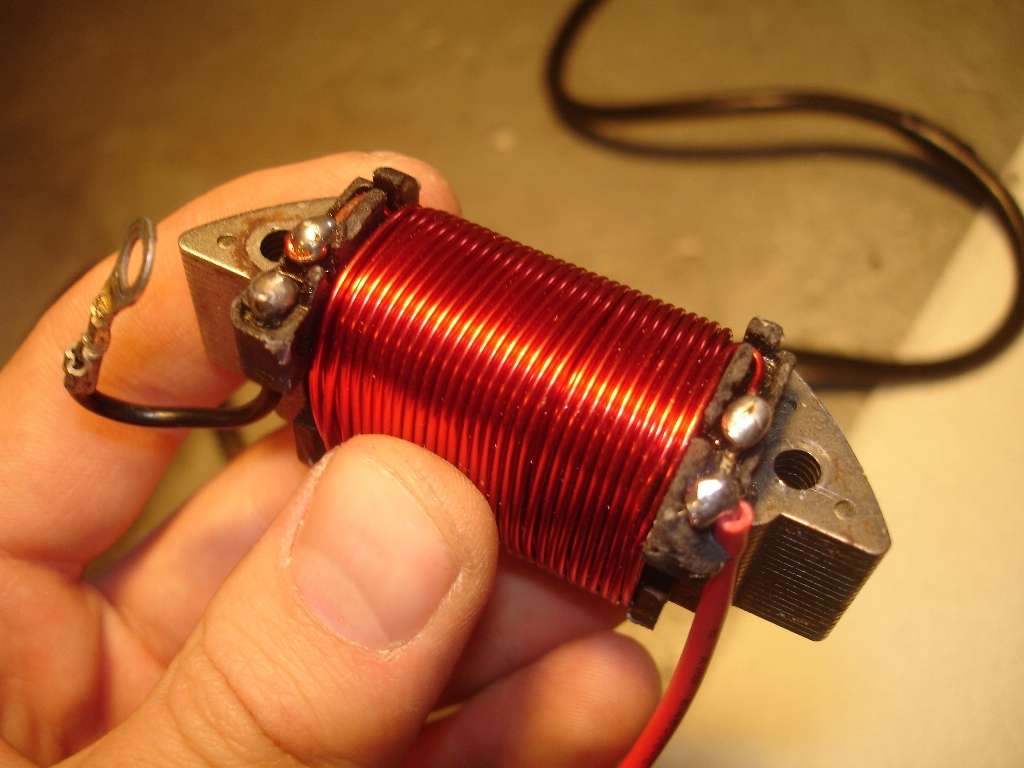
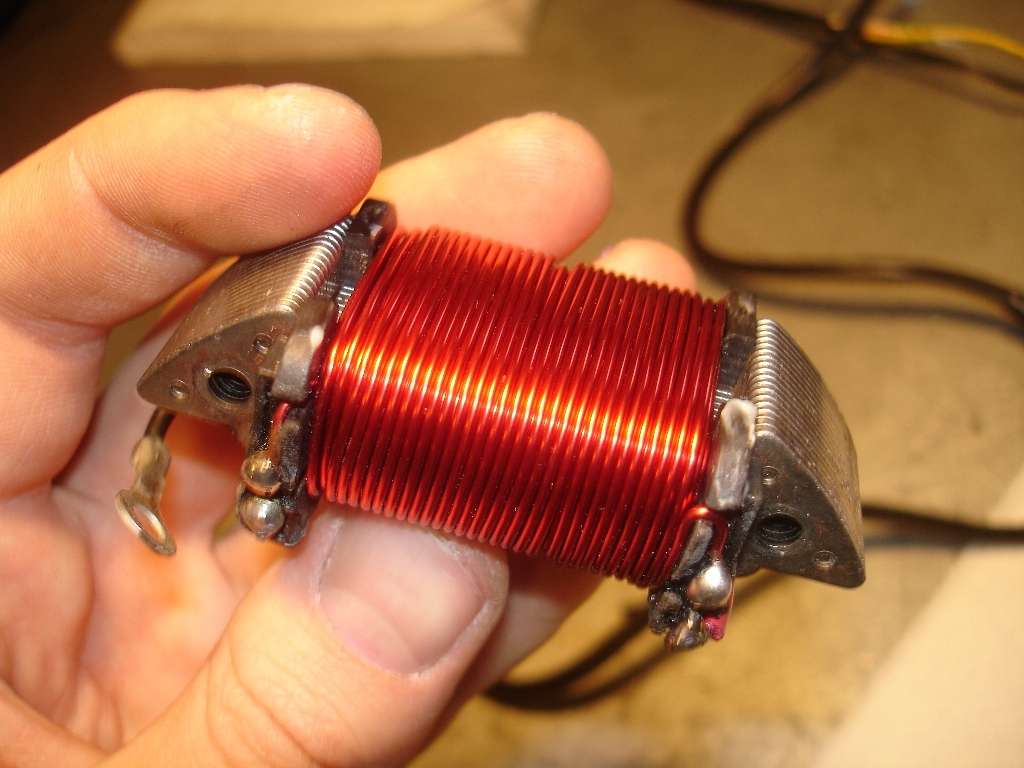
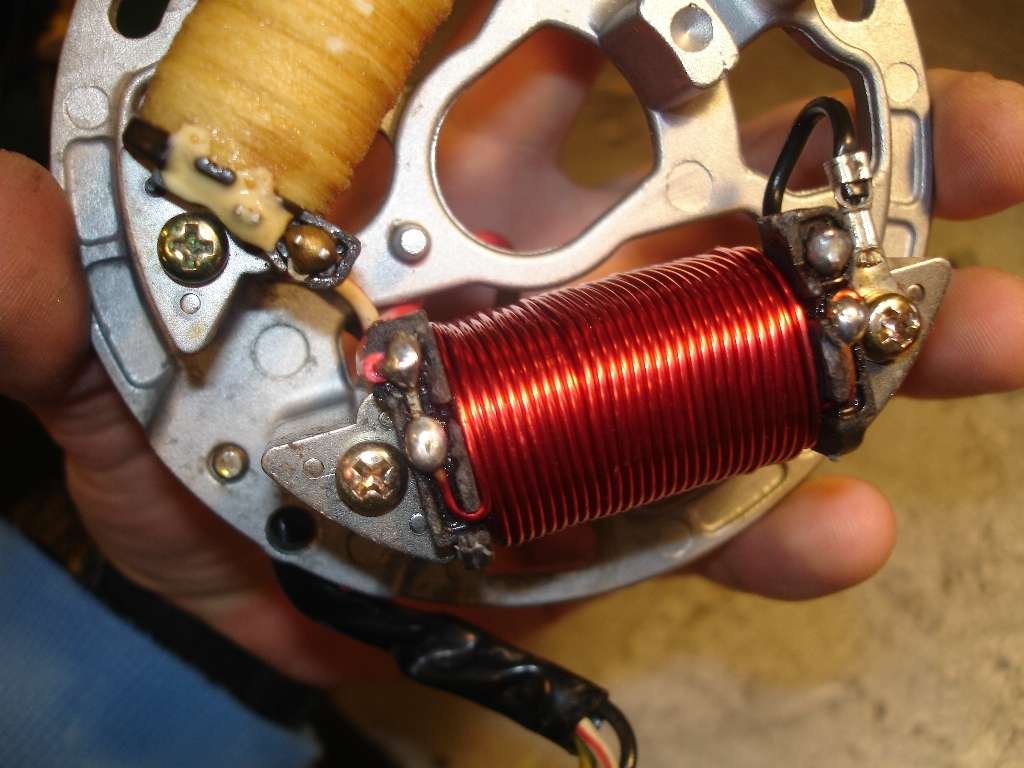
Also, found out my stator rewind is JUST a hair too big to fit under the flywheel! DOH!!! I'll have to remove the epoxy, and remove a few wraps worth of wire. Measure once, cut twice that's how I do things apparently...
I know there's not alot of pics, but it was alot of little stuff today, it's coming together nicely, once I get my GD parts... I shipped my stuff to RB designs via FedEx for I think $21. Got there in 3 days. It's being shipped back to me USPS for $30, and it's taken almost a week so far, still no sign of it. I hope it shows up soon! Same with my KIPS shaft from Ebay, it's also sent USPS and it's been almost 2 weeks. From now on stick with FedEx guys!
Got my new fork base valves installed, then toop the fork tops off (again) and modified the preload spacers. Now I have 10mm of preload. The forks were looking like shiz, so I took off the clear protective film and drysprayed them like the swingarm.
While I was into the forks, my Dad did the seat cover for me. He has a knack for stuff liek this, looks like it came from the factory that way! New GUTS seat cover with green sides.
While he was working on that, I finished up the forks with new push button bleeders.
Next, I installed the SealSavers, mounted the forks, torqued everything down, mounted the wheel, connected the tripmeter, mounted the caliper, changed the front pads, bled the front brake with fresh fluid, and then had some lunch!
Then, I mounted the new bars. Renthal CR High's, nice bars. Quite a bit wider than the old Azonics that were on there. From what I could tell, I really like the bend.
Renthal Dual Layer grips, used golf club grip tape, slid the grips on with Varsol, then safety wired them in addition. These things ain't coming off! :D
Got all the controls on and mounted, (you'd be surprised how long that can take) and got everything hooked up and torqued down. The clutch and throttle cables need to be adjusted once the engine is back in, for now they're backed off as far as they go.
Got the ProBend's back on, anyone who has them knows how rock solid these things are.
And that takes care of the front end! I just have to adust cables and install the headlight. I re-installed the read wheel again today, with the tire flipped. Should get LOTS more bite out of it.
Also, found out my stator rewind is JUST a hair too big to fit under the flywheel! DOH!!! I'll have to remove the epoxy, and remove a few wraps worth of wire. Measure once, cut twice that's how I do things apparently...
I know there's not alot of pics, but it was alot of little stuff today, it's coming together nicely, once I get my GD parts... I shipped my stuff to RB designs via FedEx for I think $21. Got there in 3 days. It's being shipped back to me USPS for $30, and it's taken almost a week so far, still no sign of it. I hope it shows up soon! Same with my KIPS shaft from Ebay, it's also sent USPS and it's been almost 2 weeks. From now on stick with FedEx guys!
'00 KDX 220R
-
scheckaet

- KDXRider.net

- Posts: 3740
- Joined: 12:09 am Nov 10 2005
- Country:
- Location: edmond oklahoma
what type of paint are you using on your fork tube and swingarm? Is that the same stuff you did the engine with, the engine enamel from duplicolor?
I cut the end off my bar, it's easier to maneuver in very tight section.
I cut the end off my bar, it's easier to maneuver in very tight section.
02 KX 200 hybrid: RB head and carb 
Sold ☹ DRZ 400 SM
bike build: http://www.kdxrider.net/forums/viewtopi ... ike+stable
bike profile http://www.kdxrider.net/forums/viewtopi ... 0709#30709
newb info: http://www.kdxrider.net/forums/viewtopi ... 57#p117919
jetting guide: http://www.kdxrider.net/forums/viewtopi ... 105&t=1156
Sold ☹ DRZ 400 SM
bike build: http://www.kdxrider.net/forums/viewtopi ... ike+stable
bike profile http://www.kdxrider.net/forums/viewtopi ... 0709#30709
newb info: http://www.kdxrider.net/forums/viewtopi ... 57#p117919
jetting guide: http://www.kdxrider.net/forums/viewtopi ... 105&t=1156
-
Slick_Nick
- Supporting Member
- Posts: 1675
- Joined: 10:06 pm Oct 22 2009
- Country: Canada
- Location: Calgary, Alberta
- Contact:
-
Julien D

- KDXRider.net

- Posts: 5858
- Joined: 07:53 pm Nov 07 2008
- Country: USA
- Contact:
-
scheckaet
- KDXRider.net
- Posts: 3740
- Joined: 12:09 am Nov 10 2005
- Country:
- Location: edmond oklahoma
I was thinking the same about the paint having to cure fore a bit with temperature. I painted a whole bunch of part with that too and might try to stick it in the oven at 400 for 30 min and see how much it'll ruin my oven 
02 KX 200 hybrid: RB head and carb
Sold ☹ DRZ 400 SM
bike build: http://www.kdxrider.net/forums/viewtopi ... ike+stable
bike profile http://www.kdxrider.net/forums/viewtopi ... 0709#30709
newb info: http://www.kdxrider.net/forums/viewtopi ... 57#p117919
jetting guide: http://www.kdxrider.net/forums/viewtopi ... 105&t=1156
Sold ☹ DRZ 400 SM
bike build: http://www.kdxrider.net/forums/viewtopi ... ike+stable
bike profile http://www.kdxrider.net/forums/viewtopi ... 0709#30709
newb info: http://www.kdxrider.net/forums/viewtopi ... 57#p117919
jetting guide: http://www.kdxrider.net/forums/viewtopi ... 105&t=1156
-
Julien D
- KDXRider.net
- Posts: 5858
- Joined: 07:53 pm Nov 07 2008
- Country: USA
- Contact:
-
Slick_Nick
- Supporting Member
- Posts: 1675
- Joined: 10:06 pm Oct 22 2009
- Country: Canada
- Location: Calgary, Alberta
- Contact:
-
ihatefalling

- Supporting Member
- Posts: 410
- Joined: 09:30 am Jul 20 2008
- Country:
-
Slick_Nick
- Supporting Member
- Posts: 1675
- Joined: 10:06 pm Oct 22 2009
- Country: Canada
- Location: Calgary, Alberta
- Contact:
-
Slick_Nick
- Supporting Member
- Posts: 1675
- Joined: 10:06 pm Oct 22 2009
- Country: Canada
- Location: Calgary, Alberta
- Contact:
Today was uneventful, there's not much more I CAN do until my parts get here from RB... 9 days and counting so far...
Got my main bearings into the case halves:

My stator rewind was too big, so I removed one whole layer of wire. Turns out one layer is about 8 feet! I decided in order to have the biggest wrap able to fit under there, I wasn't going to epoxy it. Got it all soldered up and installed. It fits well with about 10 thou clearance on each side!
I was REALLY bored, so I decided to mount up the headlight and bar pad. That took a whopping 3 minutes. Aside from clutch and throttle cable adjustment, everything forward of the stem is now 100% complete and torqued.

Have a good weekend!
Got my main bearings into the case halves:
My stator rewind was too big, so I removed one whole layer of wire. Turns out one layer is about 8 feet! I decided in order to have the biggest wrap able to fit under there, I wasn't going to epoxy it. Got it all soldered up and installed. It fits well with about 10 thou clearance on each side!

I was REALLY bored, so I decided to mount up the headlight and bar pad. That took a whopping 3 minutes. Aside from clutch and throttle cable adjustment, everything forward of the stem is now 100% complete and torqued.
Have a good weekend!
'00 KDX 220R
-
KDX4ID

- Supporting Member
- Posts: 320
- Joined: 05:42 pm Nov 02 2009
- Country:
- Location: Earth
- Contact:
You mentioned drilling the clutch basket. Why and where?
CURRENT FLEET
2008 KTM 990 Adventure...Alaska here I come!
2010 KTM 300 XCW... stop me before I buy again!
2005 KDX220... single track sweetie
2007 KTM 450 EXC... my baby
2008 KTM Superduke... Canyon Carver
1996 Honda 650L... GONE but not forgotten
http://www.friendsoftruckeetrails.org
2008 KTM 990 Adventure...Alaska here I come!
2010 KTM 300 XCW... stop me before I buy again!
2005 KDX220... single track sweetie
2007 KTM 450 EXC... my baby
2008 KTM Superduke... Canyon Carver
1996 Honda 650L... GONE but not forgotten
http://www.friendsoftruckeetrails.org
-
Slick_Nick
- Supporting Member
- Posts: 1675
- Joined: 10:06 pm Oct 22 2009
- Country: Canada
- Location: Calgary, Alberta
- Contact:
-
Slick_Nick
- Supporting Member
- Posts: 1675
- Joined: 10:06 pm Oct 22 2009
- Country: Canada
- Location: Calgary, Alberta
- Contact:
-
Slick_Nick
- Supporting Member
- Posts: 1675
- Joined: 10:06 pm Oct 22 2009
- Country: Canada
- Location: Calgary, Alberta
- Contact:
-
Slick_Nick
- Supporting Member
- Posts: 1675
- Joined: 10:06 pm Oct 22 2009
- Country: Canada
- Location: Calgary, Alberta
- Contact:
Got all my packages today, opened up the parts box from RB and WOW. While it did take a LONG time to get here, the end result is MINT! The head is a work of art, so is the carb. The crank was rebuilt really well too, and the packaging was superb. Everything was wrapped up nicely, and well padded. The documentation is great too, fantastic instructions on what jets are in there, how to tune it, etc. I didn't bring it all home to take pics, but tomorrow this thread is getting a BIG update, so I'll include plenty then.
'00 KDX 220R
-
Slick_Nick
- Supporting Member
- Posts: 1675
- Joined: 10:06 pm Oct 22 2009
- Country: Canada
- Location: Calgary, Alberta
- Contact:
Didn't get as much done today as I would have liked, life gets in the way sometimes. Didn't get the cases together, but got the top end all finished up, so tomorrow should be an easy day. Don't know if I'll go for a first start tomorrow or not, we'll see how I feel. I'm fighting off a hell of a cold too.
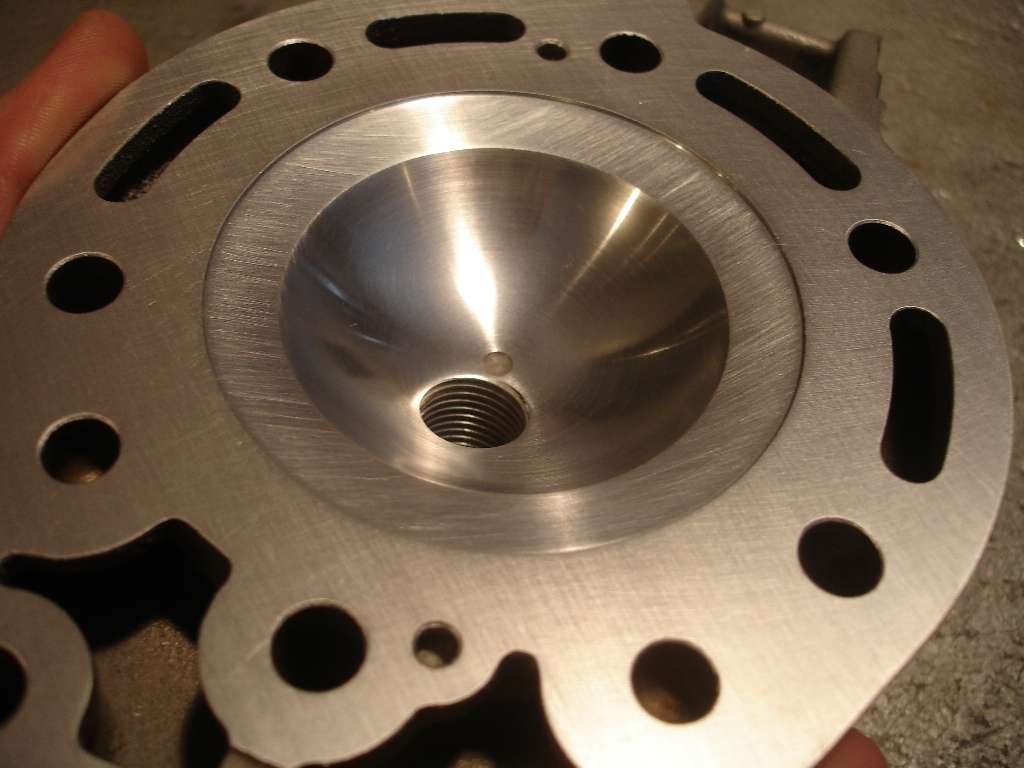
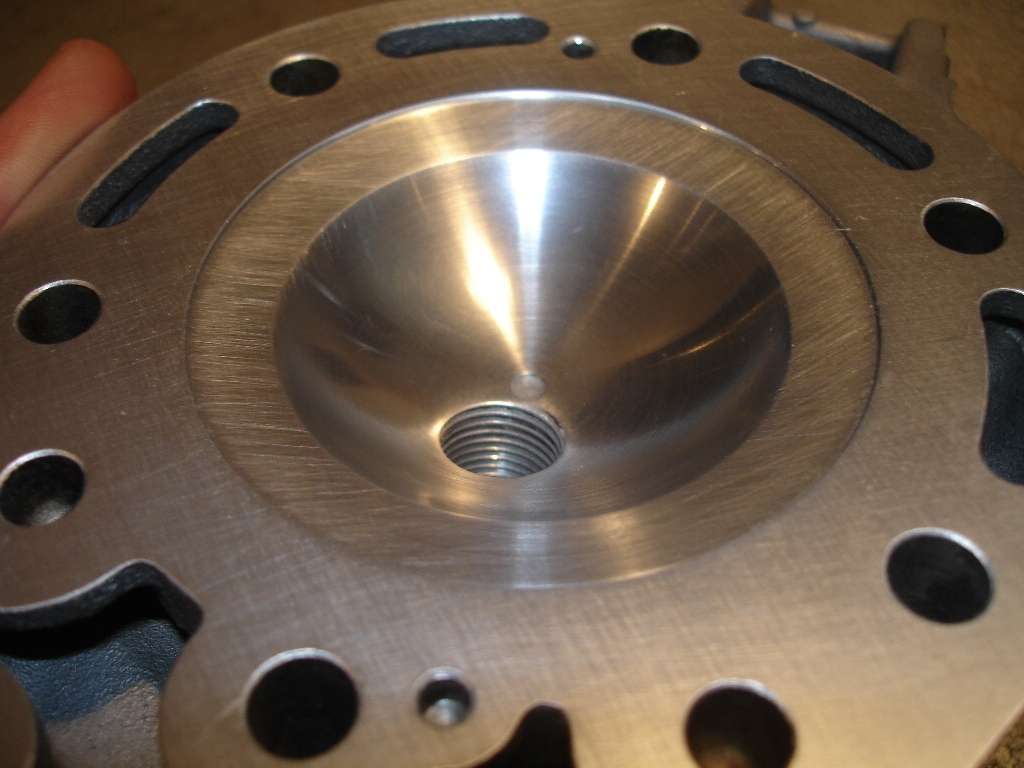
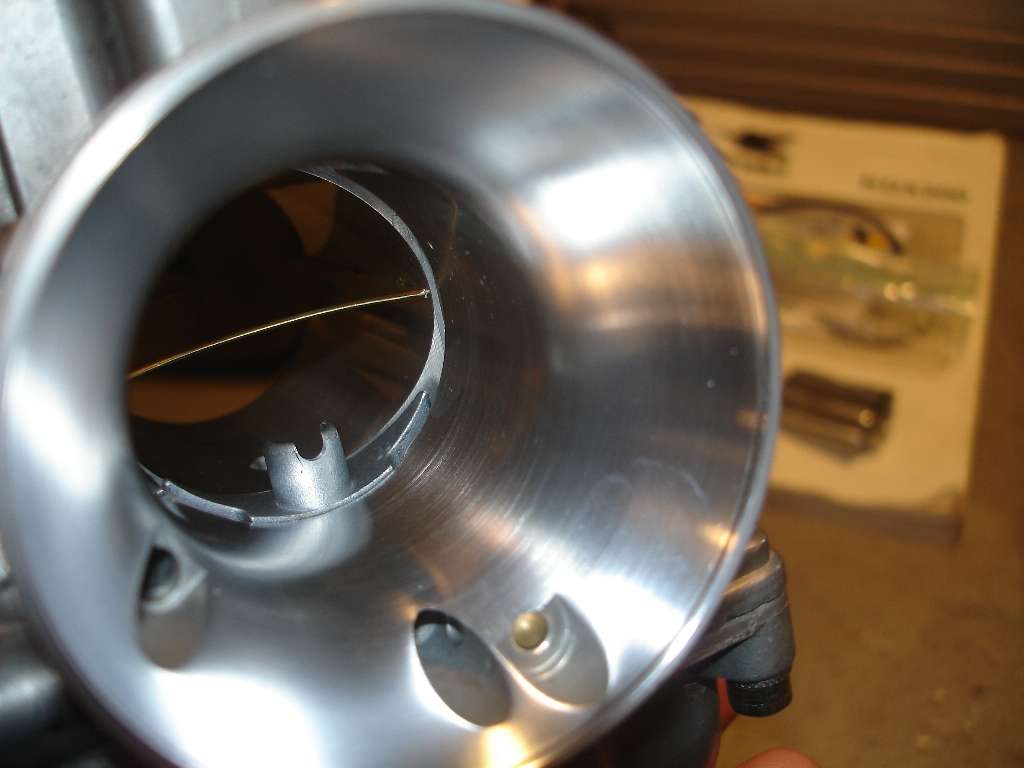
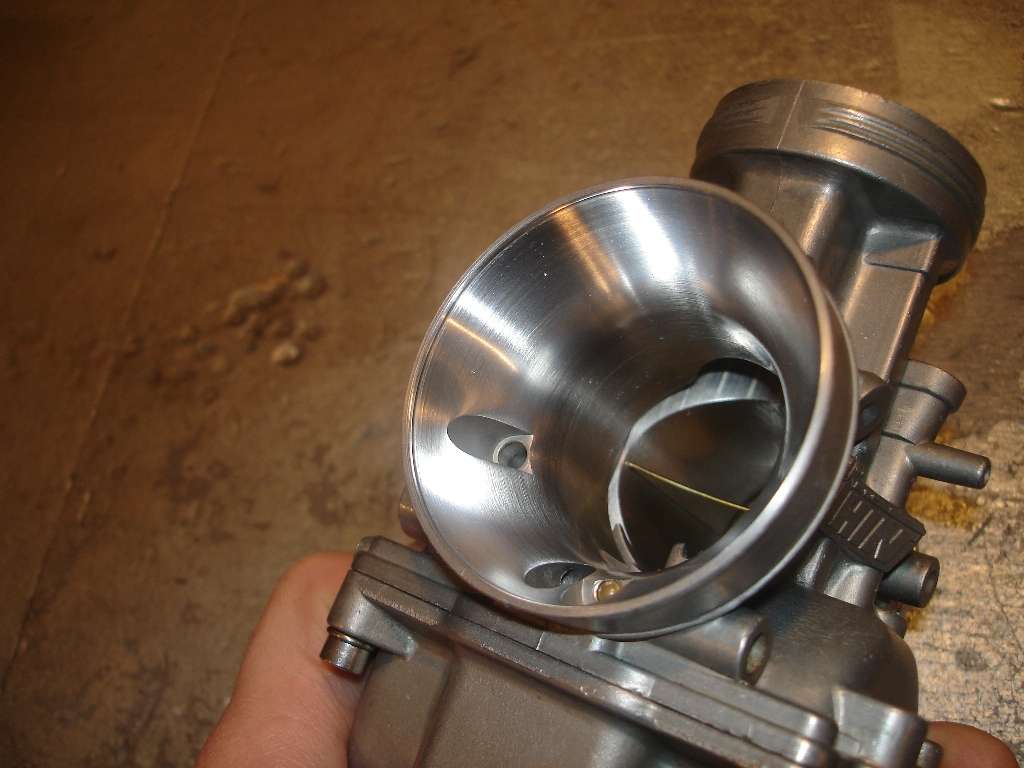
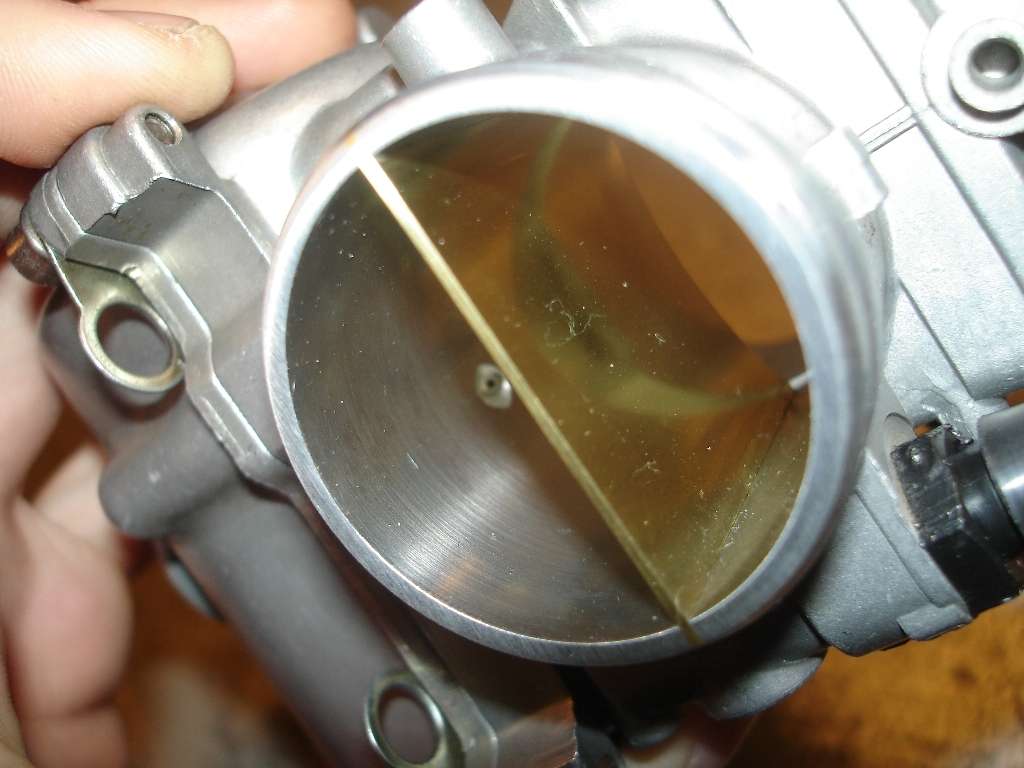
Anyways, here are some pics of my stuff from RB Designs. Head was milled to raise the compression, and the squish band was modified. Crank was rebuilt with my Wiseco rod, and the carb was bored out, and got all the goodies that Ron does for the KDX carbs, like the divider plate, float bowl screws, knob air screw, etc. The head and carb are both works of art. I'll let the pics speak for themselves.

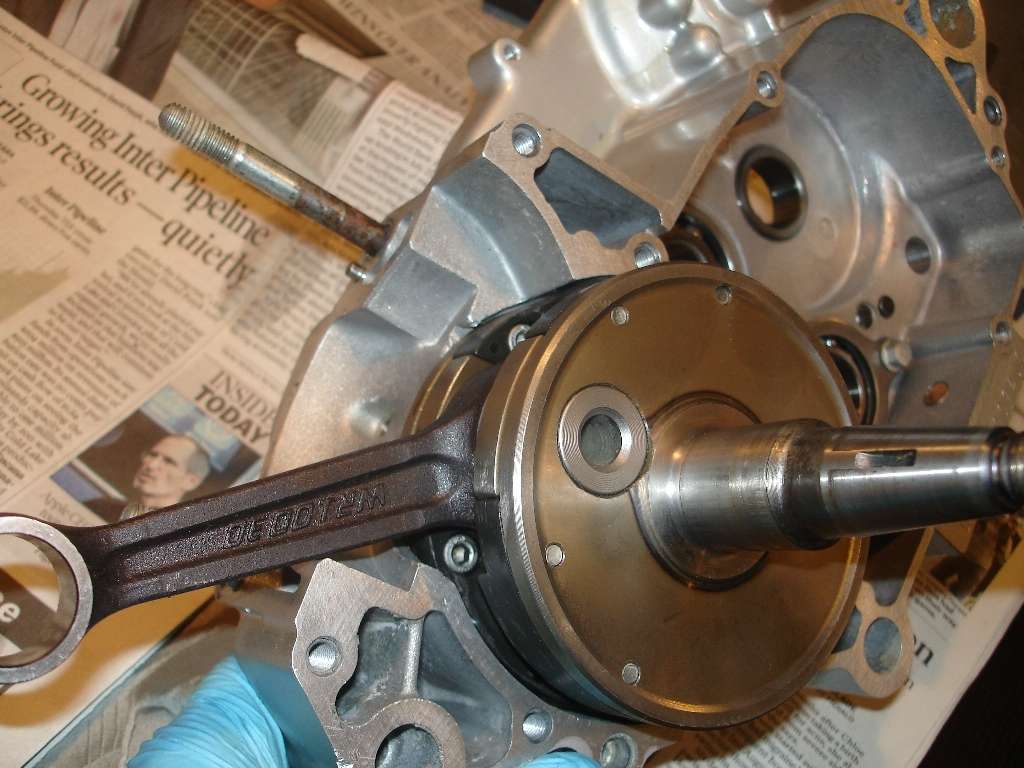
Started by getting the crank into one case half, just sweat it in. Stuck it in the freezer for about 20 mins, and heated the bearing with a blow torch. Dropped right in.
Got the trans all assembled and lubed up with ATF.

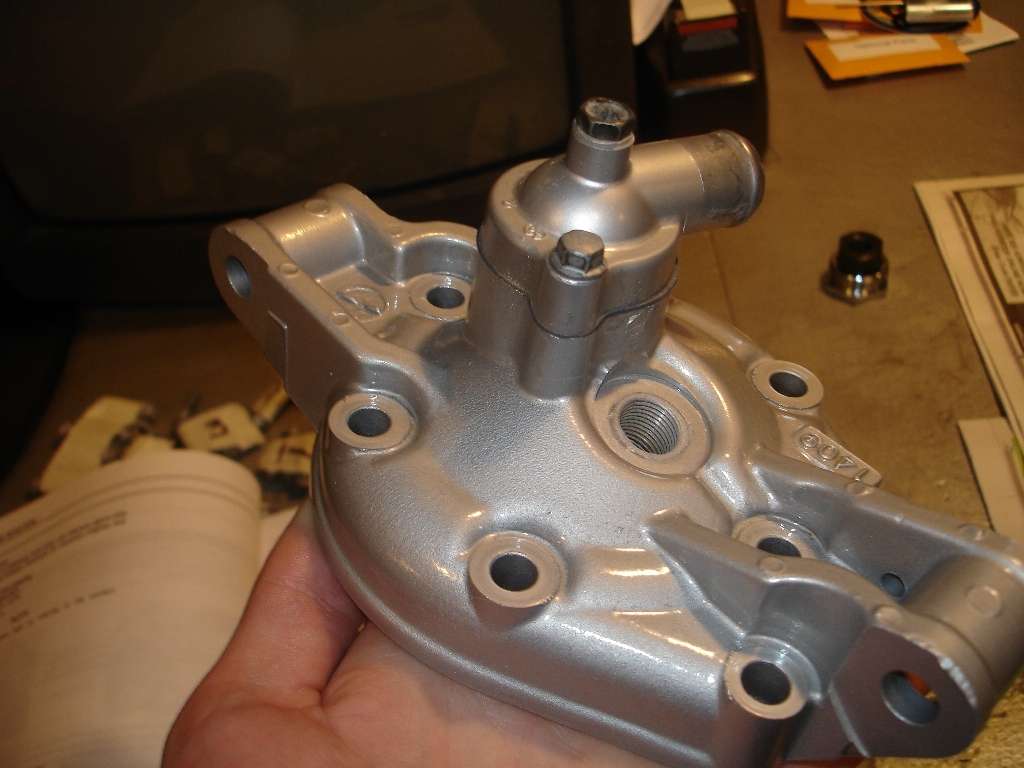
Painted the head to match the rest of the engine, then installed the water neck:
Decided to leave the bottom end till tomorrow, so I stuck the clutch plates in a ziploc of ATF so they could soak overnight. Got to work on the top end KIPS n stuff, so tomorrow I can literally bolt the jug on and be done with it.
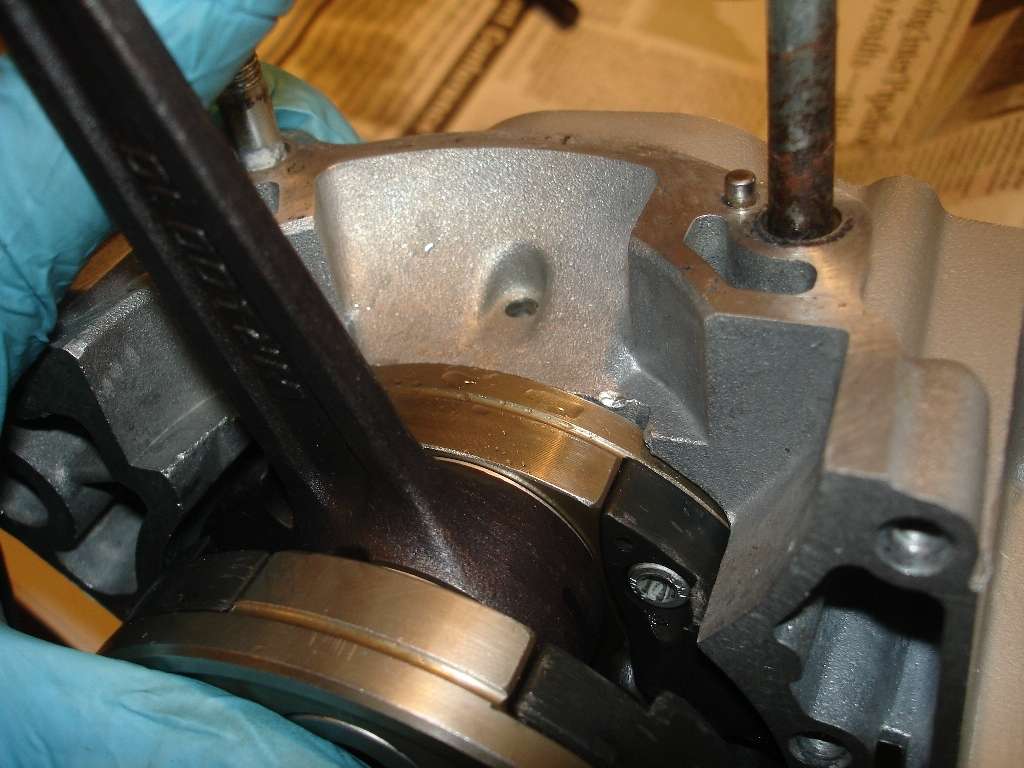
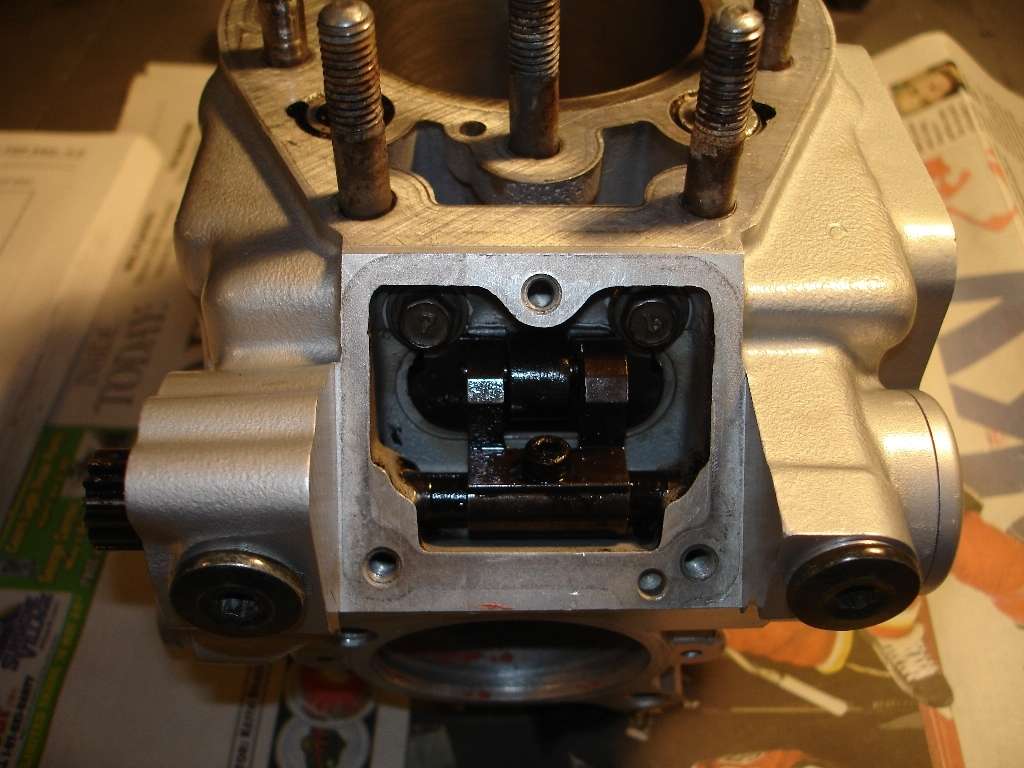
Showing proper KIPS timing:
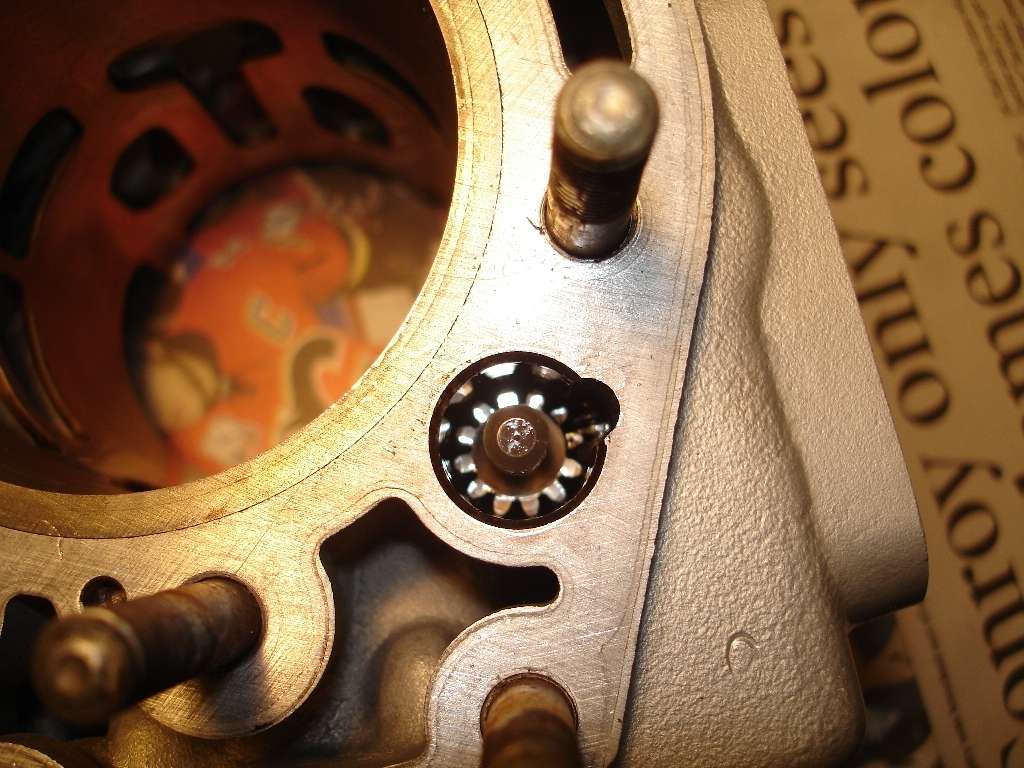
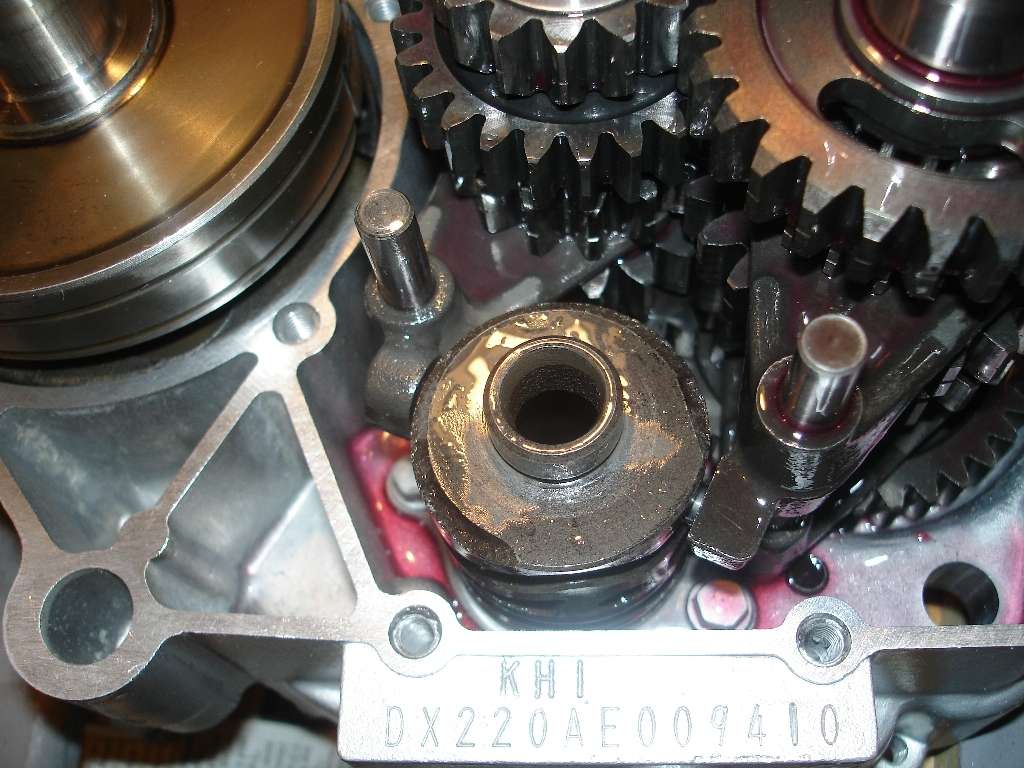
Main KIPS valve:
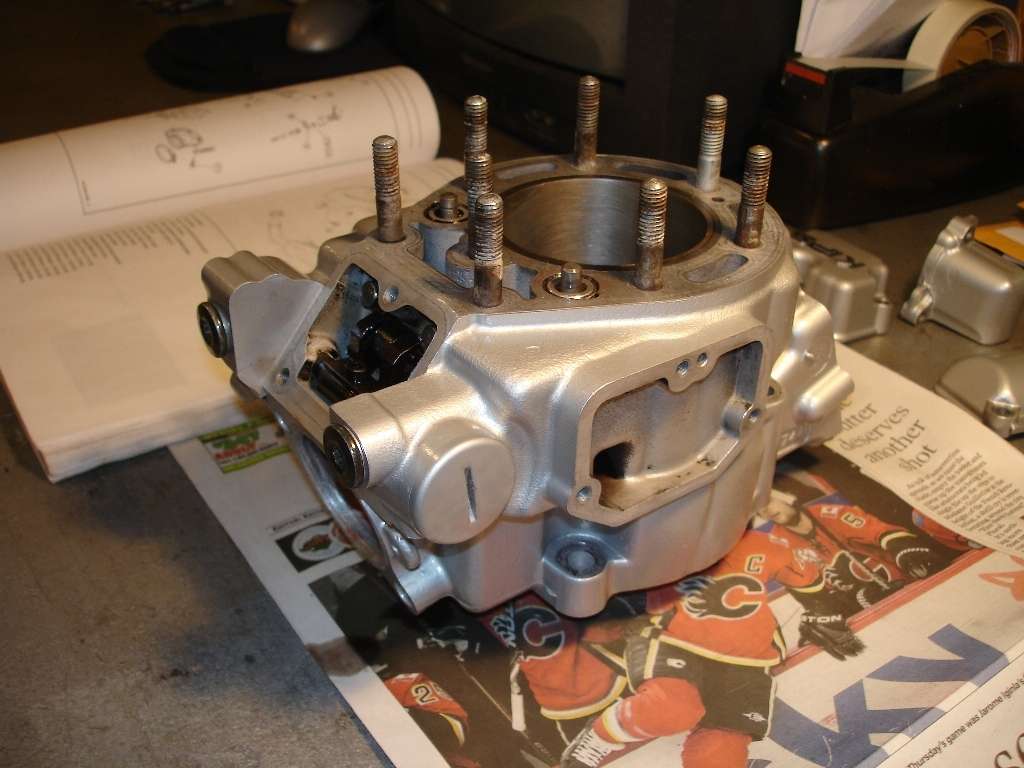
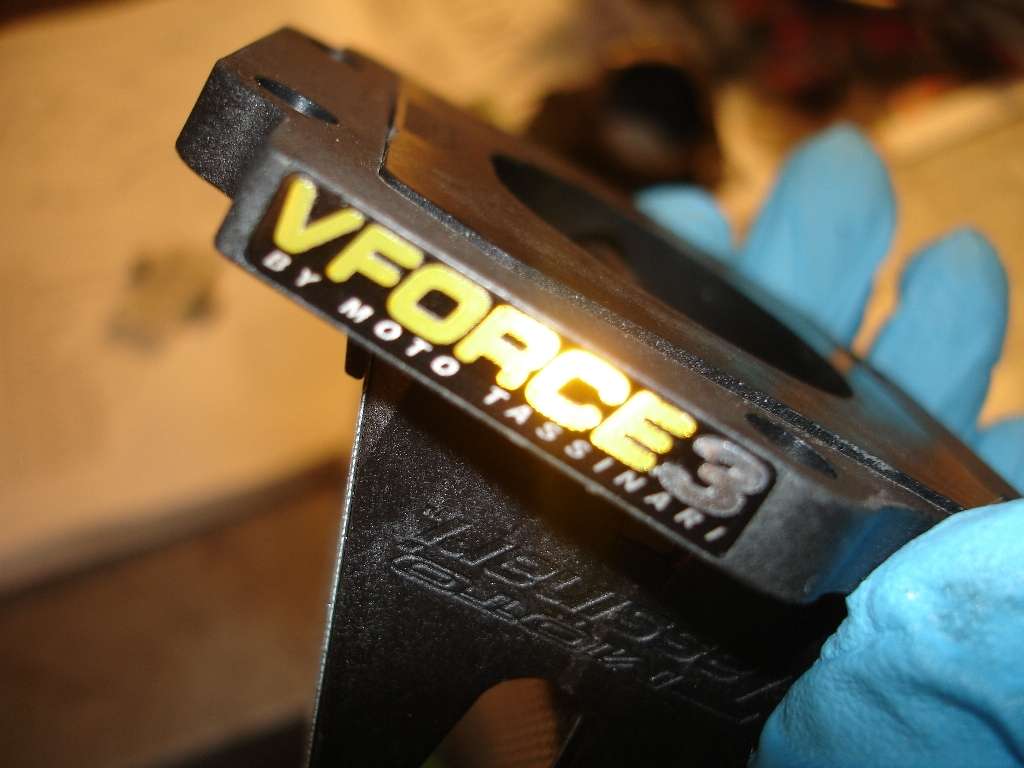
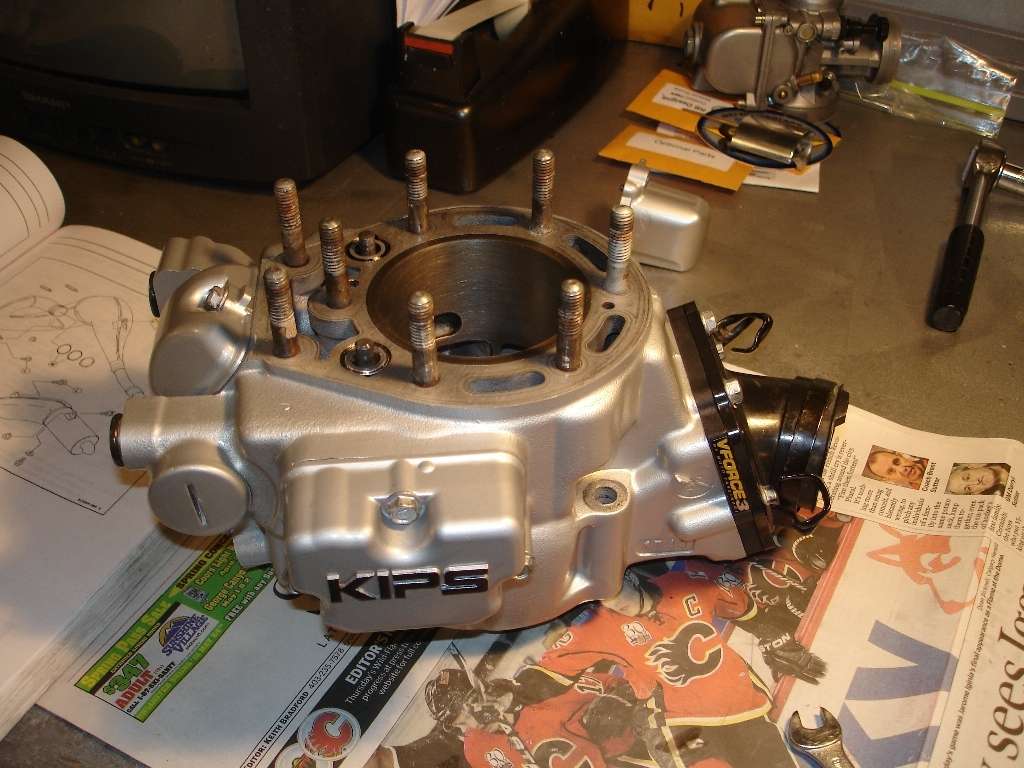
Installed the V-Force3i valve:
Completed cylinder, ready for a piston and a head then she's all done!
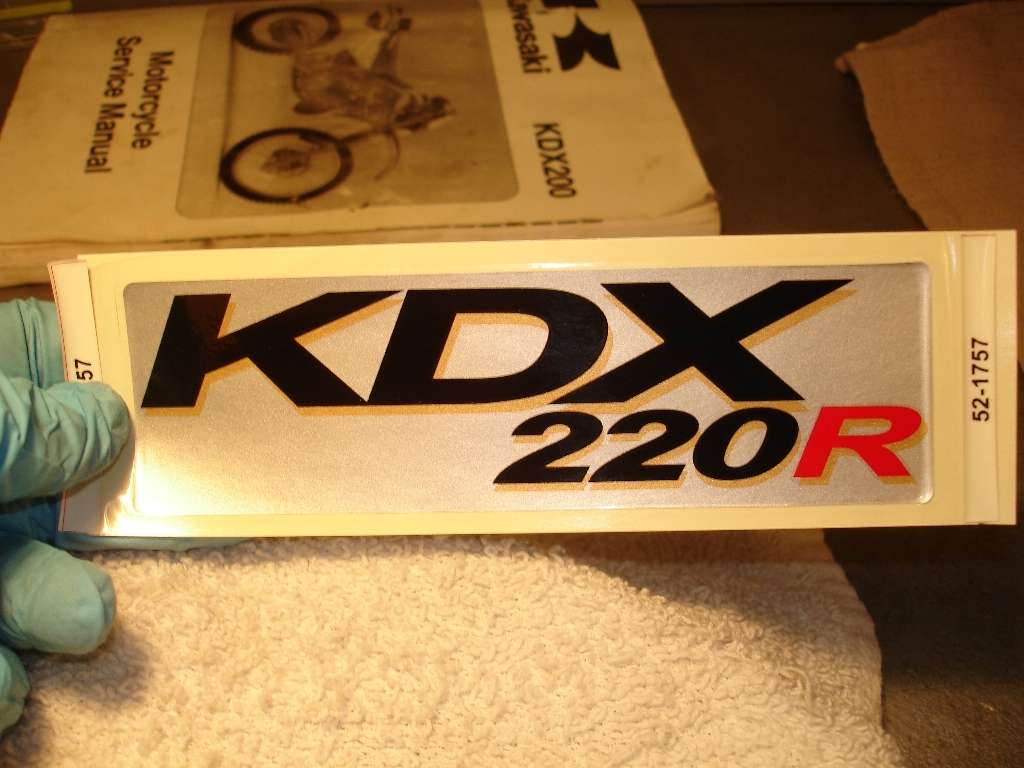
Still waiting on one, but I went with the swingarm decals of an '03 KDX, since the '98 ones were discontinued. What do you think?
[IMG::]http://img46.imageshack.us/img46/3402/dsc05233v.jpg[/img]
Anyway, that's all for tonight, check back tonmorrow if the forum is back up!
Anyways, here are some pics of my stuff from RB Designs. Head was milled to raise the compression, and the squish band was modified. Crank was rebuilt with my Wiseco rod, and the carb was bored out, and got all the goodies that Ron does for the KDX carbs, like the divider plate, float bowl screws, knob air screw, etc. The head and carb are both works of art. I'll let the pics speak for themselves.
Started by getting the crank into one case half, just sweat it in. Stuck it in the freezer for about 20 mins, and heated the bearing with a blow torch. Dropped right in.
Got the trans all assembled and lubed up with ATF.
Painted the head to match the rest of the engine, then installed the water neck:
Decided to leave the bottom end till tomorrow, so I stuck the clutch plates in a ziploc of ATF so they could soak overnight. Got to work on the top end KIPS n stuff, so tomorrow I can literally bolt the jug on and be done with it.
Showing proper KIPS timing:
Main KIPS valve:
Installed the V-Force3i valve:
Completed cylinder, ready for a piston and a head then she's all done!
Still waiting on one, but I went with the swingarm decals of an '03 KDX, since the '98 ones were discontinued. What do you think?
[IMG::]http://img46.imageshack.us/img46/3402/dsc05233v.jpg[/img]
Anyway, that's all for tonight, check back tonmorrow if the forum is back up!
'00 KDX 220R