KDX Restoration X 2
-
KDXGarage

- KDXRider.net

- Posts: 14063
- Joined: 06:45 am Nov 01 2004
- Country: United States of America
- Location: AL, USA
- Contact:
Re: KDX Restoration X 2
Looks nice!
Thank you for participating on kdxrider.net. 
To post pictures from a device: viewtopic.php?f=88&t=24128
To post pictures from a device: viewtopic.php?f=88&t=24128
-
ericr
- Gold Member

- Posts: 246
- Joined: 06:57 pm Nov 06 2017
- Country: USA
- Location: Gig Harbor, WA
Re: KDX Restoration X 2
Good tip on the subframe. The 200 will have a MX fender and a Polisport MMX headlight. I'm torn though on the 220. I have a good OEM headlight that will be going back on it and I have the original rear fender and bag that was taken off when the bike was new. Should I put the original rear fender back on and go for an updated restoration or go with a modded MX style?John_S wrote:That looks really nice!! Is it in the living room? Lol.
I like the green frame better too. If you're putting MX rear fenders on the bikes consider cutting off that last 1 1/2" of dog leg subframe otherwise it hangs down below your fender.
I love the front disk. I'm excited about these two bikes.
And yes, it is in the family room. Good thing I'm single or I'd be in lot's of trouble.
'02 KDX 200, '02 KDX 220 - My restoration thread
-
KDXGarage
- KDXRider.net
- Posts: 14063
- Joined: 06:45 am Nov 01 2004
- Country: United States of America
- Location: AL, USA
- Contact:
Re: KDX Restoration X 2
One "hare scramble" style and one original style
Thank you for participating on kdxrider.net.
To post pictures from a device: viewtopic.php?f=88&t=24128
To post pictures from a device: viewtopic.php?f=88&t=24128
-
ericr
- Gold Member
- Posts: 246
- Joined: 06:57 pm Nov 06 2017
- Country: USA
- Location: Gig Harbor, WA
Re: KDX Restoration X 2
Ok then, one original recipe coming up.Jason wrote:One "hare scramble" style and one original style
'02 KDX 200, '02 KDX 220 - My restoration thread
-
antonyp
- Member
- Posts: 21
- Joined: 01:46 am Nov 23 2016
- Country: Cyprus
Re: KDX Restoration X 2
That bike looks so nice - I would have kept it in the living room [emoji4][emoji16][emoji41]
Sent from my SM-G800F using Tapatalk
Sent from my SM-G800F using Tapatalk
-
ericr
- Gold Member
- Posts: 246
- Joined: 06:57 pm Nov 06 2017
- Country: USA
- Location: Gig Harbor, WA
KDX Restoration X 2
I was thinking of the kickstand in the previous photo. I should have mentioned what I found while I was restoring it.
The mounting plates had quite a bit of wear, to the point that they were tapered because of slop in the tolerances. There was so much play that you could grab the kickstand and move it laterally quite a bit. The through bolt also had all of its threads worn off on one side where it goes through the bracket while the kickstand is in the up position.
This is probably because the kickstand is moving up and down a lot while riding. It just wears the bolt out if it's not lubricated.
When I re-assembled, I just turned the bolt 180 degrees to put the worn area away from the tension. I also put the "U" part of the stand in a vise and squeezed it to tighten the tolerances. After that, I greased it before assembly.
These kickstands work well, despite the huge unsprung weight penalty, and they are expensive to replace. I will make it a point to keep the joint lubricated with a shot of oil, as the manual recommends.
'02 KDX 200, '02 KDX 220 - My restoration thread
-
ericr
- Gold Member
- Posts: 246
- Joined: 06:57 pm Nov 06 2017
- Country: USA
- Location: Gig Harbor, WA
KDX Restoration X 2
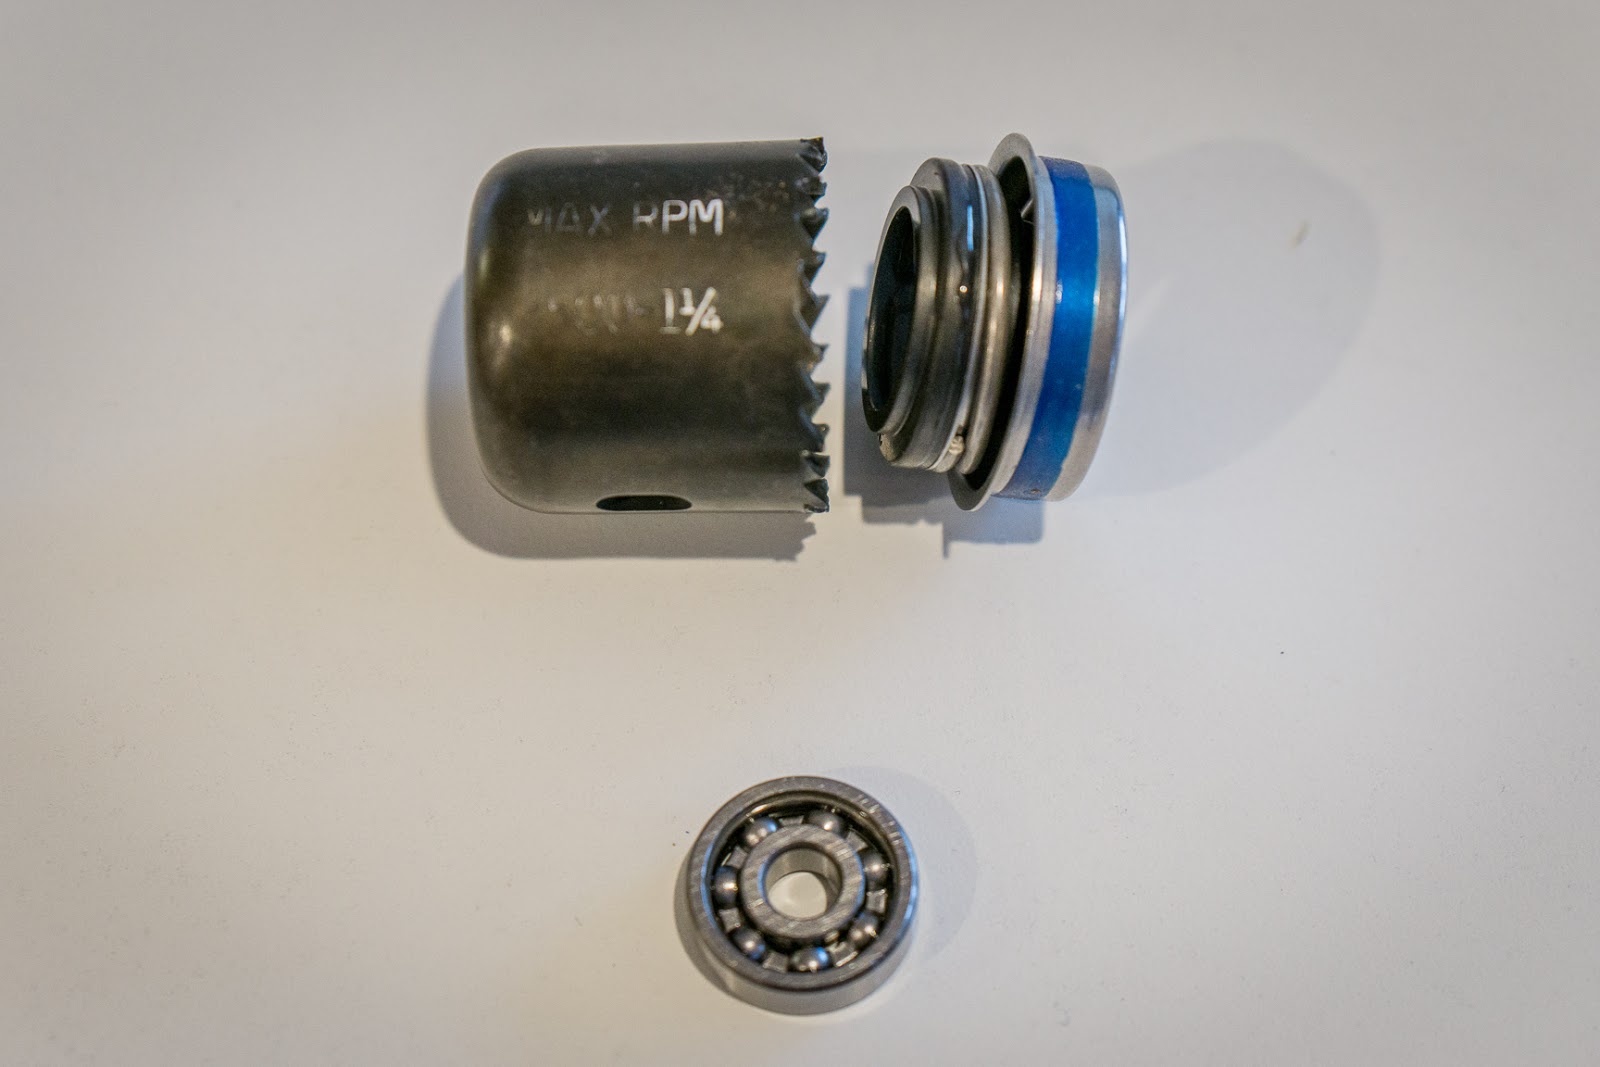
I was working on replacing the water pump seals. I wondered how I could install the mechanical seal without damaging the carbon face. I was looking at sockets and decided I needed a piece of tubing. Look what I found that fits perfectly. I don't think the teeth will damage the flange face. My other problem is with the small ball bearing that came with the kit. I don't have a blind puller attachment small enough to fit. Has anyone found a way of pulling this little bearing?
'02 KDX 200, '02 KDX 220 - My restoration thread
-
antonyp
- Member
- Posts: 21
- Joined: 01:46 am Nov 23 2016
- Country: Cyprus
Re: KDX Restoration X 2
Hmmm... Be careful with those teeth I would say 
As far as the bearing is concerned, there's two of those right ?
If I remember correctly, for the one on the engine cover what I did was slowly but thoroughly heat the whole frame/cover (not sure how you call it but I assume you took it apart) with a heat gun avoiding the bearing itself and then with a few taps on the back side it popped right out. For the one sitting in the engine case I welded on it a fairly long bolt (with a nut welded on its head) which I then pulled with a blind puller
EDIT: I just realized I was referring to the KIPS shaft bearings instead of the water pump shaft. But you don't need a blind puller for that when the cover is out - after you've taken the seals off you heat the cover well (avoiding the bearing again) and push/hit it out with a small socket. At least that' what I remember doing. It's been a while
-
ericr
- Gold Member
- Posts: 246
- Joined: 06:57 pm Nov 06 2017
- Country: USA
- Location: Gig Harbor, WA
Re: KDX Restoration X 2
I did end up grinding the teeth off. I guess I have a dedicated tool now if I ever need to change it again.
This bearing is on the other end of the waterpump shaft on the crankcase. It feels fine - I think I might just leave it. I did find a trick for pulling blind bearings though. You find a bolt or rod that will fit closely to the ID of the bearing. Then you use that with a mallet to pack modeling clay or wax into the blind space behind the bearing. The hydraulic pressure will push the bearing out.
This bearing is on the other end of the waterpump shaft on the crankcase. It feels fine - I think I might just leave it. I did find a trick for pulling blind bearings though. You find a bolt or rod that will fit closely to the ID of the bearing. Then you use that with a mallet to pack modeling clay or wax into the blind space behind the bearing. The hydraulic pressure will push the bearing out.
'02 KDX 200, '02 KDX 220 - My restoration thread
-
antonyp
- Member
- Posts: 21
- Joined: 01:46 am Nov 23 2016
- Country: Cyprus
Re: KDX Restoration X 2
Have you actually tried it ? Sounds interesting but won't the clay/wax escape from the spaces between the balls therefore preventing the build-up of pressure ?ericr wrote:I did find a trick for pulling blind bearings though. You find a bolt or rod that will fit closely to the ID of the bearing. Then you use that with a mallet to pack modeling clay or wax into the blind space behind the bearing. The hydraulic pressure will push the bearing out.
Sent from my SM-G800F using Tapatalk
-
KDXGarage
- KDXRider.net
- Posts: 14063
- Joined: 06:45 am Nov 01 2004
- Country: United States of America
- Location: AL, USA
- Contact:
Re: KDX Restoration X 2
Be careful with that. You might crack the housing.
Look on youtube for using paper or even bread
Look on youtube for using paper or even bread
Thank you for participating on kdxrider.net.
To post pictures from a device: viewtopic.php?f=88&t=24128
To post pictures from a device: viewtopic.php?f=88&t=24128
-
ericr
- Gold Member
- Posts: 246
- Joined: 06:57 pm Nov 06 2017
- Country: USA
- Location: Gig Harbor, WA
Re: KDX Restoration X 2
I haven't tried it. Those bearings feel good. I think I'll leave it alone. I saw several videos on this technique. It seems that the material itself doesn't really matter so long as it's very viscous . Paper mache, bread, modelling clay, playdough - it doesn't seem to matter so long as it's thick enough to pass through the races slowly and allow pressure to build. I'll definitely try it someday.
Speaking of bearings, I'm replacing some as part of the bottom end. Large water pump bearings as part of those rebuilds. Main crank bearings. One countershaft bearing. Most surprising is all 4 of the KIPS governor shaft bearings - they are all worn. They are at the highest point within the cases. I wonder if the wear could be because of insufficient lubrication at that high level in the case? It gives me more incentive to add more oil, or rather ATF, to the transmission.
Speaking of bearings, I'm replacing some as part of the bottom end. Large water pump bearings as part of those rebuilds. Main crank bearings. One countershaft bearing. Most surprising is all 4 of the KIPS governor shaft bearings - they are all worn. They are at the highest point within the cases. I wonder if the wear could be because of insufficient lubrication at that high level in the case? It gives me more incentive to add more oil, or rather ATF, to the transmission.
'02 KDX 200, '02 KDX 220 - My restoration thread
-
ericr
- Gold Member
- Posts: 246
- Joined: 06:57 pm Nov 06 2017
- Country: USA
- Location: Gig Harbor, WA
KDX Restoration X 2
I'm assembling the top ends now and have a question for you experts out there about ring gap.
I sent my cylinders and Weisco pistons to Milennium for replating. Their web site offered the option to send your pistons and they would bore for best fit. I'm not sure that I got a best fit though.
Here's what the factory shop manual gives for standard bore ranges and service limits;
200 - 2.5994 to 2.6000 Max 2.6024
220 - 2.7175 to 2.7181 Max 2.7205
This is what came back after replating;
200 - 2.6000
220 - 2.7190
The 220 seems rather loose. Had I known, I probably would have specified my own dimension range.
My problem is with Weisco's recommended ring gap. They multiply bore by .004 for the top ring and .005 for the 2nd ring. That gives the following suggested ring gaps;
200 - 0.010 top, 0.013 2nd
220 - 0.011 top, 0.014 2nd
Both of the rings for the 200 were at .012 so I could grind the 2nd to .013. The 220's rings are both at .015.
The shop manual calls for ring gap range of .006 to .014. I'm already exceeding that on the 220. The manual's service limit though is 0.026.
Do I need to get another set of rings or will this be OK? If I can use these rings, should I increase the gap of the 2nd ring a couple thou past .015 to reduce top ring flutter or lifting?
Edit: I decided to check piston to bore clearance. It's marked on the piston boxes. They were right on the mark. Milennium did a good job of boring to fit those pistons. It's Wiseco - why do they spec those ring gaps when the rings they supply won't meet those specs?
'02 KDX 200, '02 KDX 220 - My restoration thread
-
ericr
- Gold Member
- Posts: 246
- Joined: 06:57 pm Nov 06 2017
- Country: USA
- Location: Gig Harbor, WA
KDX Restoration X 2
The 220 engine is done! Finally.

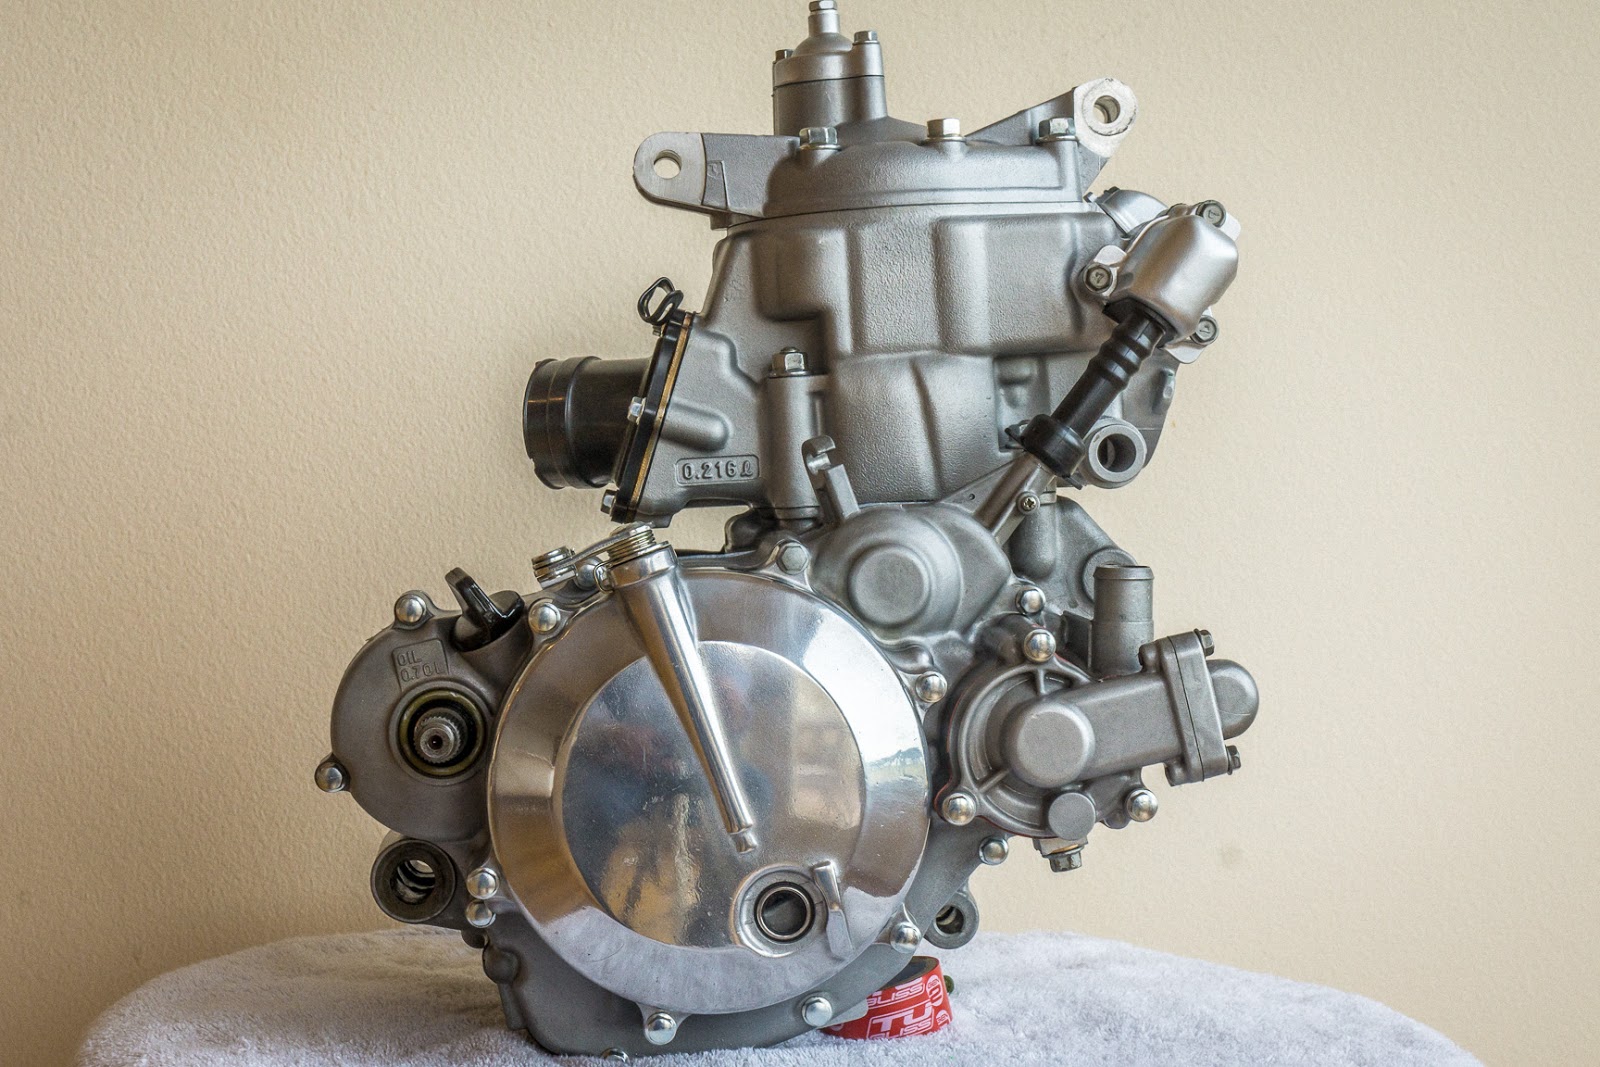
The only thing left is the stator cover after the leakdown test. The 200 engine just needs the cylinder installed and it will be done too.
Here's some of the things that were done with the engine rebuilds;
Nikasil replating by Milennium.
Weisco piston.
Crank rebuild by RB Designs with ProX rod kits and bearings.
RB Designs head mod.
ProX full gasket kits.
Water pump rebuild kit by All Balls. This probably wasn't necessary. If the water pump bearings are good, the gasket kit comes with a new shaft seal. You can flip over the ceramic face seal under the impeller. If the carbon face seal is fine, you're good to go.
New countershaft bearing, bushing, sprocket and circlip.
New Kips ball bearings.
New shifter shafts.
Boyesen 607 Power Reeds.
Tusk clutch plates. Basket notches filed and polished.
New OEM clutch springs.
Polished outside clutch cover.
New case bolts.
All other hardware refurbished/polished.
Engine exterior etched and coated with Protectaclear. I like this stuff - easy to apply, heat resistant, durable, easy to touch-up. We'll see how it holds up.
Small Kips covers and coolant elbow on head painted with Rustoleum Aluminum spray.
I think that's about it. I encountered a couple thing that were not expected.
After tightening down the clutch spring holder, the clutch plates wouldn't clamp. I had to repeat it 3 times until it worked. I couldn't tell what it was hanging up on.
When bolting on the inside clutch cover, I couldn't get the bottom to close up. I realized that the shifter was hitting the case. It took me awhile to realize that the collar under the end of the shifter mechanism had moved out of position. Next time, I'll put a dab of grease on it to hold it in position.
Last edited by ericr on 01:18 am Feb 05 2019, edited 2 times in total.
'02 KDX 200, '02 KDX 220 - My restoration thread
-
ericr
- Gold Member
- Posts: 246
- Joined: 06:57 pm Nov 06 2017
- Country: USA
- Location: Gig Harbor, WA
KDX Restoration X 2
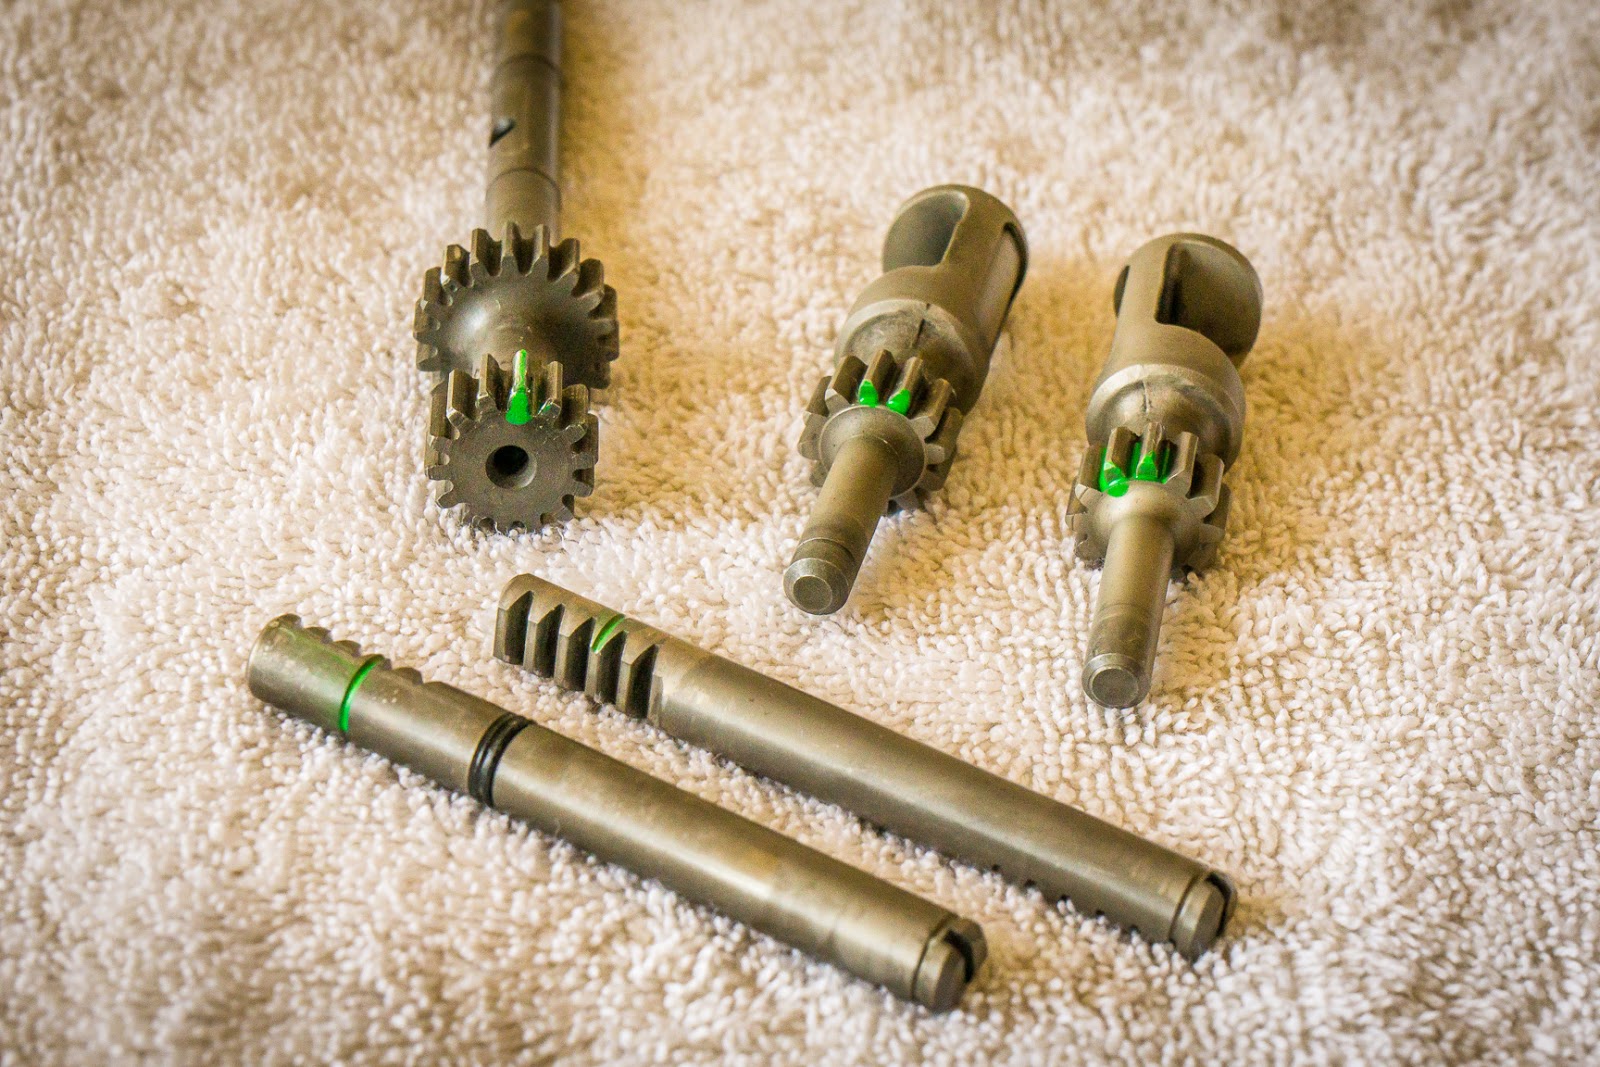
When assembling the Kips valves, I found it very difficult to line up the notched splines of the valves with the alignment mark on the shafts. A little bit of paint makes it easy;
My head studs were a mess. Rust and white rust from the plating was removed with an abrasive wheel. To protect the raw steel from rusting again, I first did a phosphate conversion coating using phosphoric acid (naval jelly). I then coated them with Protectaclear before installing them along with a couple new studs;
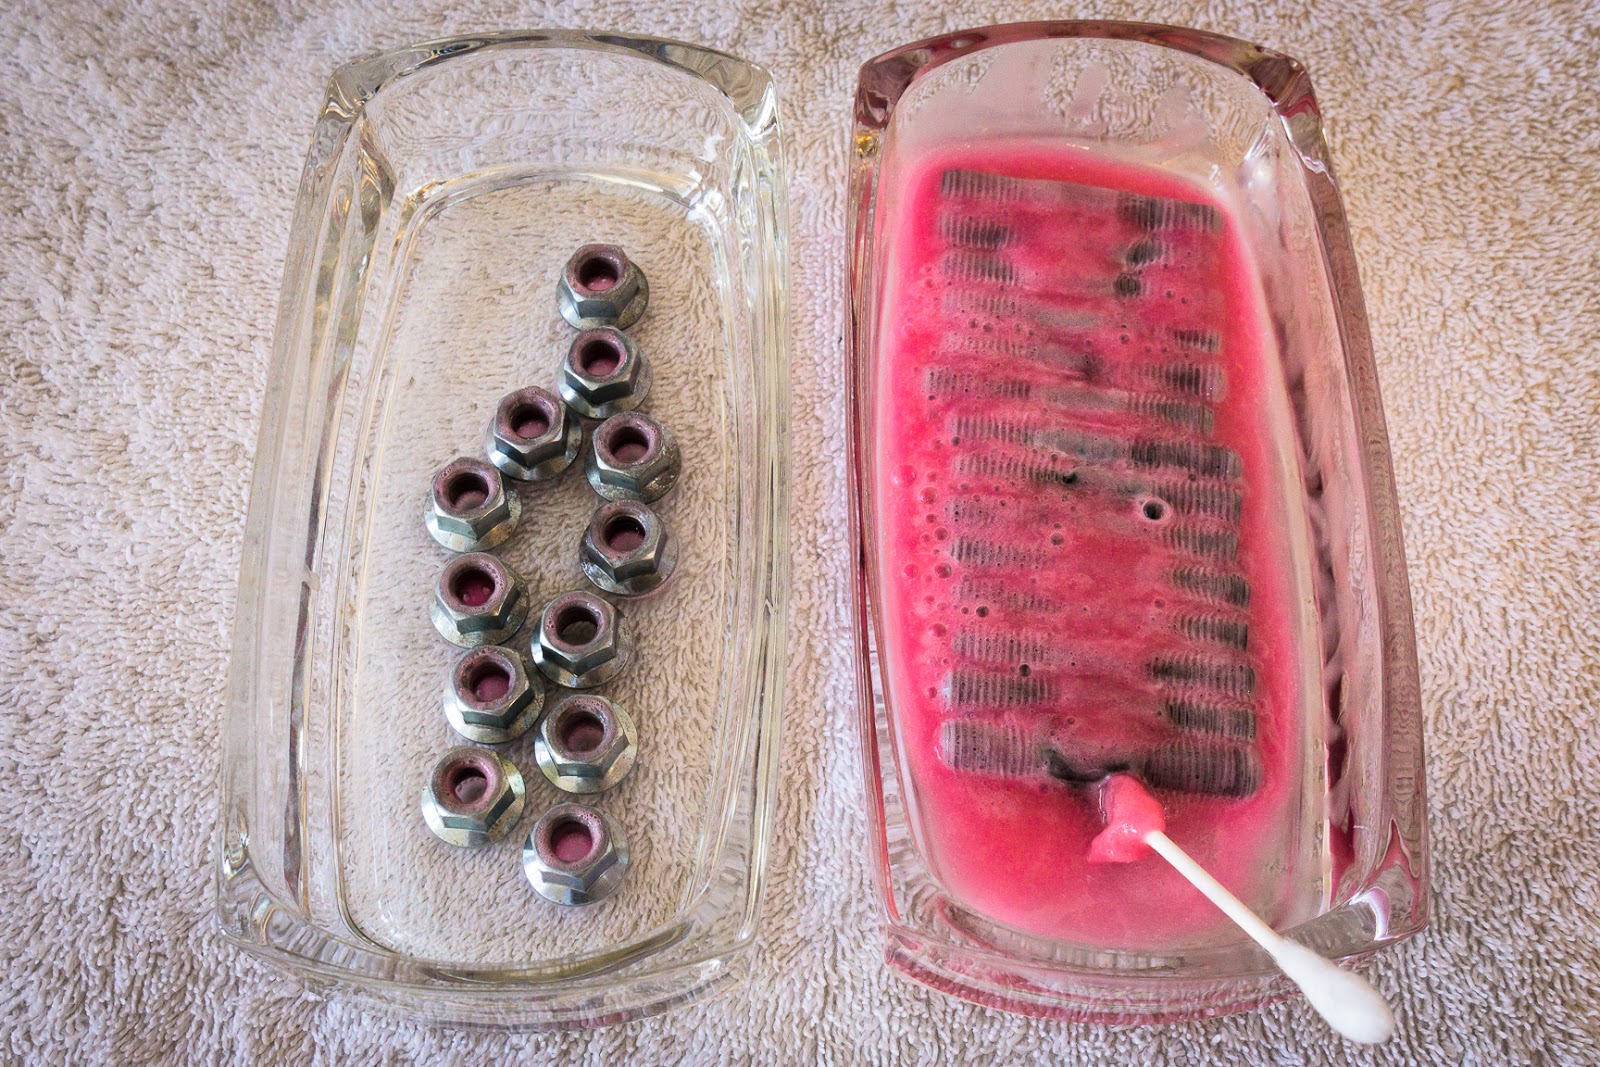
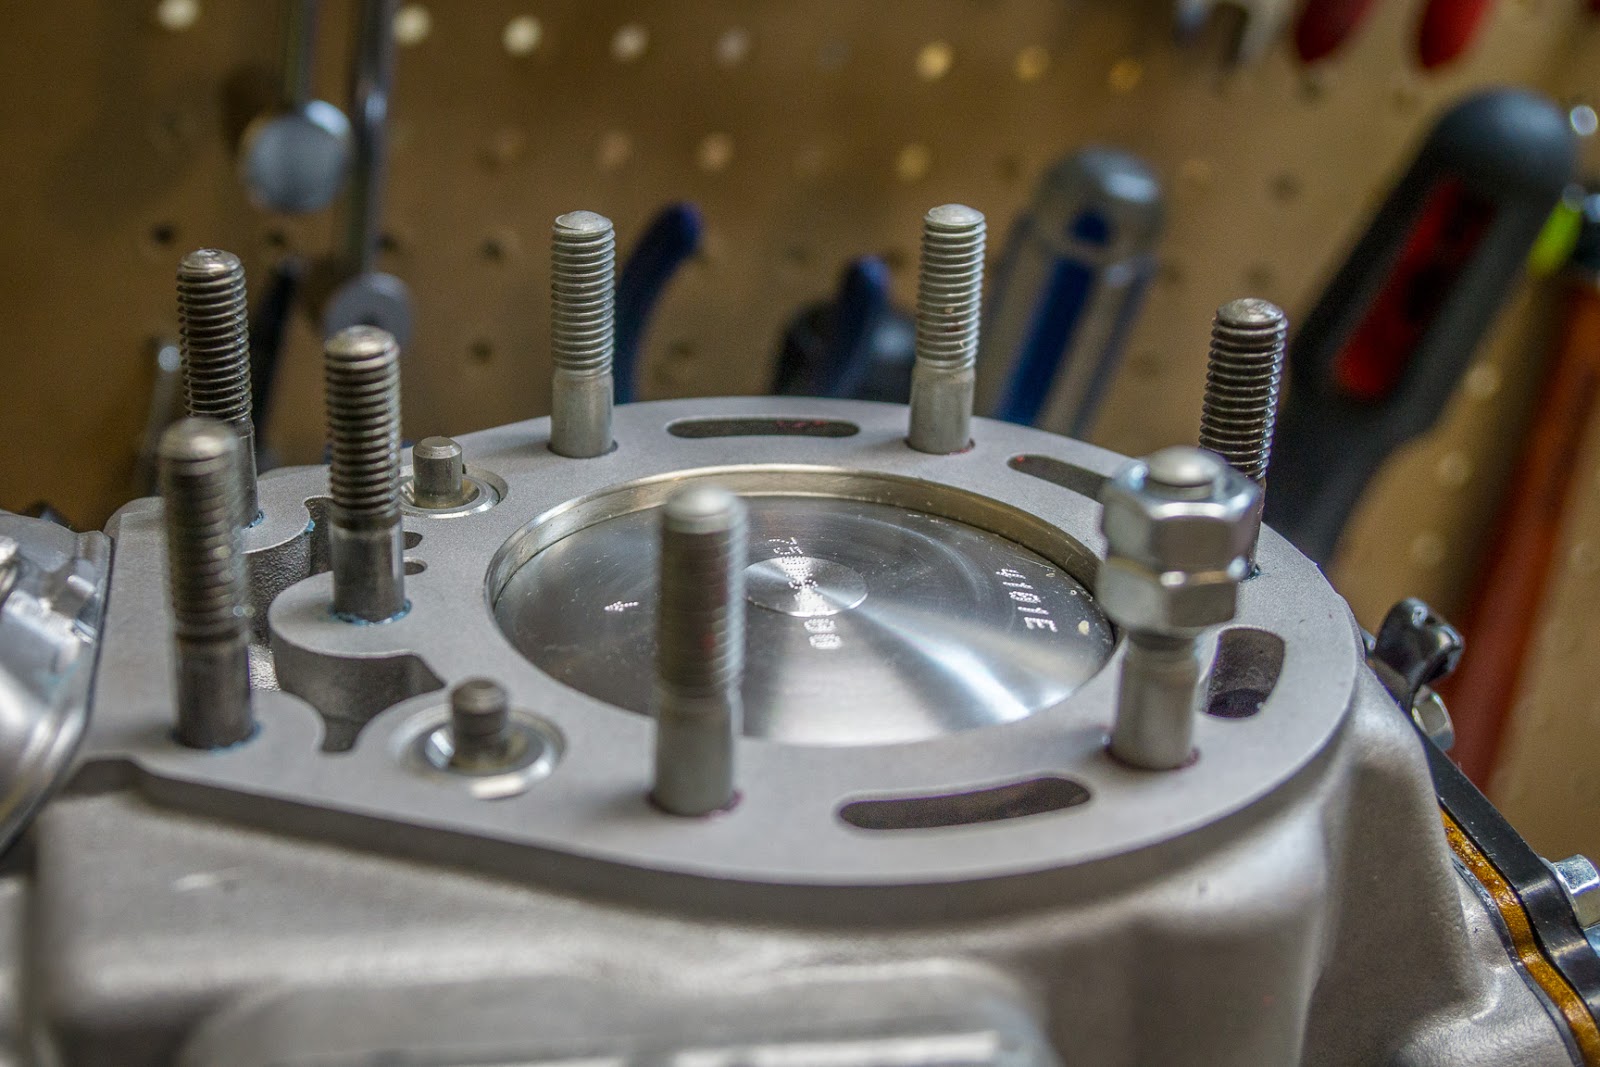
My head studs were a mess. Rust and white rust from the plating was removed with an abrasive wheel. To protect the raw steel from rusting again, I first did a phosphate conversion coating using phosphoric acid (naval jelly). I then coated them with Protectaclear before installing them along with a couple new studs;
Last edited by ericr on 02:02 pm Jan 29 2019, edited 3 times in total.
'02 KDX 200, '02 KDX 220 - My restoration thread
-
KDXGarage
- KDXRider.net
- Posts: 14063
- Joined: 06:45 am Nov 01 2004
- Country: United States of America
- Location: AL, USA
- Contact:
Re: KDX Restoration X 2
Congratulations on getting them both this far along! 
What did you use to measure the pistons, ring gaps, cylinders, ets.?
What did you use to measure the pistons, ring gaps, cylinders, ets.?
Thank you for participating on kdxrider.net.
To post pictures from a device: viewtopic.php?f=88&t=24128
To post pictures from a device: viewtopic.php?f=88&t=24128
-
ericr
- Gold Member
- Posts: 246
- Joined: 06:57 pm Nov 06 2017
- Country: USA
- Location: Gig Harbor, WA
Re: KDX Restoration X 2
I have micrometers, a bore gauge, calipers, and feeler gauges.Jason wrote:Congratulations on getting them both this far along!
What did you use to measure the pistons, ring gaps, cylinders, ets.?
'02 KDX 200, '02 KDX 220 - My restoration thread
-
KDXGarage
- KDXRider.net
- Posts: 14063
- Joined: 06:45 am Nov 01 2004
- Country: United States of America
- Location: AL, USA
- Contact:
Re: KDX Restoration X 2
OK. Good. 99 out of 100 posts I have read on the internet about measuring these parts use the wrong tools, so I was curious.
I guess on the KDX220R ring gaps, you will have to "just go with it". I can tell from your posts that it may trouble you to do so. Your level of attention to detail and specs is VERY high.
I guess on the KDX220R ring gaps, you will have to "just go with it". I can tell from your posts that it may trouble you to do so.
Thank you for participating on kdxrider.net.
To post pictures from a device: viewtopic.php?f=88&t=24128
To post pictures from a device: viewtopic.php?f=88&t=24128
-
KDXohio
- Supporting Member
- Posts: 825
- Joined: 06:04 pm Jun 19 2013
- Country: United States
- Location: Dayton, Ohio
Re: KDX Restoration X 2
Very nice work!
1990 KDX200 FMF Fatty, Answer VFC silencer, VForce 3 Cage, Wiseco Piston, KX125-J series KYB USD fork conversion, Race tech goldvalves, J series front brake assembly, air-box snorkel removed, Acerbis Headlight, KX450F Front fender, Pro Taper RM bend bars, ASV front Brake lever, MSR Clutch perch and lever, RB Head mod, 36mm PWK carb, Trail Tech Kickstand.
-
ericr
- Gold Member
- Posts: 246
- Joined: 06:57 pm Nov 06 2017
- Country: USA
- Location: Gig Harbor, WA
Re: KDX Restoration X 2
Thanks for the compliment. And, you're right, I might be troubled, maybe in more ways than one.Jason wrote:OK. Good. 99 out of 100 posts I have read on the internet about measuring these parts use the wrong tools, so I was curious.
I guess on the KDX220R ring gaps, you will have to "just go with it". I can tell from your posts that it may trouble you to do so.
'02 KDX 200, '02 KDX 220 - My restoration thread