Page 2 of 3
My 1989 CL Special rebuild.
Posted: 03:46 pm Aug 18 2012
by Dekon
Thanks, I'll be getting some Monday. Looks like I can do the rotors and the rusty bolts with that stuff.
My 1989 CL Special rebuild.
Posted: 09:37 am Sep 02 2012
by Dekon
rbates, thanks for the link to the evaporust. Wow that stuff works great. Cleaned everything thing up like new. Since I am waiting for my frame to come back from the powder coater, I have been cleaning the sub-assemblies of the bike. For example I did the air box. I took all the bolts, screws, and nuts, placed them in small deli container with a lid and let them soak over night. Next day, I put them where they belong. Then I work on a new assembly and repeat the process. Has been working out great.
My 1989 CL Special rebuild.
Posted: 09:55 am Sep 02 2012
by rbates9
I'll have to give that stuff a try sometime.
My 1989 CL Special rebuild.
Posted: 11:59 am Sep 06 2012
by Dekon
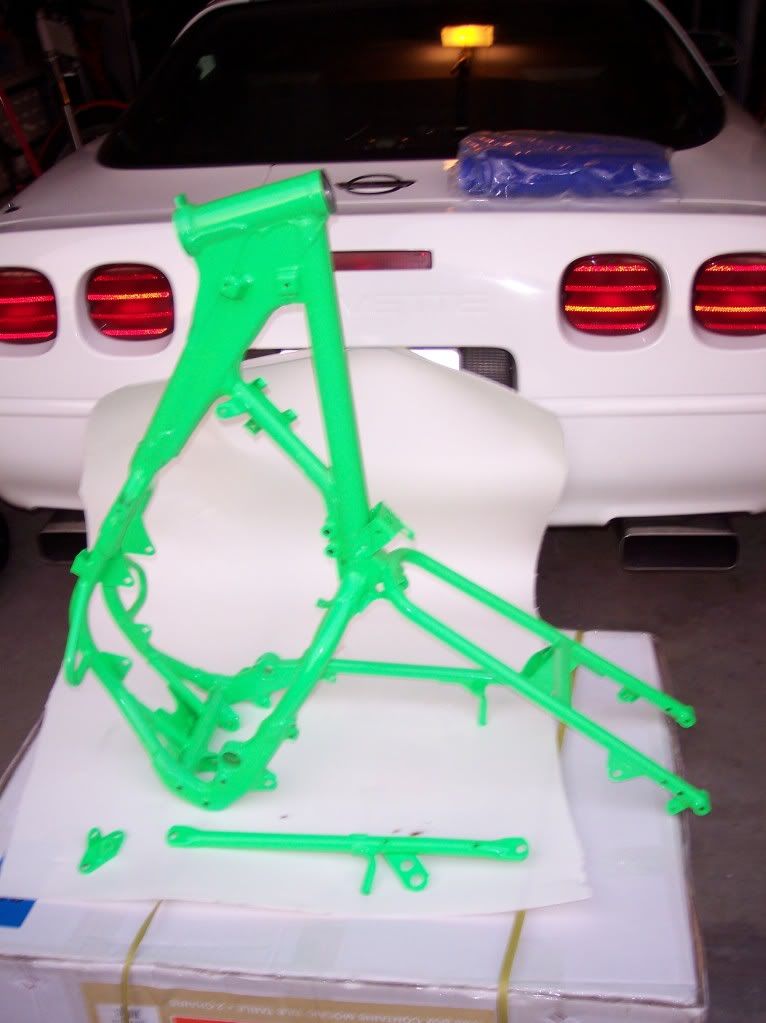
Got my frame back from the power coater last night. It looks real nice, if I do say. It was dark when I got it home so no picture yet. Hope to snap one tonight when I get home from work. Here it is:
My 1989 CL Special rebuild.
Posted: 08:47 pm Sep 06 2012
by Dekon
Quick question, do you use any thread lock when you put your bike together after a rebuild? I was thinking of using the Loctite blue for most of the assembly, and the red on stuff like the rotors and sprocket. Or should I just use the blue?
My 1989 CL Special rebuild.
Posted: 09:07 pm Sep 06 2012
by rbates9
Loctite is a good thing in the right place. I don't think there is the right place to use loctite on a bike. Could be just me. But In my opinion you should check a bike for loose fasteners after a repair and periodically after that. If you use loctite on a part then go back to check the torque of the bolt later the loctite will give a false impression of being tight when it is not. If you make sure that everything is clean when you put it together and make sure it gets tightened the way it should then you shouldn't have any problems. Just think, you put loctite on a bolt then screw it in by hand and for some reason don't tighten it the loctite will set up and the next time you check that bolt it will feel tight when it is not. Also not a single bolt on a bike is in need of red loctite. Ever. It is far too strong for any of the hardware on the bike.
Take a nut and bolt, put a dab of loctite on the threads then put the nut on by hand. let it sit over night and see how tight it feels.
My 1989 CL Special rebuild.
Posted: 10:09 pm Sep 06 2012
by Dekon
I never used it on a bike, but then again, I never broke one down to the bare frame; so I was just wondering. When I took it apart, there was red threadlock on the front and rear rotor bolts. Needed a torch to heat them up and get them off.
My 1989 CL Special rebuild.
Posted: 08:54 pm Sep 21 2012
by Dekon
Just a little update. Got all the major parts I needed together and was finally able to start reassembly. I still need to get the fork seals. First major task was to retap the drain plug. I found that a 7/16-20 bolt would work out. So I drilled it out and retapped the hole. Worked like a charm. No more stripped hole. Put the motor in the frame, greased the rear suspension, added the shock, and installed the airbox and new airbox flap. Now I can toss the hot pink one that was on there.
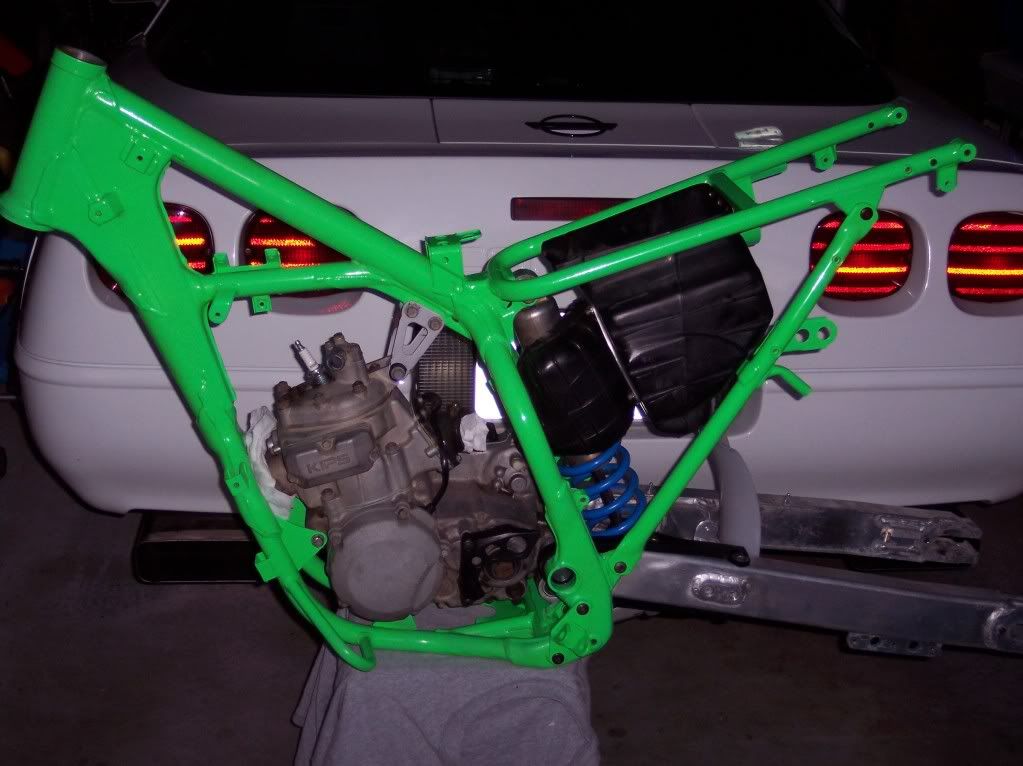
I am going to leave the swingarm bare aluminium. Man I was shocked at the price of the chain slider for the swing arm.
The powercoaters missed the upper shock hole and got powercoat in there; man what a b_tch to get the upper shock bolt on. Man that stuff is tough.
I am going to try and at least get the electrical done tomorrow.
Re: My 1989 CL Special rebuild.
Posted: 09:06 pm Sep 21 2012
by Roadhazardguy
Man that looks good! How much did they charge to powder coat it, and did they sand-blast it beforehand?
Re: My 1989 CL Special rebuild.
Posted: 10:29 pm Sep 21 2012
by Dekon
Sand blasted and power coated $150.
My 1989 CL Special rebuild.
Posted: 04:40 pm Sep 22 2012
by Goofaroo
I am going to leave the swingarm bare aluminium. Man I was shocked at the price of the chain slider for the swing arm.
I am about where you are on my 87 model. I've been shocked on many occasions as I've ordered parts for this bike. I find it helpful to have a few beers before and after you place your orders. I was going to keep track of the cost of this project but I've decided to just let it be a mystery.
Your bike is going to look great and it looks like you chose a good one to start with. I'll be keeping an eye on your progress.
Re: My 1989 CL Special rebuild.
Posted: 08:52 pm Oct 22 2012
by Dekon
I'll have to get some pictures up, but the build is almost complete. The past month it has been tough to get any work done on it; 20 minutes here, 30 minutes there. It is back on two wheels and basically together. I still have to put the plastics back on and get a new chain and sprockets but she is up and running. Shocked it started on the 2nd kick. Just for kicks, I wanted to see if the lights work. So I took a jumper wire and jumped the switch connections(I don't have a switch yet) and low and behold the tail light came on. Surprised, I jammed the headlight connectors on the back of the new headlight plug. Surprise, surprise it lit right up too.
My 1989 CL Special rebuild.
Posted: 11:55 am Oct 26 2012
by Dekon
So yesterday I afternoon, I fired the bike up. I look down at the pipe and it is leaking all over the place. I had fired it up the other night, it was not completely dark, but just dark enough I guess not to see any leaks. The pipe had been welded in a few spots by the PO, but man, this thing was pumping out a bunch of smoke from just about every weld seam. Some seams leaked for almost the entire length of the weld, others were pin holes in a couple of spots. I had planned on getting a new pipe down the road, but now it has been moved up higher on the priority list over new side panels and radiator shrouds.
Re: My 1989 CL Special rebuild.
Posted: 04:14 pm Oct 26 2012
by Goofaroo
We need pics! Too bad about the pipe. You could probably fix it but you've gone to a lot of trouble rebuilding this bike so it would be a shame to put a clapped out pipe on it. I haven't looked but I would guess you could find a good used one for a reasonable price.
My 1989 CL Special rebuild.
Posted: 07:51 pm Oct 27 2012
by Dekon
OK, so here are some pictures. First off is the beautiful welding job by the PO.
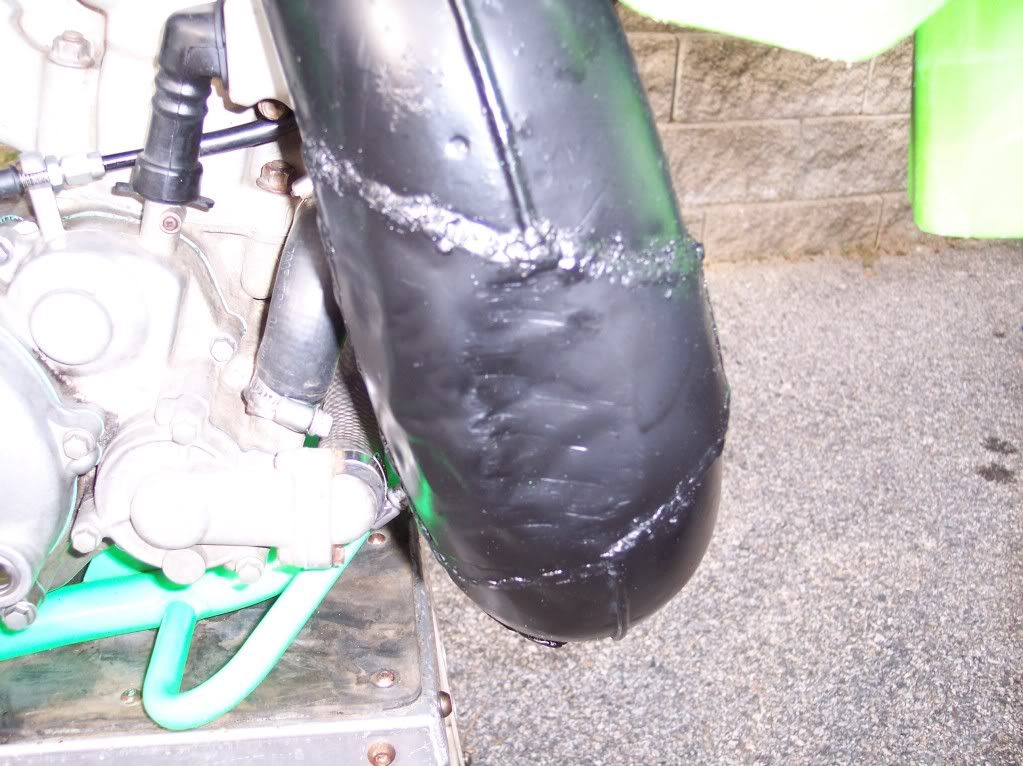
There are two more spots welded like this. Both are much smaller but leak none the less. I also can not figure out why there is a patch welded in where the pipe comes back across the frame behind the front tire. It is on the back side of the pipe on the frame side.
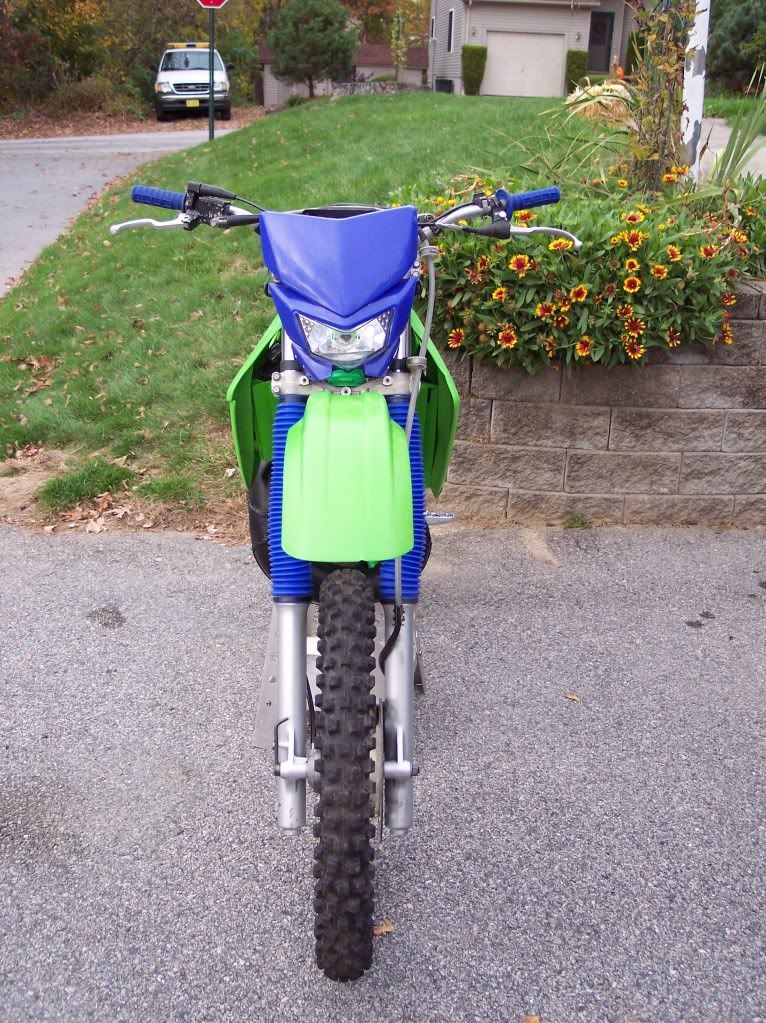
Front view.
My 1989 CL Special rebuild.
Posted: 08:05 pm Oct 27 2012
by Dekon
Right side.
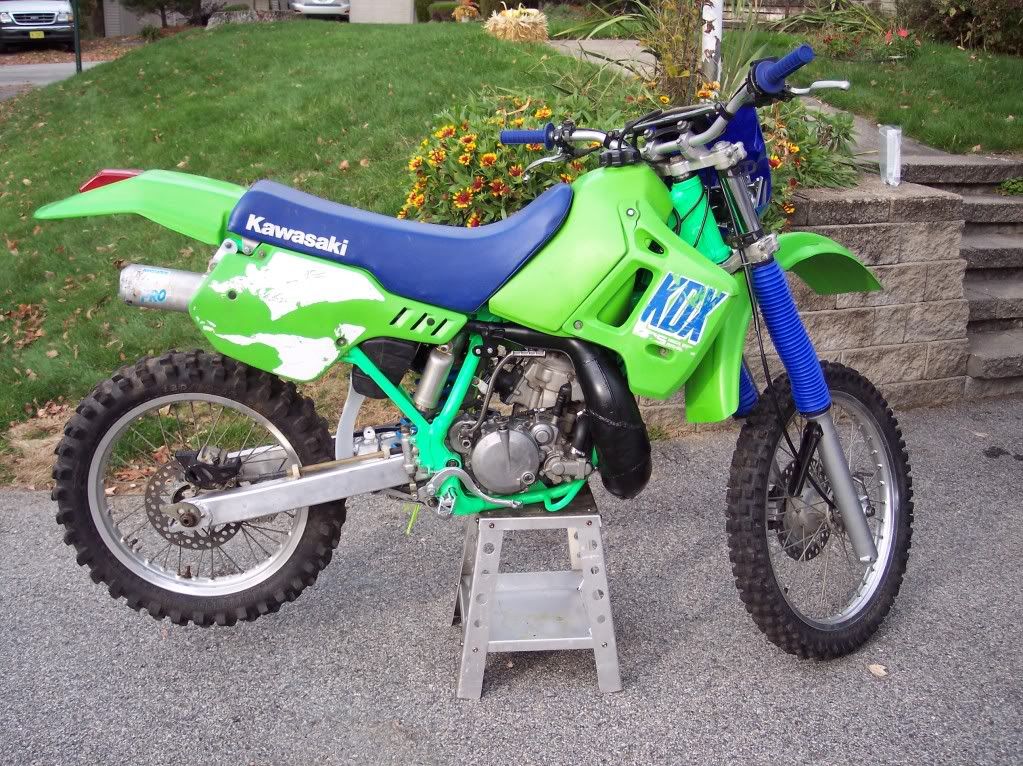
Left side.
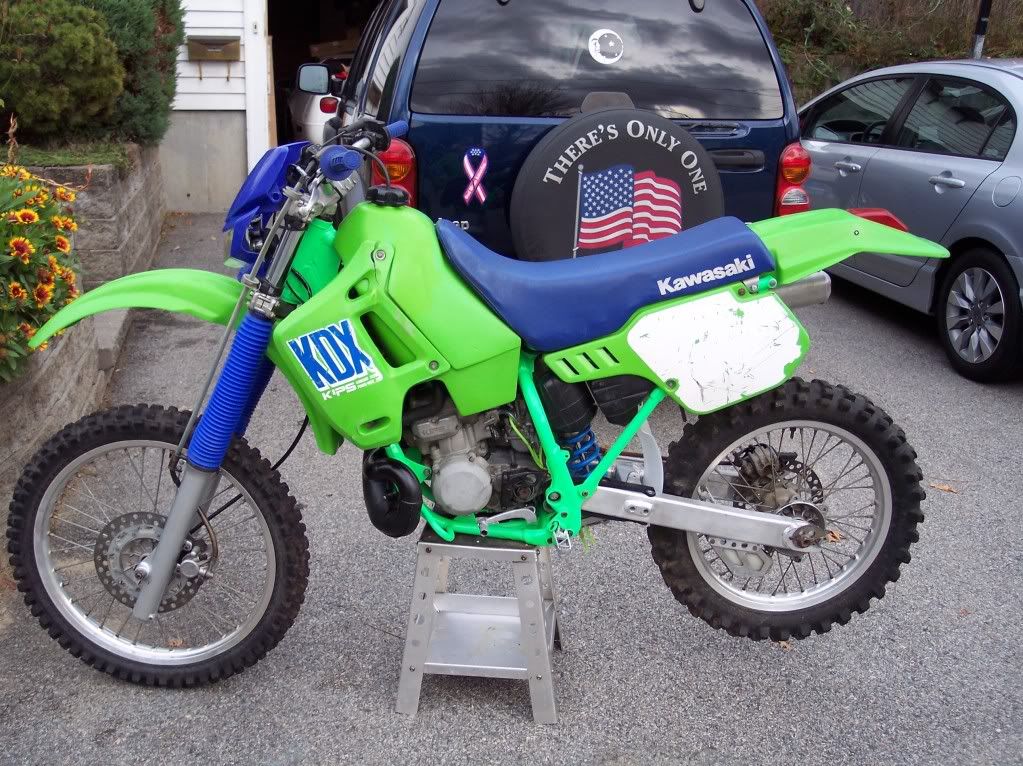
Don't mind the side panels and radiator shrouds. They were next to be replaced but the pipe bumped them from the top of the replacement list. The radiator shrouds are going to be replaced, and if I can, I am going to try and remove the white backgrounds from the side panels. Anyone have any tips for removing hose? If I can not get the white off, I am just going to replace those also.
I am almost at the finish line with this build. I was supposed to get a chain and sprocket kit and a new rear tire today from the local shop, but had to prepare around the yard for "Frankenstorm" coming Monday. I so thought I was going to be able to take it for a little test ride down the street today. I am also going the order the graphics kit. Also, just waiting on a light switch and a headlight harness I purchased from a member here. Still looking for a used chain case for the swing arm. I don't feel like paying what the dealers are getting for these things.
Re: My 1989 CL Special rebuild.
Posted: 09:42 pm Oct 27 2012
by Goofaroo
I need to replace the backgrounds on my side covers too. I am hoping I can use my heat gun and just peel them off.
Your bike is looking great!
Re: My 1989 CL Special rebuild.
Posted: 12:32 am Oct 28 2012
by Thrahl
My guesses for the welded areas of the pipe would be either the PO did the Canadian Dave mod to increase power but is not good at welding or the pipe was extremely dented, perhaps to the point of being unusable, and he cut that section out and welded in new metal (most likely the case).
If it were mine I would try to weld it back up. Nothing to lose except a little time (that is if you can weld or know someone who can do it for free) but that's because I'm a cheapskate.
But if you were eying a new shiny FMF anyways then this would be a good reason to just get it.
My 1989 CL Special rebuild.
Posted: 06:09 pm Nov 10 2012
by Dekon
So, I finally got the front master cylinder, sprockets and chain on today. Now, I have discovered, that the clutch is not working. When I pull in the lever, it pulls, but the clutch will not engage. I tried to adjust both at the perch and down by the clutch arm. Still no clutch. When the bike was apart, I measured the plates and they were all within spec. Anyone have any ideas?
I also scored. I needed a new front master cylinder as the lower lever mount was broken, and while searching a breaker for one I also found a used pipe for cheap. Well, they arrived the other day and I just took a quick look and put the box in the garage. As I grabbed the master cylinder from the box I saw some markings on the pipe. I rubbed the dirt off and low and behold it is an FMF Gold Series pipe. Not bad for $25. So, I think that was a score. It has one little ding in it and I will probably get it taken out.
My 1989 CL Special rebuild.
Posted: 06:21 pm Nov 10 2012
by rbates9
Dekon wrote: When I pull in the lever, it pulls, but the clutch will not engage. I tried to adjust both at the perch and down by the clutch arm. Still no clutch. When the bike was apart, I measured the plates and they were all within spec. Anyone have any ideas?
Are you saying that the clutch will not disengage or will not engage? When you put the bike in gear does it just sit there or does it take off? It sounds like something might not be assembled correctly. Like a washer out of place or something.