I believe this is correct.fuzzy wrote:I don't know about the 250, but I'm fairly sure a 200 would NOT have a lined bore that year. I think it started in 86 along with the installation of the KIPS valve.
Too Stupid to Stop: 1983 KDX 250 Resurrection
-
Julien D

- KDXRider.net

- Posts: 5858
- Joined: 07:53 pm Nov 07 2008
- Country: USA
- Contact:
Re: Too Stupid to Stop: 1983 KDX 250 Resurrection
-
Dekon
- Supporting Member II

- Posts: 674
- Joined: 07:54 am Jun 26 2012
- Country:
- Location: Rhode Island
Too Stupid to Stop: 1983 KDX 250 Resurrection
Any updates on this? I miss the reading your writing style. 
-
dfeckel
- Platinum Member

- Posts: 644
- Joined: 07:46 am Nov 09 2009
- Country:
Too Stupid to Stop: 1983 KDX 250 Resurrection
Thanks for the compliments!
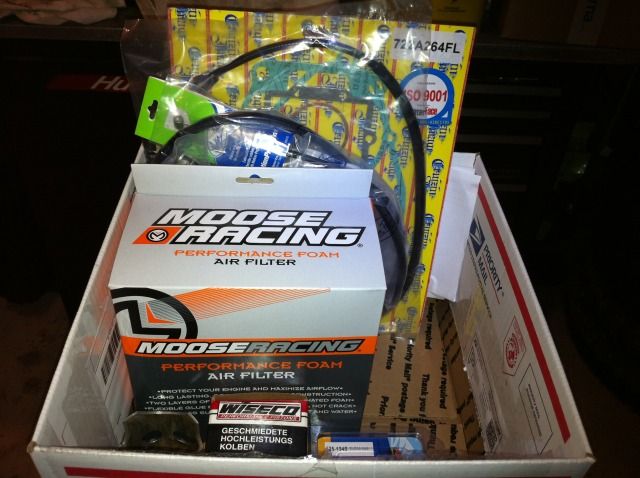
Not much to report except that the parts are marching in. I received a new clutch cable, front brake cable, rear wheel bearings, main bearings and seals, fork seals and dust wipers, air filter (pricey! Especially since I also had to fleabay an air box assembly to get a cage for the filter--mine must still be at the bottom of that lady's trash can), and gasket set. The cylinder is off getting bored, then it will receive a Wiseco. I'm anxious to try installing the main bearings using dry ice to shrink the bearings and insert into room temperature cases. The extra coldness of dry ice versus the freezer should make heating the cases unnecessary.
For giggles I took some 120 grit sandpaper to the horribly faded headlight plastic. There is in fact some green under there, but it's deep down. Nothing a few hour's worth of elbow grease won't liberate. luckily, the side panels aren't too bad, and the tank is good enough already. I think it lived in the shed while everything else was outside.
I'll post updates as I progress!
David Eckel
-
Dekon
- Supporting Member II
- Posts: 674
- Joined: 07:54 am Jun 26 2012
- Country:
- Location: Rhode Island
Too Stupid to Stop: 1983 KDX 250 Resurrection
The dry ice method sounds interesting.
-
gopack4749
- Member
- Posts: 42
- Joined: 12:21 pm Apr 22 2012
- Country:
- Location: Asheville, NC
Too Stupid to Stop: 1983 KDX 250 Resurrection
Post up some pics of the work on the fenders-side plates.
-
Goofaroo
- Gold Member

- Posts: 531
- Joined: 12:42 pm Sep 09 2012
- Country:
- Location: Edmond, Oklahoma
Too Stupid to Stop: 1983 KDX 250 Resurrection
Yep. I'll be putting my bottom end back together soon and that doesn't sound like a bad idea. Please post the results and I'll do the same if I get around to it before you do.The dry ice method sounds interesting.
-
zz3gmc
- Member
- Posts: 124
- Joined: 09:02 pm Jun 28 2009
- Country:
- Location: Pemberton NJ
Too Stupid to Stop: 1983 KDX 250 Resurrection
Cool project! Thats a 83, I can tell by the long, thin silencer and the the KDX graphics on the side panels. I used to race a 84 KDX250 along with my 84 200 when I first started racing enduros in 85. I have a red 84 200 in the garage that I hope to get running someday. It may turn into a green one though, I have a NOS headlight, digital odo, and sidepanel in green. The red stuff is hard to come by. I remember the 250 being a good bike but the 200 handled the SJ tight better and was almost as fast. I ended up swapping the the wheels from the 250 onto my 200, bolted on, to get the bigger brakes. I even swapped the suspension from the 250 onto the 200. I remember seeing a article on hopping up the 250 where they installed the head, cylinder and pipe from a aircooled KX250. They also built up a IT250 in the same manner.
Good Luck with the project and keep us posted!
Good Luck with the project and keep us posted!
-
dfeckel
- Platinum Member
- Posts: 644
- Joined: 07:46 am Nov 09 2009
- Country:
Too Stupid to Stop: 1983 KDX 250 Resurrection
Cool info! Thanks for chiming in. As soon as I make more progress, I'll post up. I've been prepping my Husky for a hare scramble this weekend, but I might have a little time on Saturday to work on the '83.
David Eckel
-
dfeckel
- Platinum Member
- Posts: 644
- Joined: 07:46 am Nov 09 2009
- Country:
Too Stupid to Stop: 1983 KDX 250 Resurrection
Many days elapsed, minor progress achieved.
Mrs. Postmanlady has been busy. Parts from lands flung far and wide. Gaskets from mother Japan, piston from father parts distributor, bearings from sister All Balls, air filter from brother Moose (ferried by squirrel).
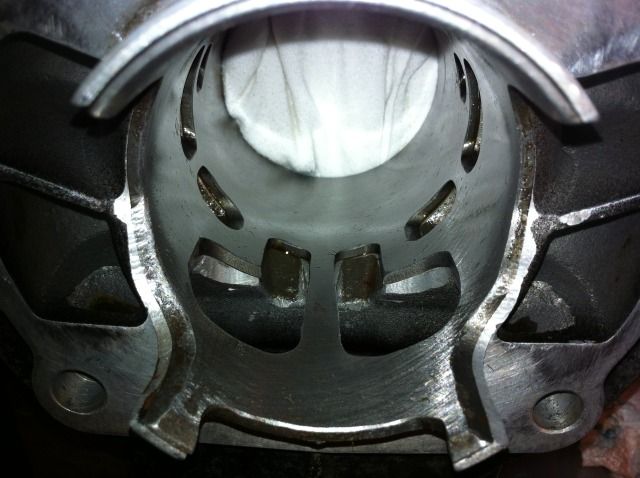
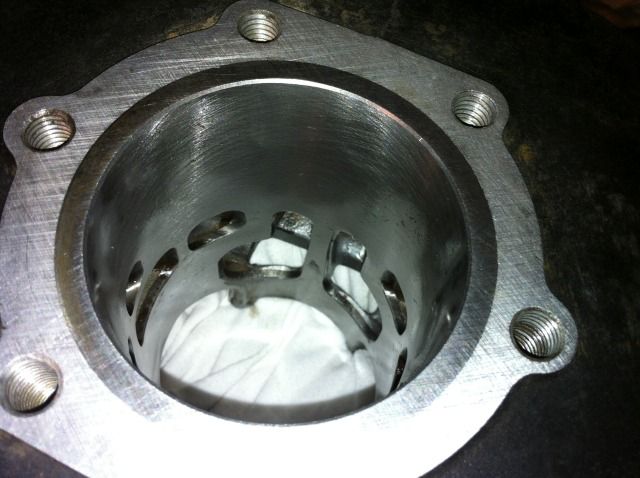
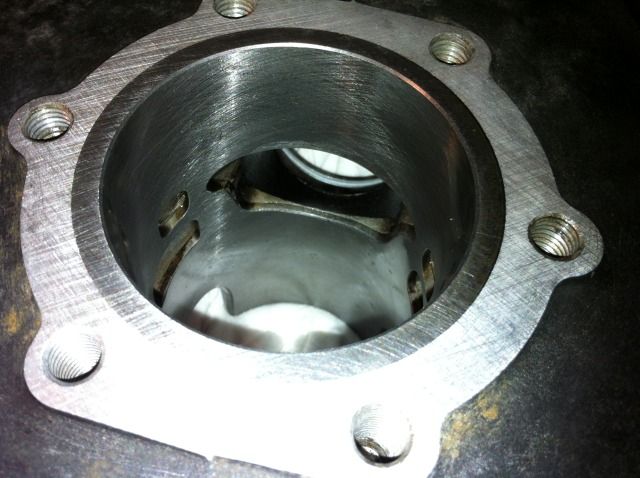
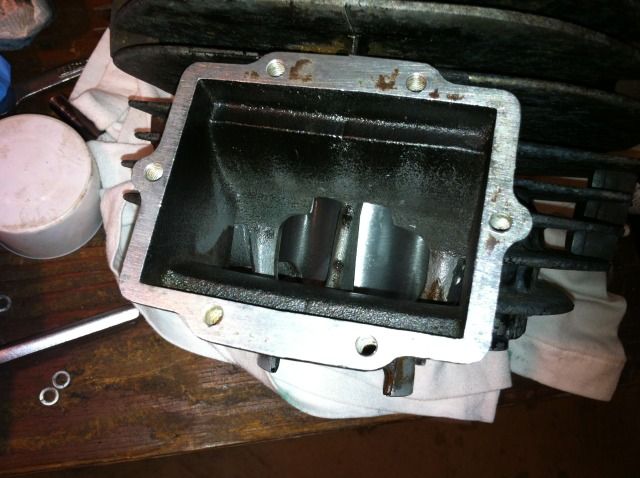
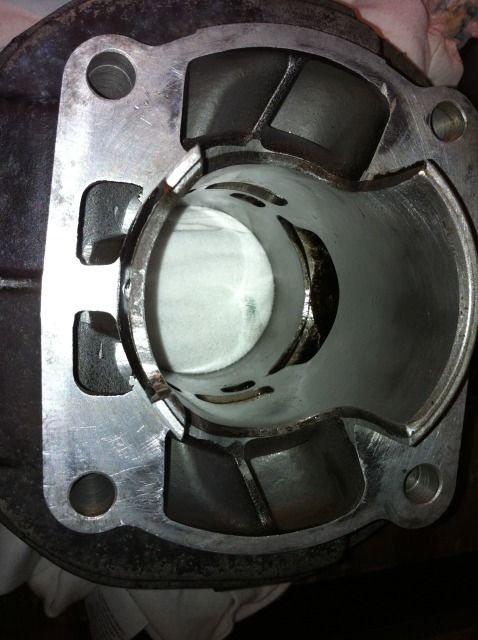
I got the call from Redline Motorcycles in Pemberton, NJ that my cylinder was done. Woot! I hopped on ye olde CL-gold Ninja 600 and zipped out to pick it up. They had to take it two bore sizes to get the grooves out. Most all of the surface rust pitting was eliminated, too. There is still a little bit on the bridge in the intake port as well as on the lowest part of the sleeve, but I'm not concerned.
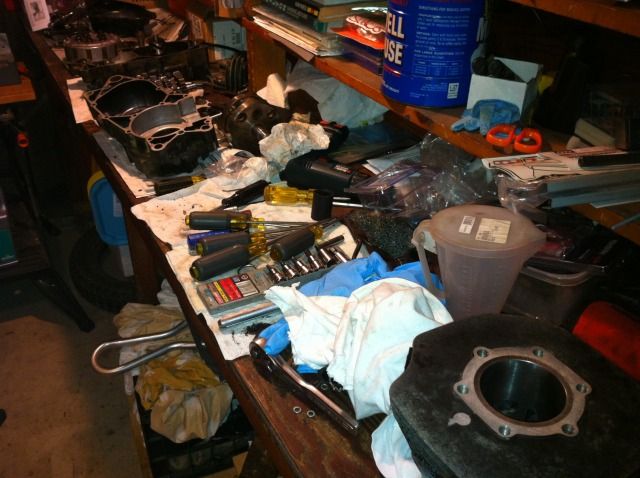
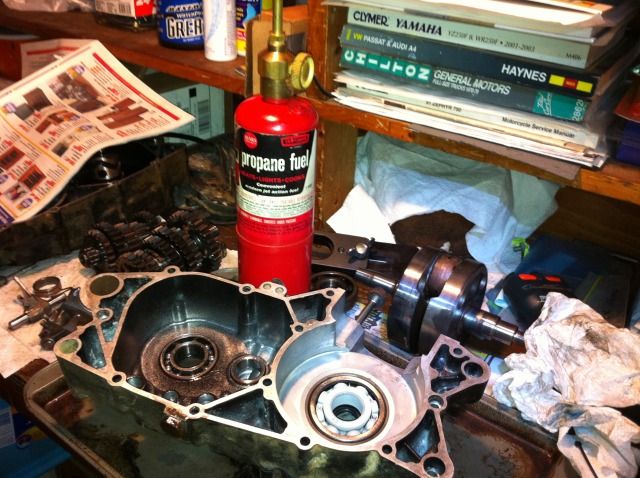
Before we get started, I remind everyone to keep a clean, organized work space. I cannot understate the importance of this enough. :)
I sent my grocer gopher out to the local grocery store to pick up some dry ice. She returned with $1.19 worth of solid CO2.
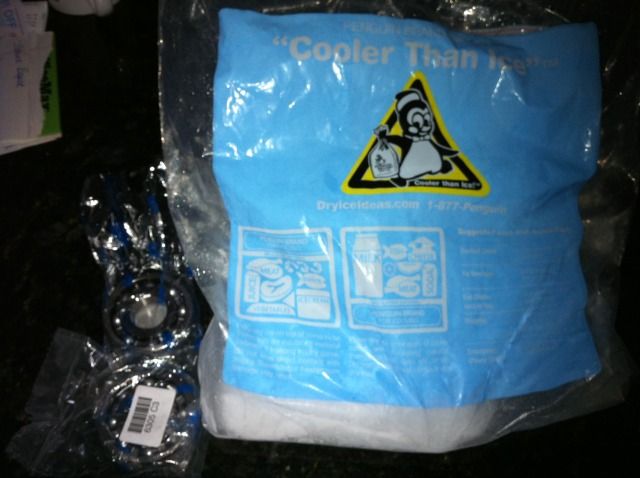
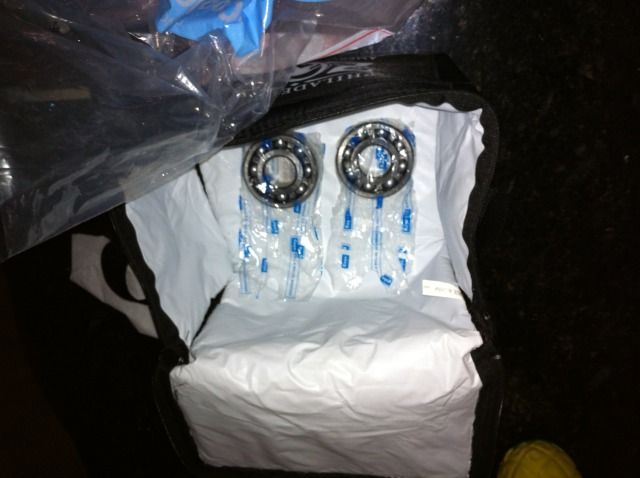
Bearing chiller.
In my excitement to try the dry ice bearings/ambient temperature cases experiment, I almost forgot to put in the new crank seals. Would I have been pissed if I'd totall forgotten.
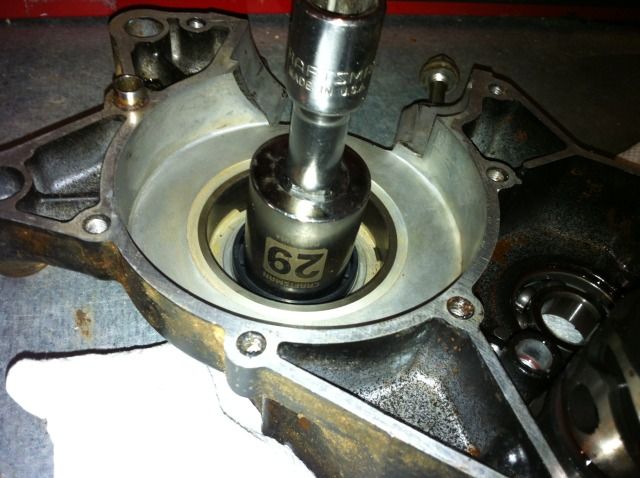
The bearings were super frosty. I wore a pair of semi-thin winter gloves to avoid freezing my finger tips. Ambient temperature was about 65 fahrenheit in the garage (love that cool fall weather). I rapidly transported the frosty bearing to the case, dropped it into its hole...and it went in about a millimeter. D'oh! I quickly tapped it out from the other side and put it back in the chiller. Unfortunately, I don't think this is a viable trick. Maybe if it was a scorching hot day, but there just wasn't enough shrinkage for them to drop right in. I had to resort to the torch to put a little heat in the cases. After doing that, they dropped right in.
So that's all the progress for this weekend. I'm racing a hare scramble on the Husky tomorrow, and I doubt I'll be doing much in the garage when I get home.
I'll probably get the motor back together next, then I have to start in on the forks. Then disassemble, clean and lube the linkage and swing arm bearings. Then rehab the plastic as much as I'm able/willing. Then tires, cables, missing fasteners... I'll keep ya updated!
Mrs. Postmanlady has been busy. Parts from lands flung far and wide. Gaskets from mother Japan, piston from father parts distributor, bearings from sister All Balls, air filter from brother Moose (ferried by squirrel).
I got the call from Redline Motorcycles in Pemberton, NJ that my cylinder was done. Woot! I hopped on ye olde CL-gold Ninja 600 and zipped out to pick it up. They had to take it two bore sizes to get the grooves out. Most all of the surface rust pitting was eliminated, too. There is still a little bit on the bridge in the intake port as well as on the lowest part of the sleeve, but I'm not concerned.
Before we get started, I remind everyone to keep a clean, organized work space. I cannot understate the importance of this enough. :)
I sent my grocer gopher out to the local grocery store to pick up some dry ice. She returned with $1.19 worth of solid CO2.
Bearing chiller.
In my excitement to try the dry ice bearings/ambient temperature cases experiment, I almost forgot to put in the new crank seals. Would I have been pissed if I'd totall forgotten.
The bearings were super frosty. I wore a pair of semi-thin winter gloves to avoid freezing my finger tips. Ambient temperature was about 65 fahrenheit in the garage (love that cool fall weather). I rapidly transported the frosty bearing to the case, dropped it into its hole...and it went in about a millimeter. D'oh! I quickly tapped it out from the other side and put it back in the chiller. Unfortunately, I don't think this is a viable trick. Maybe if it was a scorching hot day, but there just wasn't enough shrinkage for them to drop right in. I had to resort to the torch to put a little heat in the cases. After doing that, they dropped right in.
So that's all the progress for this weekend. I'm racing a hare scramble on the Husky tomorrow, and I doubt I'll be doing much in the garage when I get home.
I'll probably get the motor back together next, then I have to start in on the forks. Then disassemble, clean and lube the linkage and swing arm bearings. Then rehab the plastic as much as I'm able/willing. Then tires, cables, missing fasteners... I'll keep ya updated!
Last edited by dfeckel on 01:56 pm May 01 2018, edited 1 time in total.
David Eckel
-
zz3gmc
- Member
- Posts: 124
- Joined: 09:02 pm Jun 28 2009
- Country:
- Location: Pemberton NJ
Too Stupid to Stop: 1983 KDX 250 Resurrection
How were your swing arm and linkage bearings? Mine are pretty worn on my 84 200 and I have been having a hard time finding replacements. The swing arm bearings are available but havent found linkage bearings yet. Does Redline do the boring onsite? Im right down the street from them and need to get a TS400 cylinder bored.
-
dfeckel
- Platinum Member
- Posts: 644
- Joined: 07:46 am Nov 09 2009
- Country:
Too Stupid to Stop: 1983 KDX 250 Resurrection
Redline took it to a shop to do the boring. I don't think it was far away, but they don't physically do it at their place. They turned it around in a little over a week, including ordering the piston. Good price, good service. Plus, it's so refreshing to have a shop that will work on a bike older than 15 years.
I'm optimistic about my chassis bearings. The swing arm pivot came out with a minum of pounding, and there is very little play in the rear end when lifting. I have not actually taken apart the linkage and push rod, but I'm hoping for a clean and grease. My '87 200 needed new spherical bearings in the push rod as well as the push rod bolts. I was able to get NOS spherical bearings for the price of a night in Vegas, but the bolts are unobtainium, as are the seal caps. I was missing a seal cap, so I bought a used link, bolts and seal caps from eBay. The used bolts were better than what I had, but not perfect. The new bearings took out 80% of the play in the linkage, so it's ridable right now. However, I'm thinking hard about having a machine shop fab up some new bolts. I'm afraid the old bolts will accelerate the wear on the new spherical bearings. I also need to pull the linkage and shock off of it because I have an intermittant sqeak back there.
I'm optimistic about my chassis bearings. The swing arm pivot came out with a minum of pounding, and there is very little play in the rear end when lifting. I have not actually taken apart the linkage and push rod, but I'm hoping for a clean and grease. My '87 200 needed new spherical bearings in the push rod as well as the push rod bolts. I was able to get NOS spherical bearings for the price of a night in Vegas, but the bolts are unobtainium, as are the seal caps. I was missing a seal cap, so I bought a used link, bolts and seal caps from eBay. The used bolts were better than what I had, but not perfect. The new bearings took out 80% of the play in the linkage, so it's ridable right now. However, I'm thinking hard about having a machine shop fab up some new bolts. I'm afraid the old bolts will accelerate the wear on the new spherical bearings. I also need to pull the linkage and shock off of it because I have an intermittant sqeak back there.
David Eckel
-
ctrider
- Supporting Member II
- Posts: 4
- Joined: 08:16 pm Jun 19 2012
- Country:
- Location: north central connecticut
Re: Too Stupid to Stop: 1983 KDX 250 Resurrection
Cool project! I have some info for zz3gmc- a company called DC plastics makes a full set of plastics for his '84 200 (except gas tank). They advertise only green, but will make them in any color you want for the same price. I had them make me a spare set for a red '84 I recently picked up. The quality and color match are pretty good ( I will probably put the spare set on and save the O.E plastic). I look forward to the updates!
-
zz3gmc
- Member
- Posts: 124
- Joined: 09:02 pm Jun 28 2009
- Country:
- Location: Pemberton NJ
Too Stupid to Stop: 1983 KDX 250 Resurrection
I have a set of DC red side panels that came with the bike. I cleaned up the rear fender, front fender and tank pretty good. I only really need a headlight. I may get a green set just to change it up at times. I also have a DC rear fender on my 81 PE400. Not bad quality. Definately good for a rider! Real strong compared to stock.
-
Goofaroo
- Gold Member
- Posts: 531
- Joined: 12:42 pm Sep 09 2012
- Country:
- Location: Edmond, Oklahoma
Too Stupid to Stop: 1983 KDX 250 Resurrection
I'm having the same issues with my 87 model. I can't find the sphericals for the pushrod and the bolts are worn. Not anything terrible but I would sure like to freshen them up.I was able to get NOS spherical bearings for the price of a night in Vegas, but the bolts are unobtainium, as are the seal caps. I was missing a seal cap, so I bought a used link, bolts and seal caps from eBay. The used bolts were better than what I had, but not perfect. The new bearings took out 80% of the play in the linkage, so it's ridable right now. However, I'm thinking hard about having a machine shop fab up some new bolts. I'm afraid the old bolts will accelerate the wear on the new spherical bearings. I also need to pull the linkage and shock off of it because I have an intermittant sqeak back there.
The upper shock mounting bolt was also worn but I replaced it with a hardened bolt from ACE hardware that had the proper OD on the shoulder. It'll do for now. As for the pushrod bolts, I've thought about finding a shoulder bolt that fits and either use it as is or try to drill and tap them for grease zerks and grind a relief in the middle to dispense the grease. If I don't drill them for zerks I'll just have to plan on taking them apart from time to time for service just like I would have to do on most MX bikes. In most cases, only the off-road models get zerks anyway.
That triggers a thought: Instead of having a machine shop fab something up from scratch maybe you could just have them modify an off the shelf bolt. I used to be a machinist and I can tell you that it would be quite a bit less expensive if they just modified a bolt. It would also be a lot softer bolt unless you had them send it off for heat treating.
Either way, It's a damned shame you can't find these parts. You can buy kits to rebuild the linkage on a 1989 or newer bike very inexpensively. It has been the only real problem I've come across as I've gone through this bike. It will work pretty well for now but I'm sure that the wear will begin to accelerate and at some point I'll have to get creative and tighten up the linkage.
Keep us posted on your progress. Looks like a fun project and I'm anxious to see it come back to life.
By the way, the picture of your workbench was eerily similar to mine when you posted the pic. Engine split and on the left, head on the right, three screwdrivers next to the head, etc. It was very strange.
-
canamfan
- Supporting Member II
- Posts: 444
- Joined: 09:55 pm May 08 2011
- Country:
- Location: butler mo USA
Too Stupid to Stop: 1983 KDX 250 Resurrection
I was just reading your build post, pretty neat. I have a friend that is a small town kawasaki dealer since 1978. He has a lot of NOS parts. His # is 660-388-6159 dougs cycle chop salisbury Mo. I also took apart a 83 kdx 200 for parts a while back i'll check the linkage bearings to see if there are any good ones. I didn't know they were not available.
good luck Steve
good luck Steve
-
KDXGarage

- KDXRider.net
- Posts: 14062
- Joined: 06:45 am Nov 01 2004
- Country: United States of America
- Location: AL, USA
- Contact:
Too Stupid to Stop: 1983 KDX 250 Resurrection
You have another great rebuild going. Congratulations!
Thank you for participating on kdxrider.net. 
To post pictures from a device: viewtopic.php?f=88&t=24128
To post pictures from a device: viewtopic.php?f=88&t=24128
-
dfeckel
- Platinum Member
- Posts: 644
- Joined: 07:46 am Nov 09 2009
- Country:
Too Stupid to Stop: 1983 KDX 250 Resurrection
Sorry for the delay in any updates, but I really haven't gotten much done in the garage lately. The last couple of enduros and hare scrambles ahve kind of forced me to dedicate wrenching time to the race bike. Plus, family life has been very busy lately. But I promise I'll have some better updates soon.
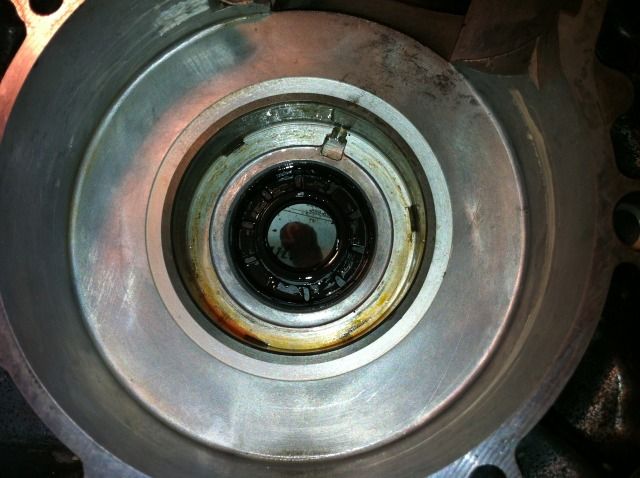
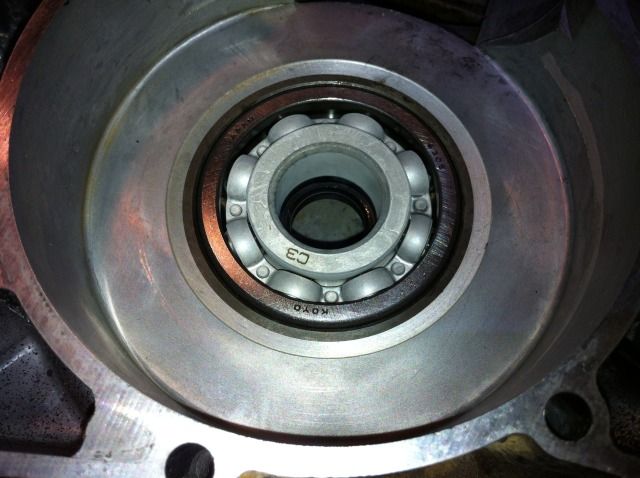
As it is, I managed to get the crank pressed into the right case half. The first time I tried, the chamfer on the crank caught the edge of the new seal and turned it inside out. When I removed the case half from the press, the crank wouldn't move freely in the new main bearing. The twisted seal was binding it up. I pressed the crank back out, got the seal unfolded, put the seal spring back into place, and pressed the crank in again. This time, I removed the case half from the press a couple times during the process to make sure the crank shaft was not deforming the seal. Success. Next up, joining the case halves.
As it is, I managed to get the crank pressed into the right case half. The first time I tried, the chamfer on the crank caught the edge of the new seal and turned it inside out. When I removed the case half from the press, the crank wouldn't move freely in the new main bearing. The twisted seal was binding it up. I pressed the crank back out, got the seal unfolded, put the seal spring back into place, and pressed the crank in again. This time, I removed the case half from the press a couple times during the process to make sure the crank shaft was not deforming the seal. Success. Next up, joining the case halves.
David Eckel
-
dfeckel
- Platinum Member
- Posts: 644
- Joined: 07:46 am Nov 09 2009
- Country:
Too Stupid to Stop: 1983 KDX 250 Resurrection
First of all, sorry there's no pictures. But we've all seen a motor reassembled before, right? So who needs to see all that? Not you guys!
I finally scrounged up a few hours to reassemble the cases today. The main catalyst for this is the long line of other bikes I need to work on (I'm looking at you, Husqvarna with the coolant-fouling spark plug, and you KX-DX hybrid with the broken powervalves). I can't fix the racers with the air cooled motor exploded all over my workbench now, can I?
First things first, I'm put the transmission together with the shift forks and tested to make sure everything spun nicely. Clunk. I couldn't get the input shaft and output shafts to spin freely when they were meshed together. What the...? Each shaft with its gears in place by itself spun great. Together, they would not turn more than half a revolution before something would clunk and stop the presses. Hmm... I printed out parts fiches to make sure I had all the correct washers and spacers, that the gears were on the shafts correctly, and everything was groovy. But no dice.
It's at this point I made a command decision. The trans shifted fine before I took it apart. I lost no pieces. Nothing was worn or broken. So if I just joined the cases, everything should work, right? I barged blindly ahead, hoping that the problem would somehow fix itself.
Threebond placed, cases joined, crank centered and...transmission shafts still clunking to a halt. Bugger. Just for giggles, I put the shifter mechanism back on to see if moving the drum around would get things going. When tightening the ratchet hold-down bracket thingee, I heard the shift drum press a couple millimeters into its bearing...Ah-HA!!! When splitting the cases, the shift drum pulled slightly out of its bearing, resulting in the shift drum being in the incorrect position. This caused the shift forks to have the gears in incompatible positions for the shafts to turn. Now it shifts just like it did before tear down.
Phew!
Refreshed cylinder washed, new piston installed, head torqued to spec, side cover back on...starting to look like a workbench again!
David Eckel
-
Goofaroo
- Gold Member
- Posts: 531
- Joined: 12:42 pm Sep 09 2012
- Country:
- Location: Edmond, Oklahoma
Re: Too Stupid to Stop: 1983 KDX 250 Resurrection
Thanks for the update. Now get back to work.
-
dfeckel
- Platinum Member
- Posts: 644
- Joined: 07:46 am Nov 09 2009
- Country: