crf250/kdx hybrid build with pics
-
sloldman
- Member
- Posts: 8
- Joined: 12:24 pm Dec 07 2013
- Country:
crf250/kdx hybrid build with pics
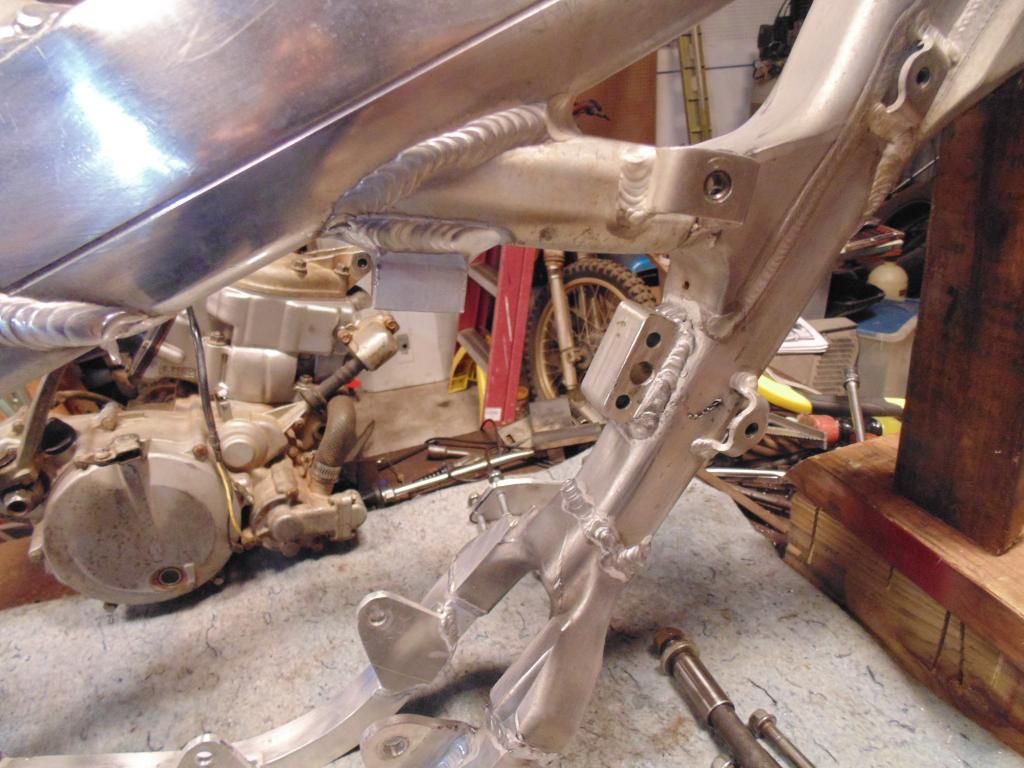
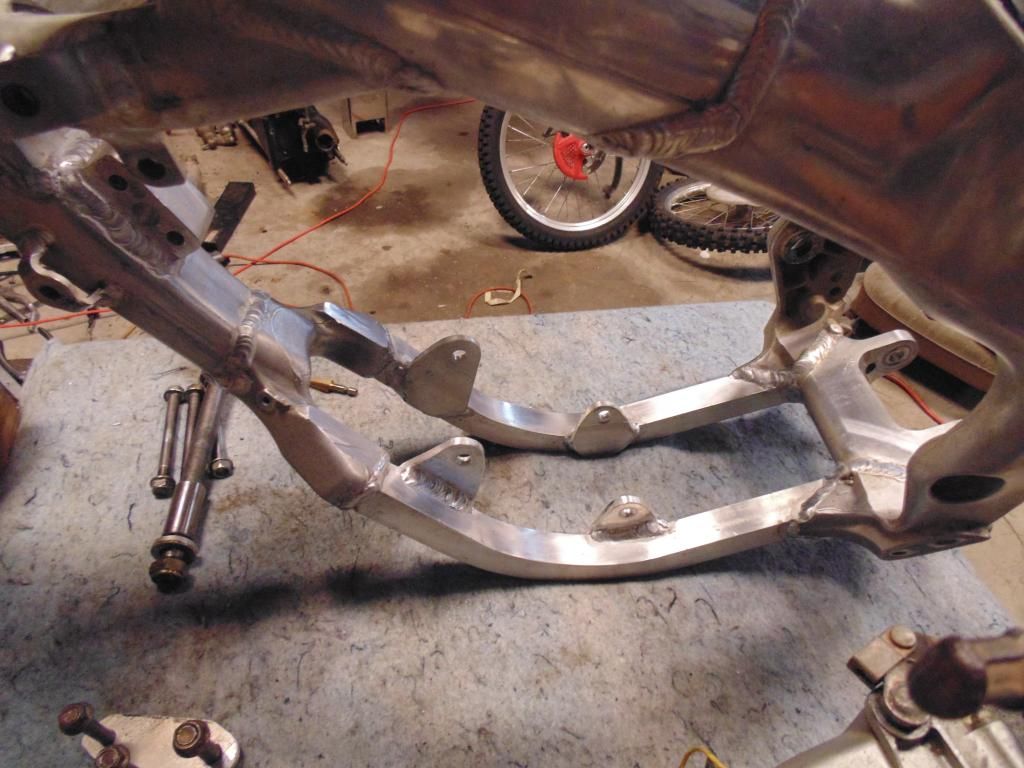
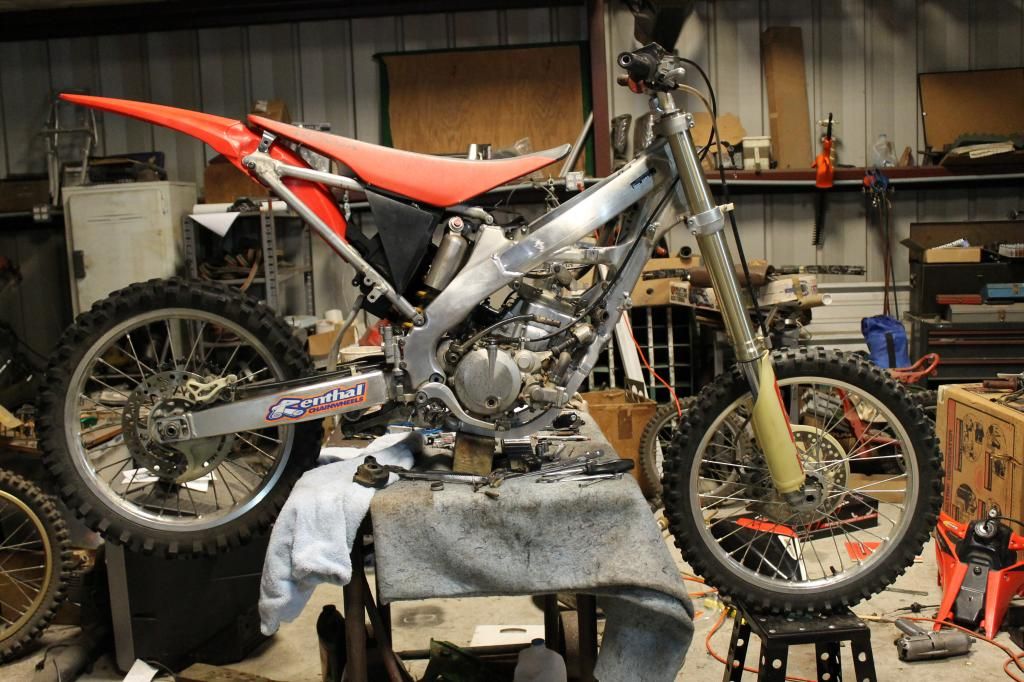
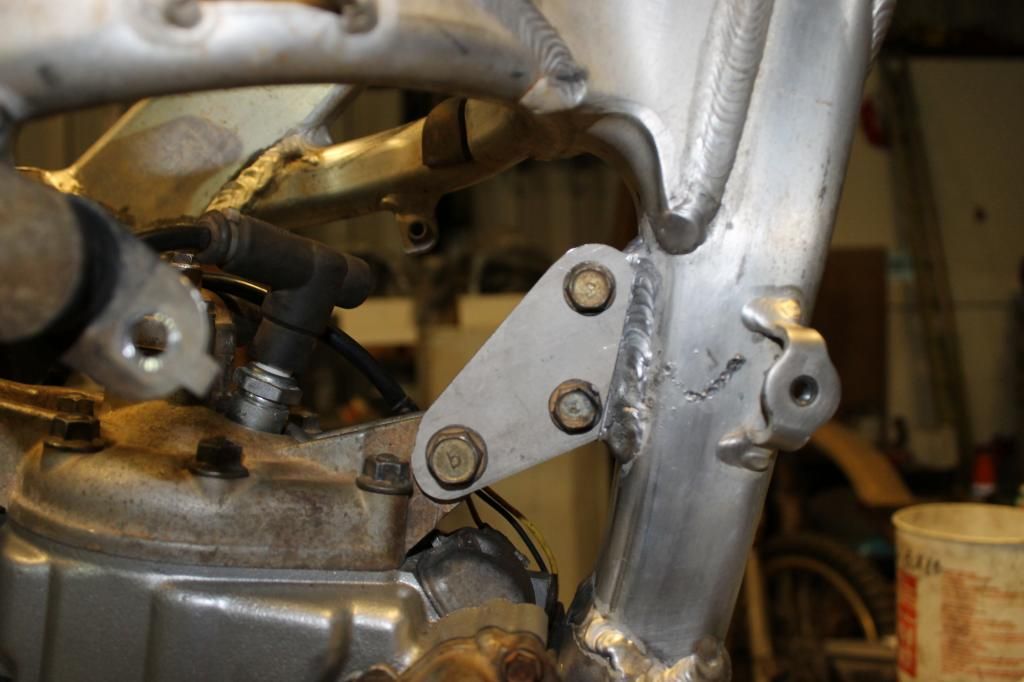
Note: the following is provided for educational purposes only. The use of power tools, welding, fabrication, modification, and the operation of motorcycles stock or altered in any way, are all activities that may result in injury or death. Do so at your own risk. I started this build in feb 2014. It was been off and on till mid june when it reached the rideable stage. Low bucks has been the overriding theme. Still have some things I would like to do to it as time and money permit. Carb and head mods for sure, possibly some porting too. will also be going to an 18" rear wheel/tire setup in the future. Purchased the motor donor bike off craigslist for $450 with recent fresh top end including new cylinder. Also got the old cylinder with it so I can have it ported and replated if I want. I really was not looking for a 220 but could not turn it down at that price. The 05 Honda crf250r had a locked up crank so I got it for about $200 worth of swapped labor. I weighed some things as I went along, this was done with bathroom scales so I will not claim that the results are very accurate but the comparisons should be close. The first step after removing both motors was to fit the motor/ frame/ swingarm mating point together properly. This operation is well documented in some of the cr125 swaps already done on here, but I will recap this to some degree. I lightly shaved the inside of the swingarm on both sides where the seal for the bearing is. Note:be sure to pack something in there to keep the grinding debris out. I cut it with an angle grinder to the point the seal was flush with the edge. The motor must be drilled (reamed) to fit the Honda 17mm swing arm bolt. Do this slow and carefully in steps to keep things on center. If you have doubts see a machinist for this. The left and right sleeves that the Honda swingarm bearings ride on are different lengths. The right sleeve worked great on the left side for me with no cutting. The left sleeve had to be cut to the proper length. Note this is hardened steel. I cut it with a cut off disc and a angle grinder, cooling it often with water to prevent overheating the steel. You may want to cut a few mm long and then finish trim as need to achieve the proper length and a good square edge. The right side of the swingarm need to be ground on slightly to get good clearance from the engine case as the arm piviots. I also trimmed the engine case down on the right side to narrow it slightly and to get more clearance for the arm to piviot during suspension travel. As noted before this is all very similar to the cr125 swap. Next with the engine and swingarm bolted in the frame by the swing arm bolt I determined where I wanted the motor to sit and added a front head stay block and bracket. Once I was happy with the motor location I tacked the front head stay block to the front frame down tube. Now the fun really begins as it is time to cut out the lower cradle. this must be done with great care as you will want to save the "Y" section as this will be used later. Cut on the welds at the point where the cradle tubes meet the bottom of the frame and the "Y". After the cradle is removed refit the motor and swingarm to the frame with the swingarm bolt and install the front head stay. Now look at the exhaust port location and determine where you need to cut the front down tube to reattach the "Y" for proper exhaust clearance. Note it is better to cut it to low and have to cut it again than cut off too much! With the "Y" off now you will need to carefully cut the old tubes out while leaving as much of the inside socket area as posible to refit the "Y" to the frame down tube and the new cradle tubes. It will also be good to cut the front motor mount tabs off the "Y" at this time. Now remove the remains of the old cradle tubes from the bottom of the frame, saving the socket area just like you did with the "Y". The new cradle tubes were made from 1 inch sq .125 wall 6061 aluminum tube. I had them around from a previous project that another guy never finished(kx500 in kx450f frame). They were plenty long but the bend was a little tight so I tweaked the bend and then cut to fit. Be sure you have plenty of tube up in the sockets on the frame and "Y" as this has to add strength. You will want to go slow and careful at this point. I slanted the "Y" back more than it was with the honda to give more exhaust clearance and allow the cradle tubes to tuck in closer to the bottom of the motor. Once you are happy with the cradle tubes you can make the 4 mount brackets for the 2 bottom motor mount bolts, mine were made out of .250 thick 6061 aluminum plate. Once this was all done with everything set in place I paid a local tig-meister to weld it up. we started with the motor in place and the lower mounts bolted to the motor. He tacked everything together, then we removed the motor and he finish welded it all together. Don't forget to add brackets for your exhaust pipe hangers. If I did it again I would make the bolt holes for the lower motor mounts undersize and the drill to proper size after it was all welded, as the heat did move things slightly. After the motor is reinstalled with the swingarm, front head stay, lower mounts bolted up etc., the next step is the rear head stay. I made mine from .250 thick 7075 aluminum, and bent them much like the oem Honda head stays. Don't skimp on the head stays as this is a vital step to frame strength and life by controlling vibration. From here on out it is just mounting electric items: coil- to frame behind rear head stay. CDI box: to rear fender inside air box. Note I used the Honda radiators. I had the lower hose neck on the right rad moved to point straight down like the kdx rad. I used Mylers for this work and was very happy with the results. The air box was a pain in the rear. I used an thin sheet of aluminum to adapt the front of the kdx air box and boot to the rest of the Honda air box and still had to space the Honda box forward about 10mm. It still uses the kdx type filter. Just make sure you get a good seal between the air boot-box- filter, because dirt will kill a motor FAST! Hope this inspires someone out there. Please don't flood me with questions as I am lucky to get on here once a week. I will try to answer a few now and then but don't expect a speedy response. I am Very busy, old, and type painfully slow. I am also a computer idiot!!! I have photos as soon as I can figure out how to post them! It may take a few days to get my son to help me!!!
Last edited by sloldman on 09:06 pm Sep 16 2014, edited 2 times in total.
-
sloldman
- Member
- Posts: 8
- Joined: 12:24 pm Dec 07 2013
- Country:
-
sloldman
- Member
- Posts: 8
- Joined: 12:24 pm Dec 07 2013
- Country:
-
sloldman
- Member
- Posts: 8
- Joined: 12:24 pm Dec 07 2013
- Country:
05crf250/kdx220 hybrid with pics
Some notes on the pictures:
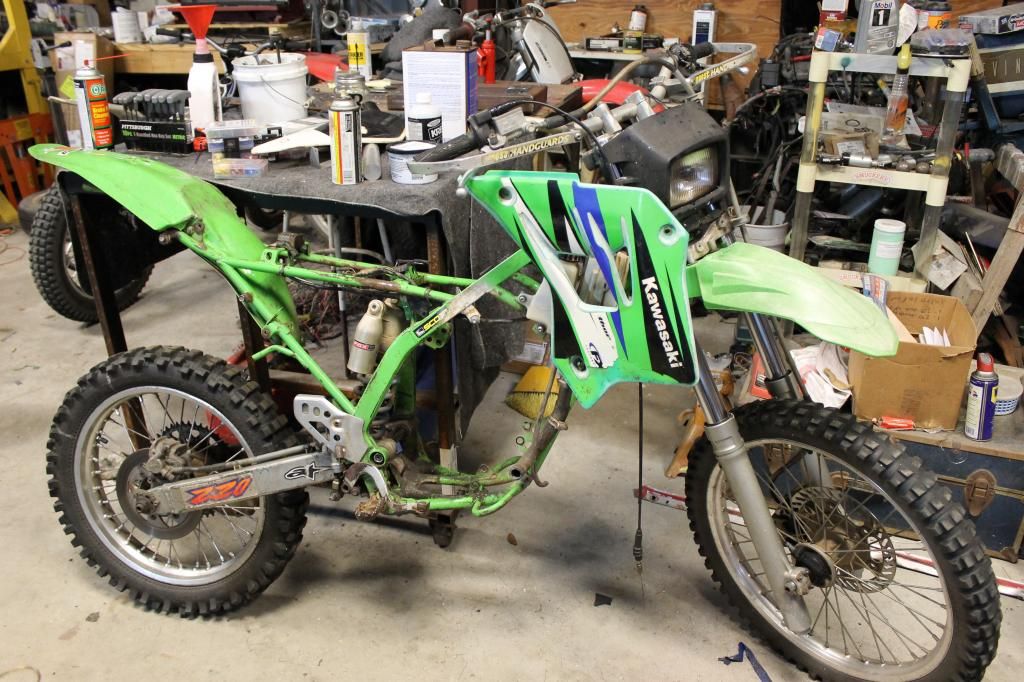
1- donor bike
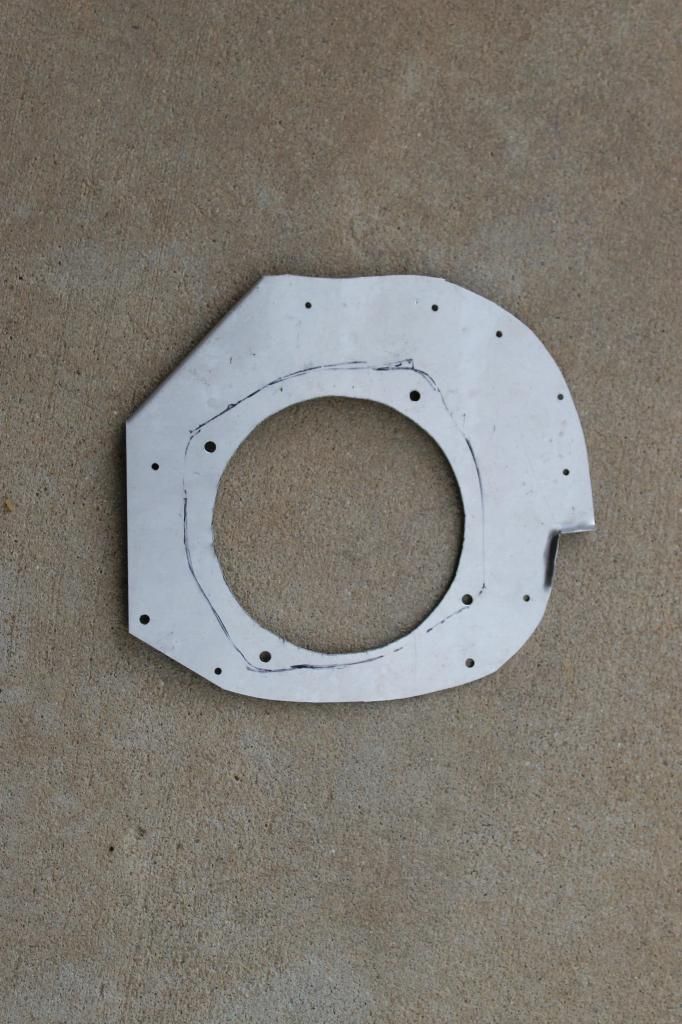
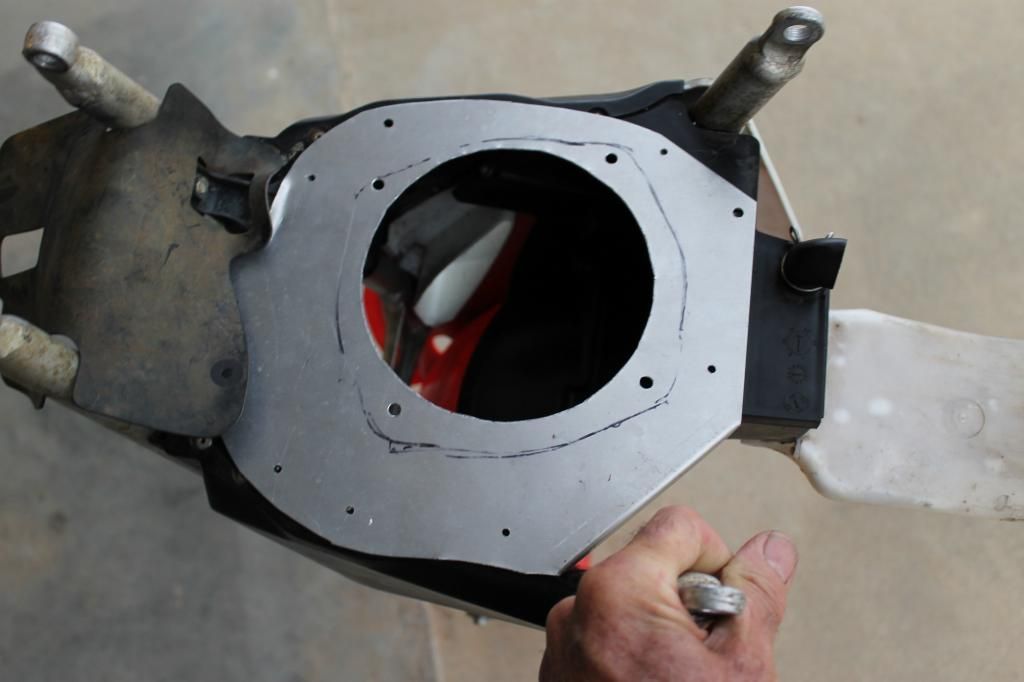
2- Air box adapter plate made from sheet aluminum
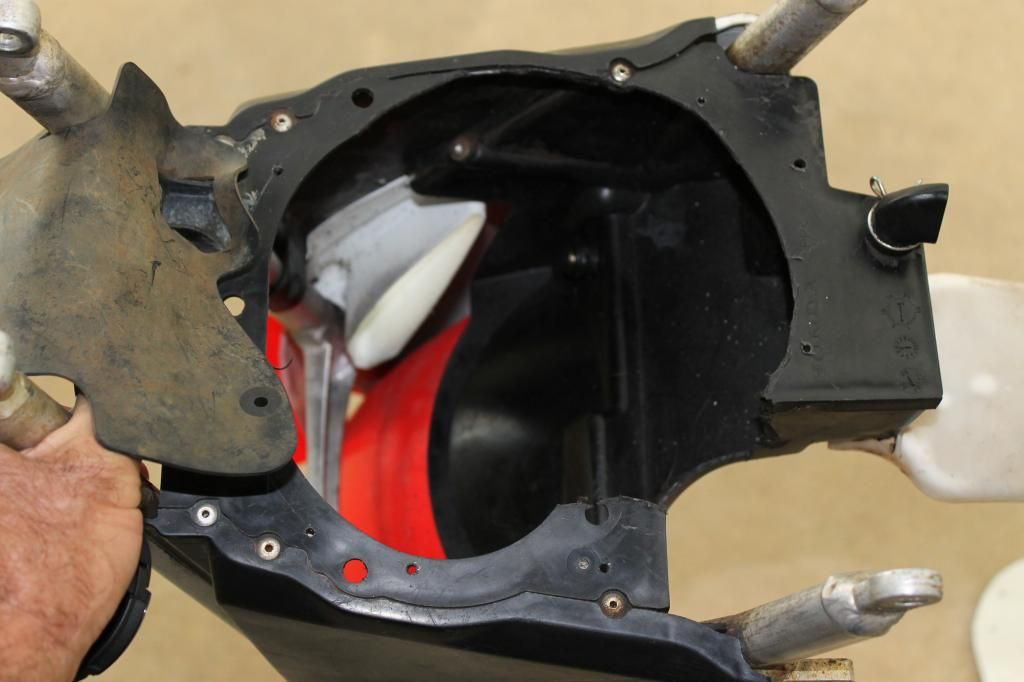
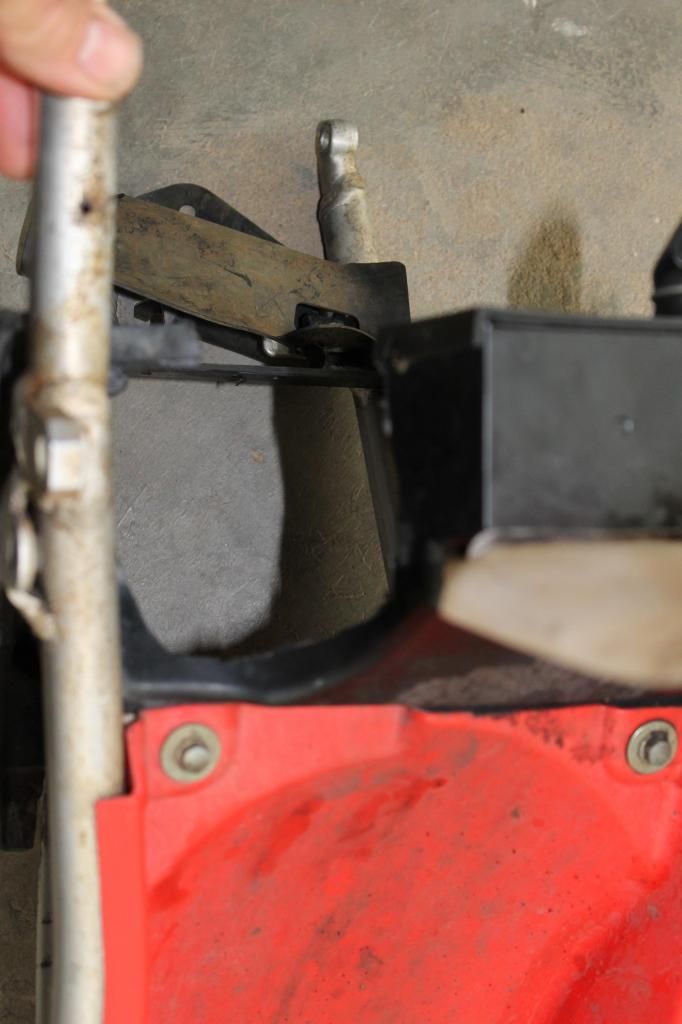
3- Honda air box trimmed for adapter plate and kdx filter setup
4- Honda air box showing cut out area on bottom right side (where exhaust pipe passes under) to allow room for kdx filter and some air flow around it. this was closed in with more sheet aluminum to seal it back up from water and dirt from rear wheel. Much less room is need for exhaust because the kdx stinger is lower and much smaller than the 4 stroke stuff.
5- Air box adapter plate sitting on the Honda air box. It was pop riveted in place with rtv silicone in between for the final assembly.
6- Rear head stay detail. I used stock Honda frame bracket and fabricated the curved aluminum plates. Yes they are long but less than an inch longer than the ones on the Honda motor.
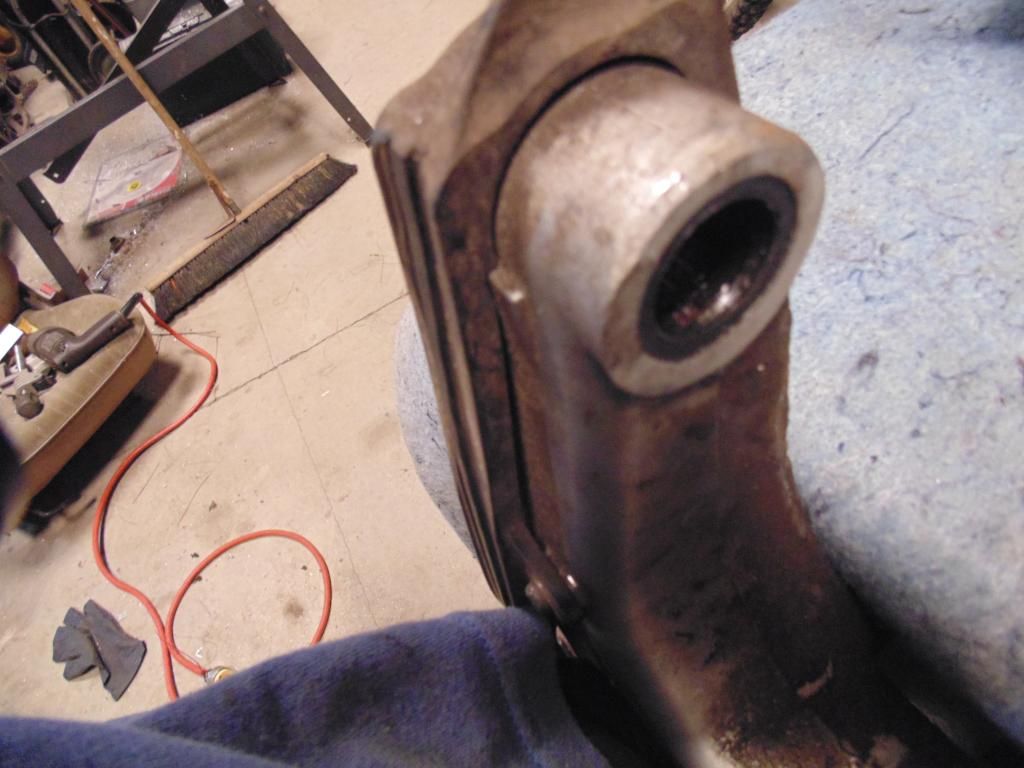
7- Right side of swingarm. Inside edge trimmed flush with the seal, outside ground down slightly for engine case clearance.
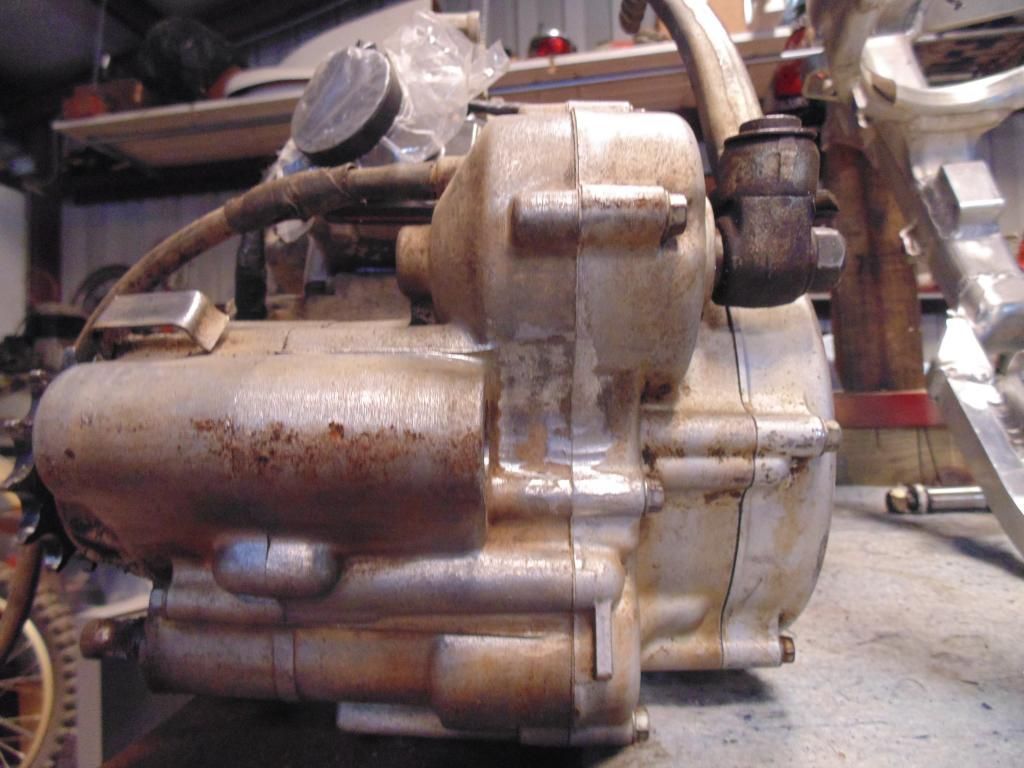
8- Rear of kdx engine case. Right end of swing arm bolt hole boss was trimmed some to allow the swingarm to fit better. I do not remember exactly how much. I think 5mm or less. The back of the case was lightly ground under the kick start area to allow the swingarm to piviot freely.
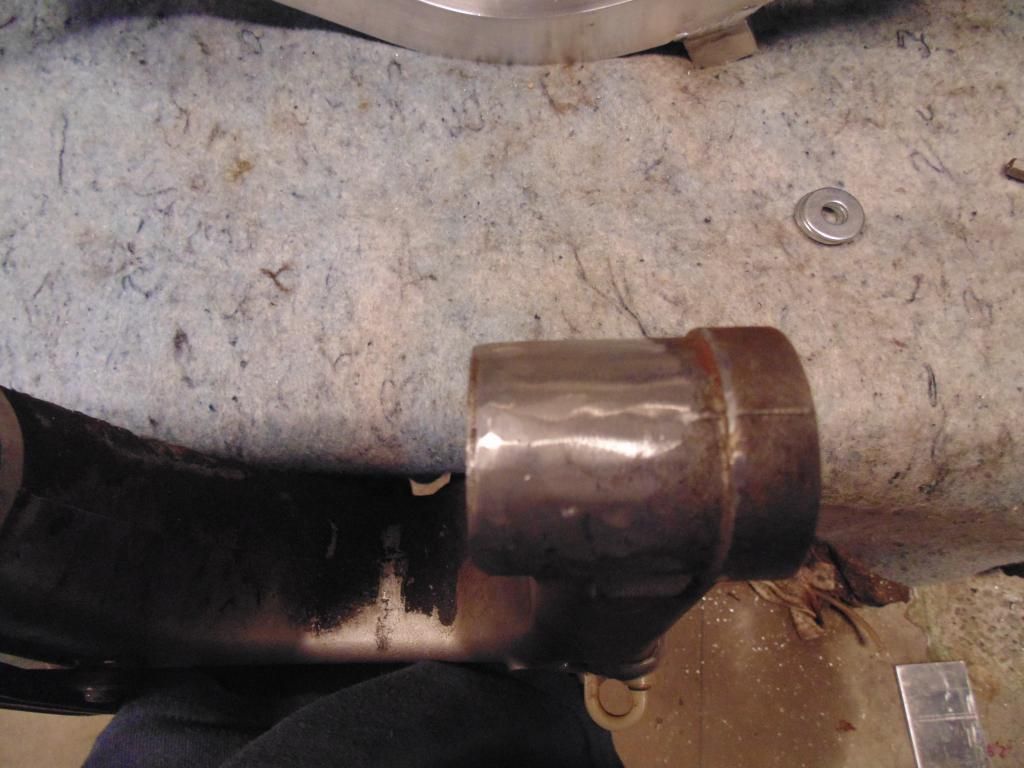
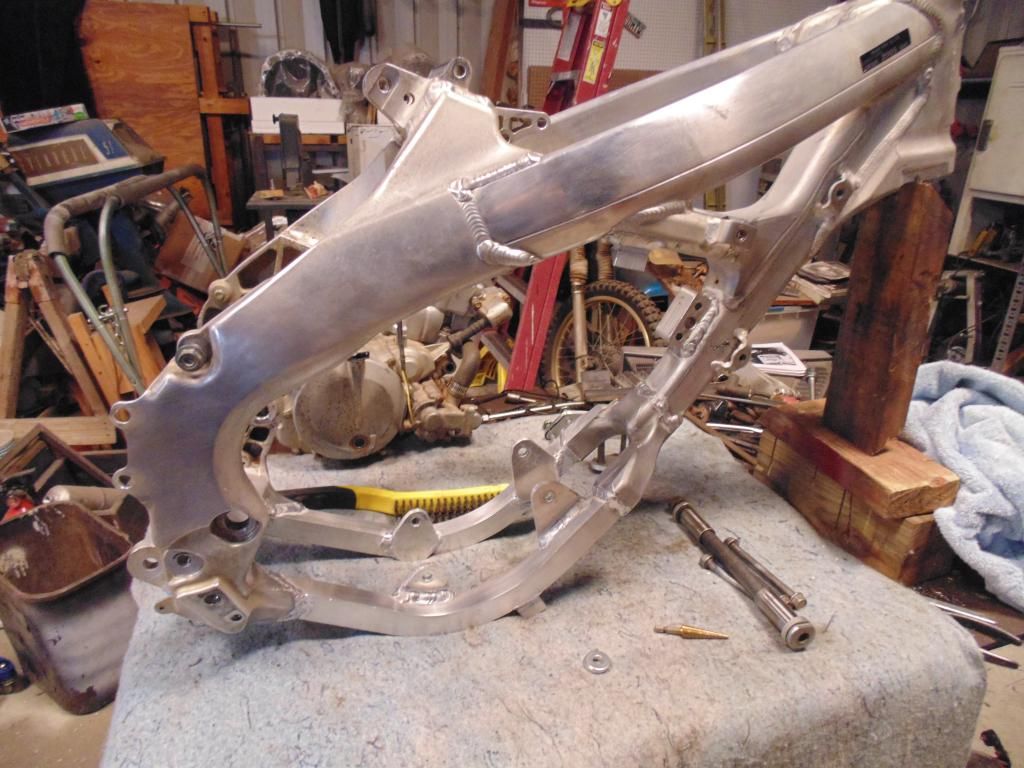
9- Frame showing front head stay mount block added, relocated "Y" with crf front motor mount tabs cut off, and upper pipe mount tab welded on.
10- Frame cradle with new tubes and motor mount tabs to fit kdx motor.
11- Welded frame ready to start assembly.
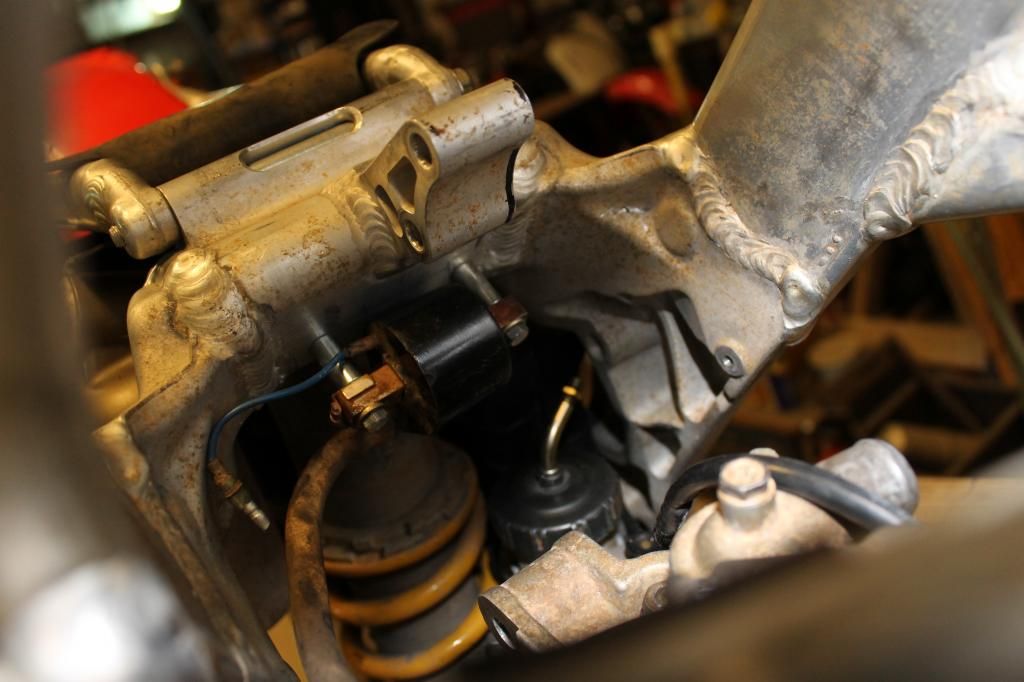
12- Coil mounting detail. Spacers and metric bolts from local hardware store. I drilled and tapped frame for the coil.
13- Going back together.
14- Front head stay detail.
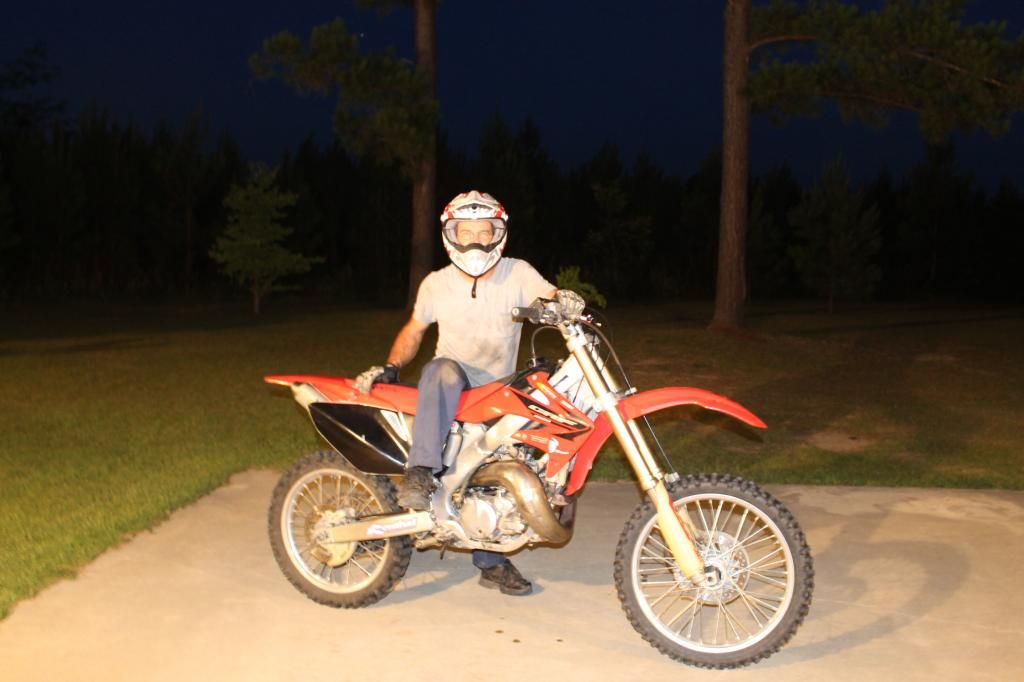
15- First ride.....short due to darkness!
- ICRage42
- Supporting Member
- Posts: 598
- Joined: 07:24 am Jan 09 2013
- Country:
- Location: Kawasaki, Ninja Ohio
05crf250/kdx220 hybrid with pics
Awesome bike man! Nice job on the work. So were you able to get a good run on it yet?
Dibs on the plastic and kickstand if there is one lol
Dibs on the plastic and kickstand if there is one lol
If you cant fix it with a hammer, you have an electrical problem.
-
sloldman
- Member
- Posts: 8
- Joined: 12:24 pm Dec 07 2013
- Country:
05crf250/kdx220 hybrid with pics
ICRage42: Thanks for the kind remarks! Yes, I have a few hours on it now. Replaced the front tire after the second ride, Michelin intermediate sc2, and raised the forks about 5mm in the triple clamps. Some loose sandy spots where I ride. Very happy with the front end now. The kdx had no stand when I got it, sorry. Would like to sell the kdx roller complete, but may consider parting it. I need to think on that a while. If I decide to part it I will pm you first.


