I'm planning on following the routing for the 2005 and newer cr125's (2 top hoses into a T-fittiing then into the head).hybridracing65 wrote:good post with details.
nice work.
You pipe fitment is almost identitical to how i did mine.
I should have taken pics to post!
so are you running KDX rad hose routing of Honda rad hose routing?
I just purchases an IMS tank and not i have to do the same spigot mod as you did.
I also need to update rad hose routing to fit tank.
winter project - hybrid #2 2003 cr125/E-series
-
marrk_us

- Supporting Member I

- Posts: 141
- Joined: 02:18 am Nov 06 2007
- Country:
- Location: fountain, Colorado
winter project - hybrid #2 2003 cr125/E-series
-
marrk_us
- Supporting Member I
- Posts: 141
- Joined: 02:18 am Nov 06 2007
- Country:
- Location: fountain, Colorado
winter project - hybrid #2 2003 cr125/E-series
Thanks for the compliments guys. I'm trying to do it right and not let the urge to "get er done" rush me.
Today I worked on the air box adapter. Trying to include step by step pics, because when it comes to final assy. and i'm building the sandwich of the kdx air boot, adapter plate, cr air box, kdx filter mount with black silicone mixed in, i'm sure i'll have my hands full and won't be able to take pics then.
!st I traced and cut out the blank plate using the cr boot mount ring for a template.
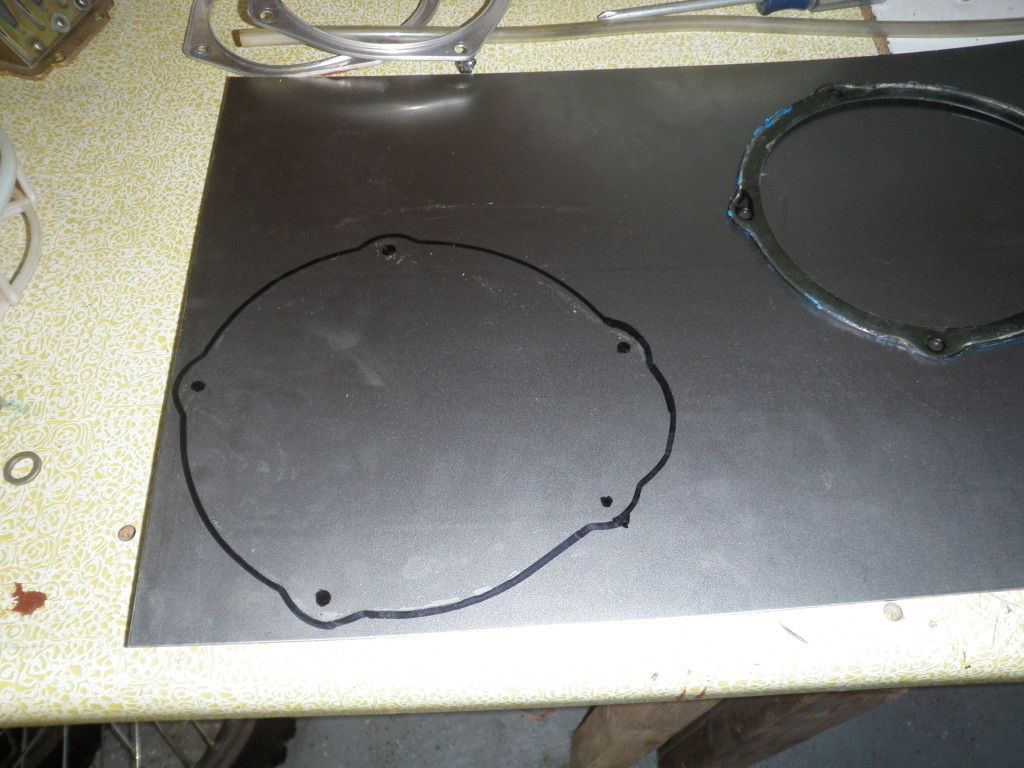
Drilled the blank, mounted the ring to it, then went around the edges with the dremel tool to form it to its final shape, taking care to smooth all burrs and sharp edges as I go. If I don't do it now i'm sure a couple years down the road i'll slice myself up, trust me it's my luck.
Then I mounted it to the cr air box.
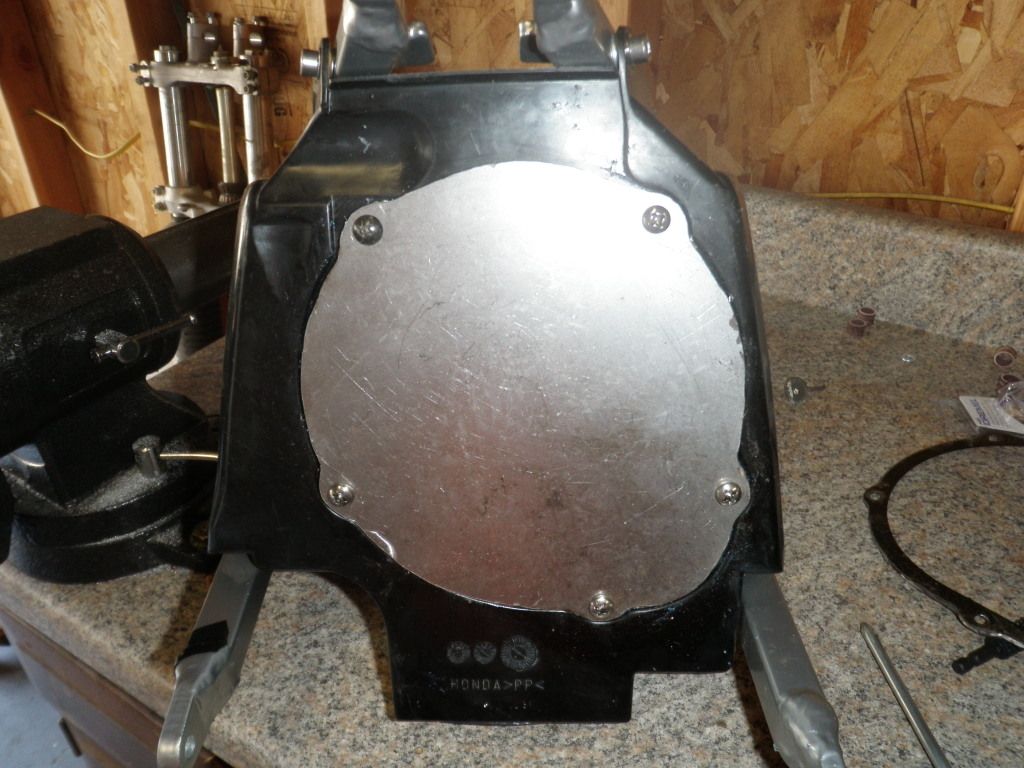
I took the air box, mounted it on the bike with the air boot already on the carb, marked where it needed drilled, then drilled and mounted the kdx air boot ring.
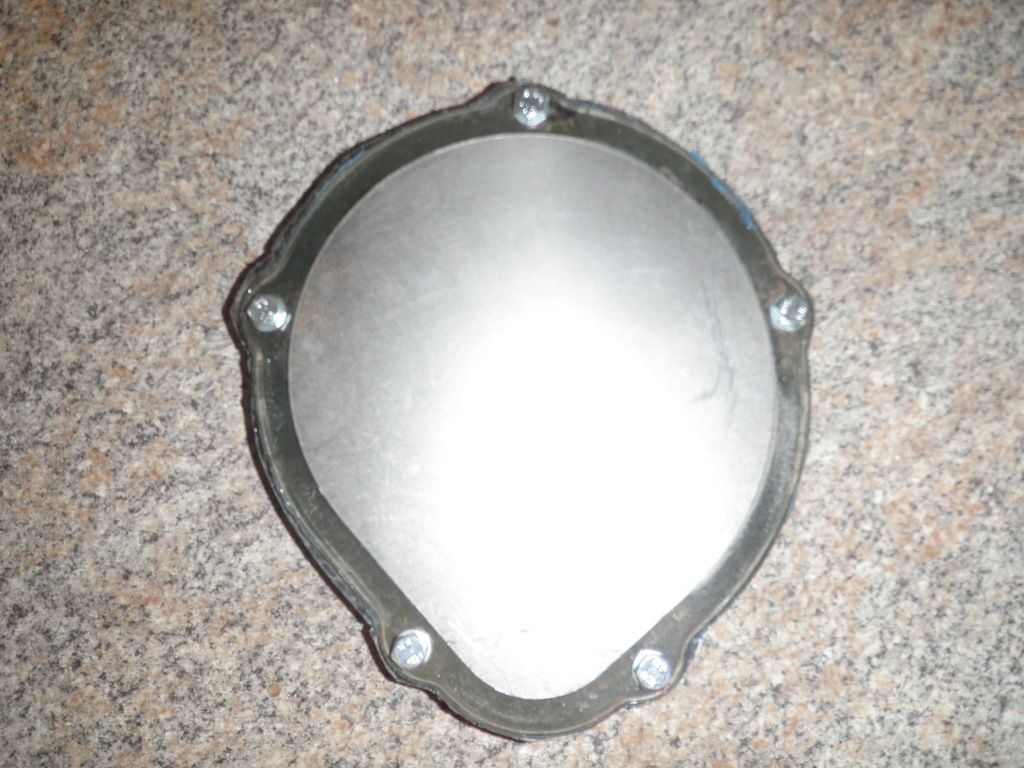
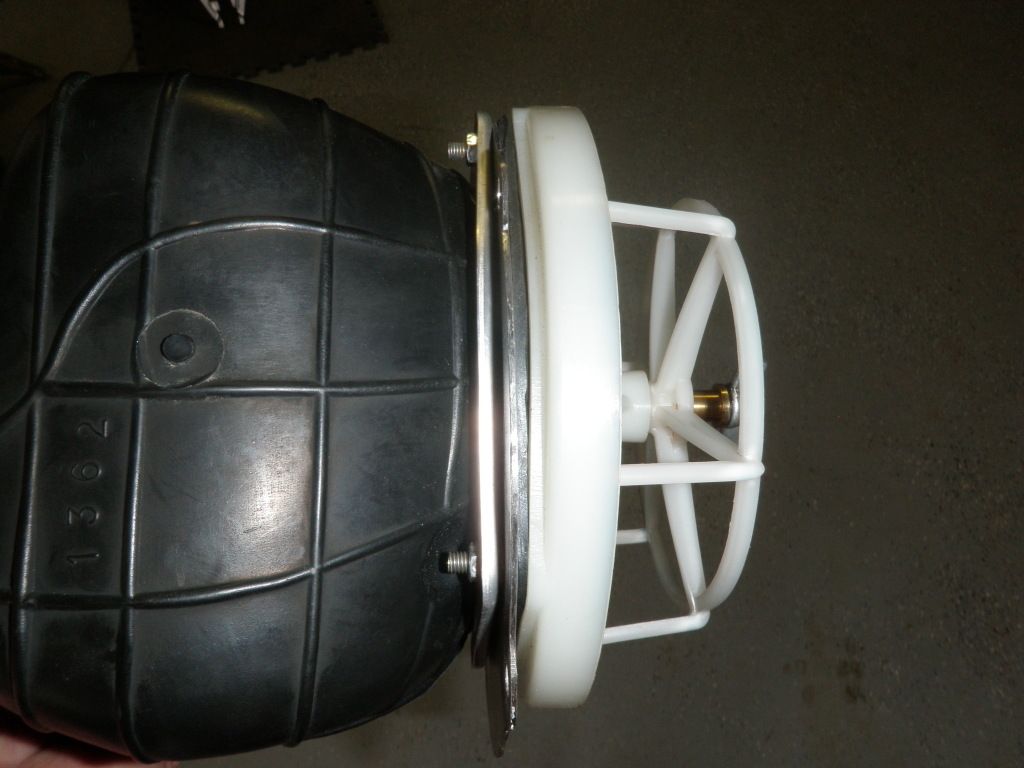
View from inside
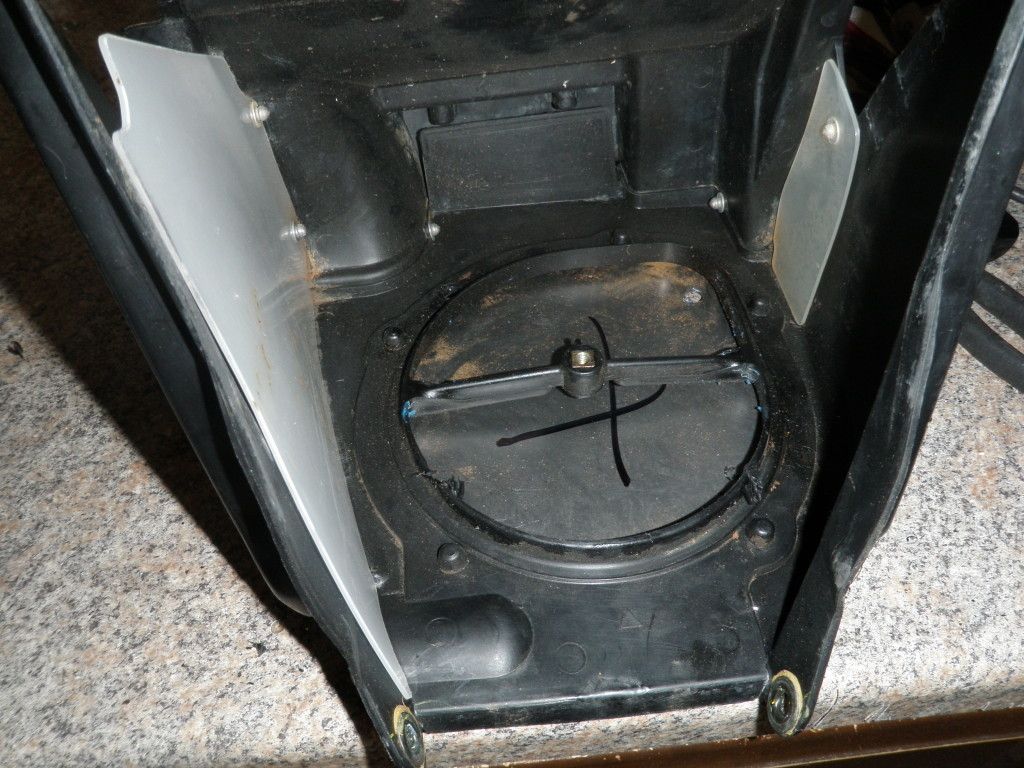
I plan on using the kdx air filter, mainly because the ring seen here is used to sandwich and seal the rubber air boot.

Removed the box from the subframe , traced the inside of the boot ring and cut the metal out of the center. On this step there was a lot of sanding/filing/ dremel tool use to get a very close fit without any edges. Don't want anything to cut through the rubber boot and cause a air leak and possibly engine damage down the road.
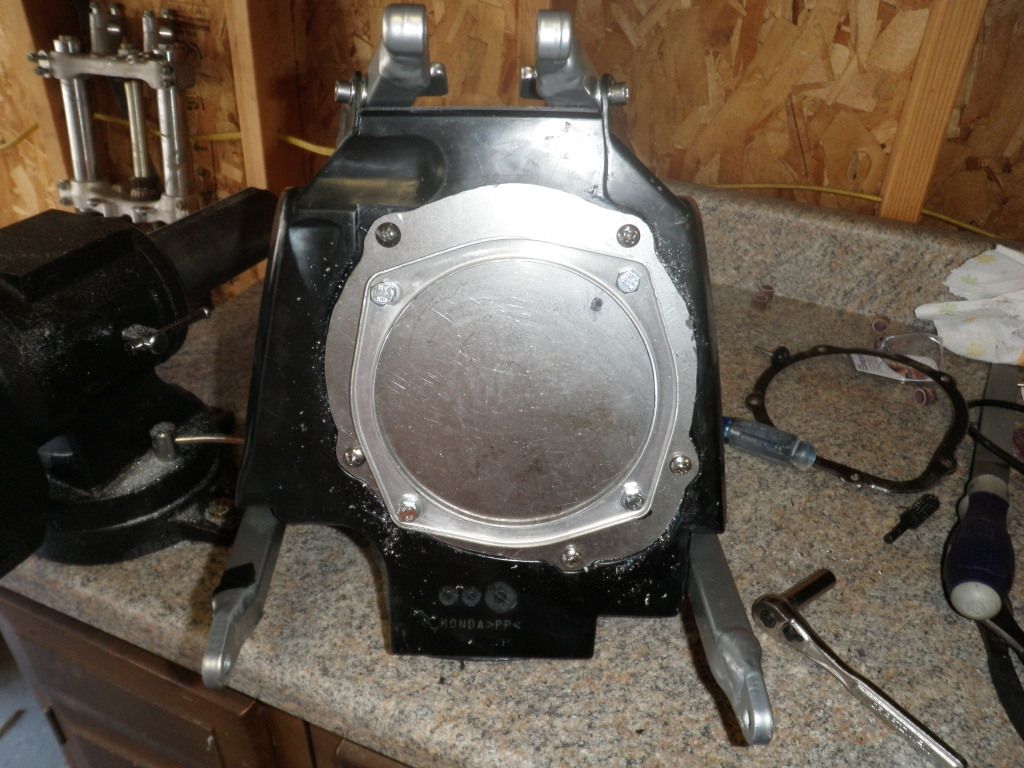
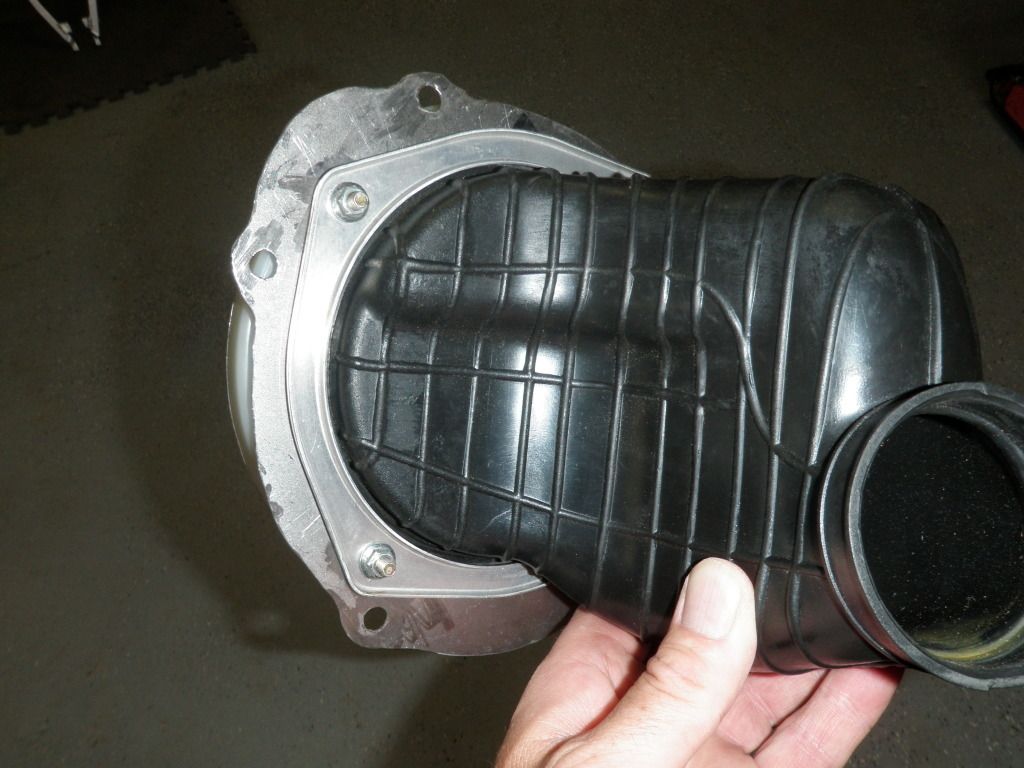
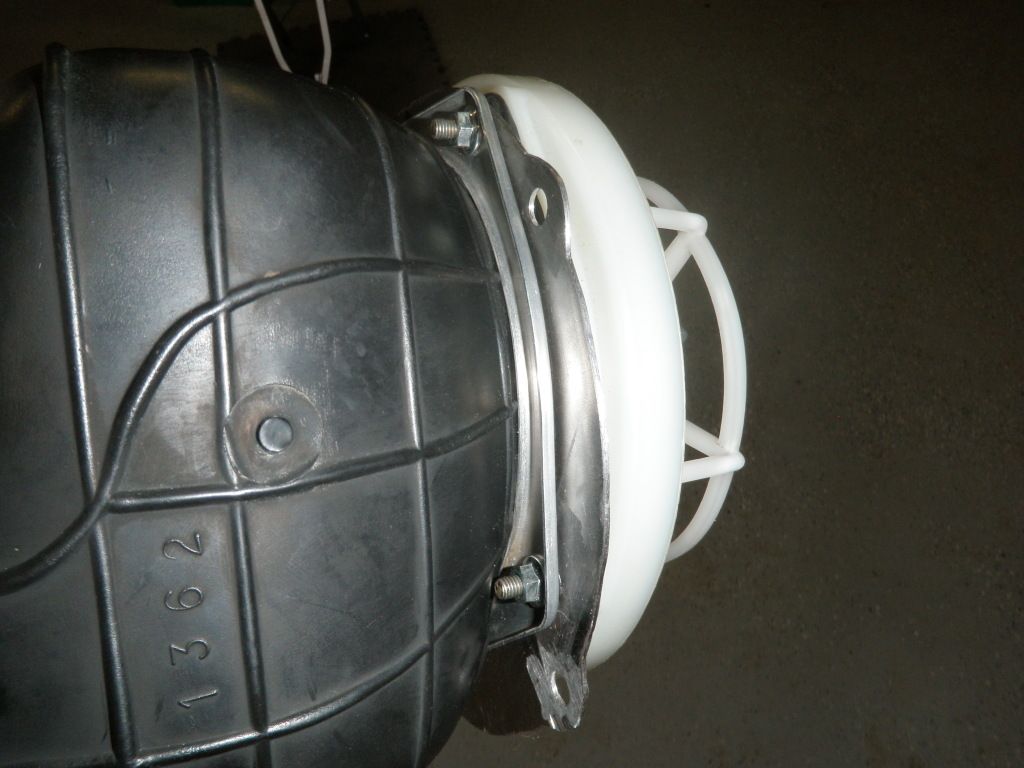
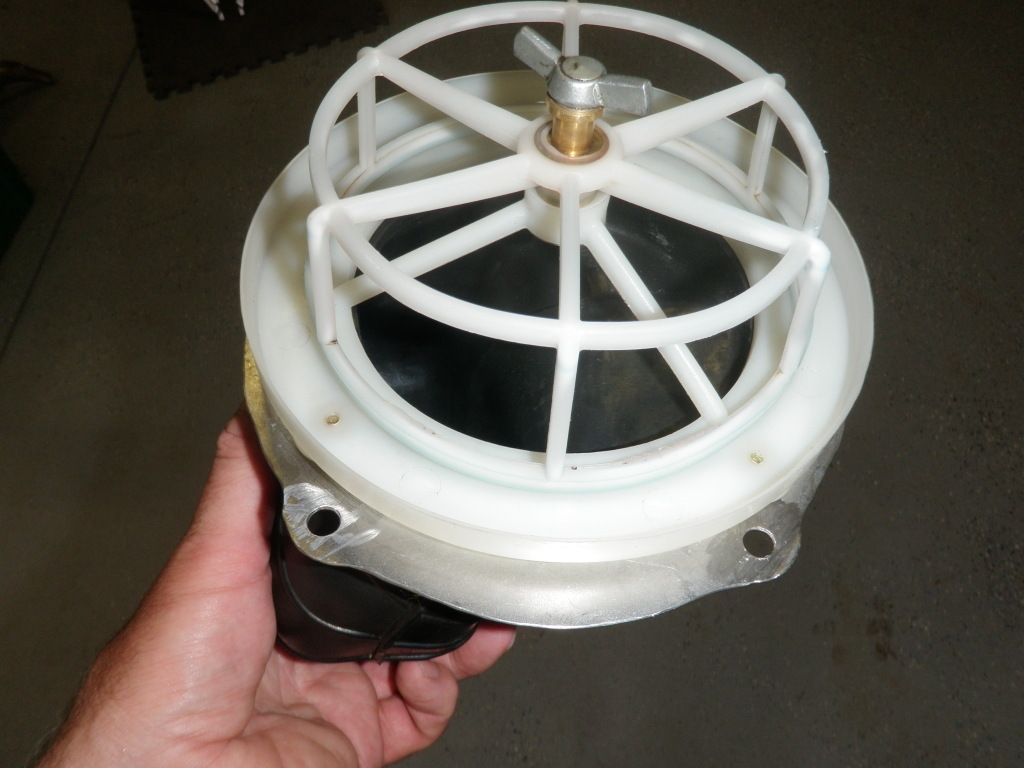
Here's an idea how the "sandwich" should look upon assembly. I omitted the cr air box for the sake of getting decent pictures, just imagine it's
located between the rubber boot and the adapter plate.
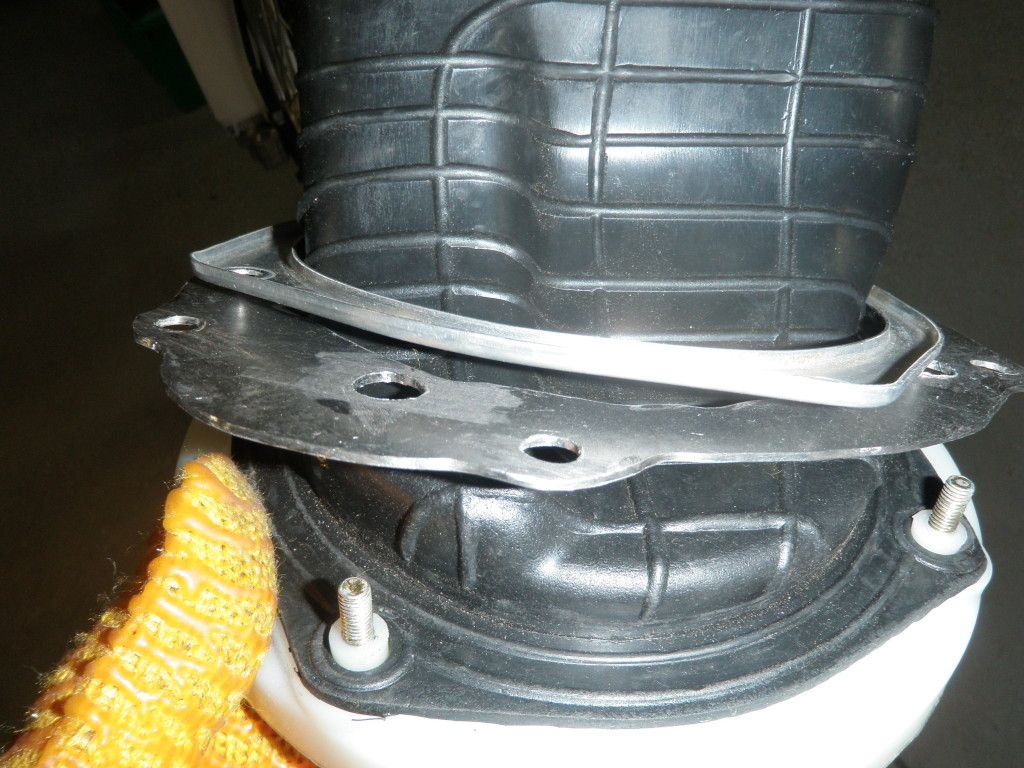
Other pics of the assembly (minus the air box of course). Hope they help anyone who has to do this in the future.
I stopped here for the day. There was enough patience testing going on today and I thought it wise not to try to assemble everything while tired and probably ending up covered head to toe in black silicone and in a bad mood,( which I know would be a given this late in the day) better to start off fresh next time. I still need to cut out the original Honda air filter mount from inside the air box so the kdx mount fits nicely. Plus there are metal shavings everywhere so i'll start off next time taking everything apart and giving it all a good cleaning before assembly.
Today I worked on the air box adapter. Trying to include step by step pics, because when it comes to final assy. and i'm building the sandwich of the kdx air boot, adapter plate, cr air box, kdx filter mount with black silicone mixed in, i'm sure i'll have my hands full and won't be able to take pics then.
!st I traced and cut out the blank plate using the cr boot mount ring for a template.
Drilled the blank, mounted the ring to it, then went around the edges with the dremel tool to form it to its final shape, taking care to smooth all burrs and sharp edges as I go. If I don't do it now i'm sure a couple years down the road i'll slice myself up, trust me it's my luck.
Then I mounted it to the cr air box.
I took the air box, mounted it on the bike with the air boot already on the carb, marked where it needed drilled, then drilled and mounted the kdx air boot ring.
View from inside
I plan on using the kdx air filter, mainly because the ring seen here is used to sandwich and seal the rubber air boot.
Removed the box from the subframe , traced the inside of the boot ring and cut the metal out of the center. On this step there was a lot of sanding/filing/ dremel tool use to get a very close fit without any edges. Don't want anything to cut through the rubber boot and cause a air leak and possibly engine damage down the road.
Here's an idea how the "sandwich" should look upon assembly. I omitted the cr air box for the sake of getting decent pictures, just imagine it's
located between the rubber boot and the adapter plate.
Other pics of the assembly (minus the air box of course). Hope they help anyone who has to do this in the future.
I stopped here for the day. There was enough patience testing going on today and I thought it wise not to try to assemble everything while tired and probably ending up covered head to toe in black silicone and in a bad mood,( which I know would be a given this late in the day) better to start off fresh next time. I still need to cut out the original Honda air filter mount from inside the air box so the kdx mount fits nicely. Plus there are metal shavings everywhere so i'll start off next time taking everything apart and giving it all a good cleaning before assembly.
Last edited by marrk_us on 02:39 pm Aug 10 2012, edited 2 times in total.
-
Tedh98

- Supporting Member II

- Posts: 1576
- Joined: 01:08 pm Mar 20 2009
- Country:
- Location: Atlanta, Georgia
- Contact:
winter project - hybrid #2 2003 cr125/E-series
Looking good.
I used black RTV on mine. I thought it might hold up better to oils and grease than silicone. After 2+ years it is still in good shape.
I used black RTV on mine. I thought it might hold up better to oils and grease than silicone. After 2+ years it is still in good shape.
-
marrk_us
- Supporting Member I
- Posts: 141
- Joined: 02:18 am Nov 06 2007
- Country:
- Location: fountain, Colorado
winter project - hybrid #2 2003 cr125/E-series
[quote="Tedh98"]Looking good.
I used black RTV on mine. I thought it might hold up better to oils and grease than silicone. After 2+ years it is still in good shape.[/quo
Just checked, it was black rtv that i bought.
I used black RTV on mine. I thought it might hold up better to oils and grease than silicone. After 2+ years it is still in good shape.[/quo
Just checked, it was black rtv that i bought.
-
Tedh98
- Supporting Member II
- Posts: 1576
- Joined: 01:08 pm Mar 20 2009
- Country:
- Location: Atlanta, Georgia
- Contact:
winter project - hybrid #2 2003 cr125/E-series
Good deal.
I put mine together when it was pretty warm, that caused the RTV to set-up quicker than I planned. Otherwise I would have taken more pictures of that part of it.
I thought about bringing it in the house but knew I'd get that stuff all over.
I put mine together when it was pretty warm, that caused the RTV to set-up quicker than I planned. Otherwise I would have taken more pictures of that part of it.
I thought about bringing it in the house but knew I'd get that stuff all over.
-
marrk_us
- Supporting Member I
- Posts: 141
- Joined: 02:18 am Nov 06 2007
- Country:
- Location: fountain, Colorado
winter project - hybrid #2 2003 cr125/E-series
Read your post, that's why I took a bunch of pics today! Hopefully someone will find it useful down the road. Hot or cold I already know half the tube is for the airbox and half will be all over me 
-
kdxtreme
- Supporting Member I
- Posts: 269
- Joined: 11:45 pm Oct 27 2010
- Country:
- Location: Bothell Wa
Where can I find these this would help me also.marrk_us wrote:Just got these in the mail today. I remember spending a lot of time scrounging nuts and bolts for the last hybrid, a lot of time at the dealer, home depot, and trying to clean up old nasty fasteners.
Seems pretty complete, high quality bolts, and packages are well marked. Should save me a few headaches and time on the build.


Did I say riding?
-
marrk_us
- Supporting Member I
- Posts: 141
- Joined: 02:18 am Nov 06 2007
- Country:
- Location: fountain, Colorado
Re: winter project - hybrid #2 2003 cr125/E-series
The ebay seller was 'fastnerguy'. I just checked and he doesn't have anything listed on ebay at all, strange since he has over 6000 feedbacks. I did run into a problem with a couple of the bolts, the rotor bolts were allen head instead of hex head bolts and the heads interfered with the caliper when you turned the wheel. If I had it to do over I would just buy the bolts on ebay by what ever I needed. Several sellers carry kits by "Bolt" I got some of mine from 'fullcirclepowersportsco'. They were very reasonably priced, very nice kits, and since you'll need some kx bolts and some kdx that's the way i'd go.

This complete bodywork fastener kit was $19
This complete bodywork fastener kit was $19
-
kdxtreme
- Supporting Member I
- Posts: 269
- Joined: 11:45 pm Oct 27 2010
- Country:
- Location: Bothell Wa
-
marrk_us
- Supporting Member I
- Posts: 141
- Joined: 02:18 am Nov 06 2007
- Country:
- Location: fountain, Colorado
winter project - hybrid #2 2003 cr125/E-series
The new chain, chain guard and Alba rollers arrived this week. I ordered a 120 link, ended up taking 4 links off. The Regina chain I ordered arrived with "both" clip and press type master links, nice touch.


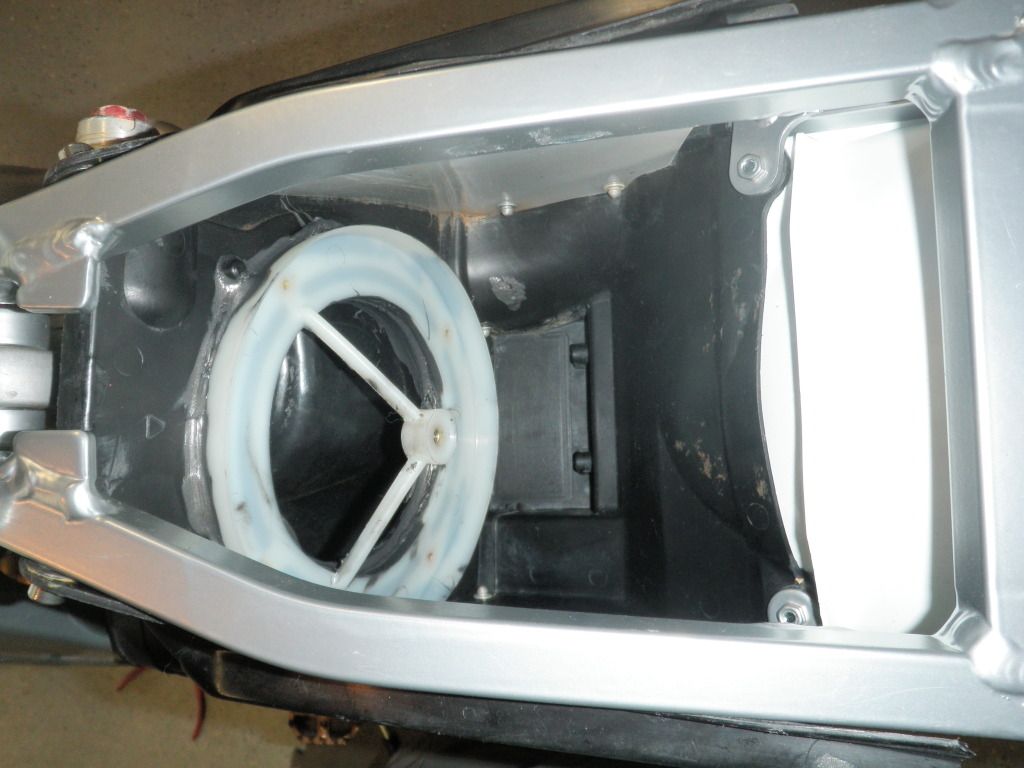
I finally got the airbox adapter sealed, assembled and mounted. The boot lined up perfectly.
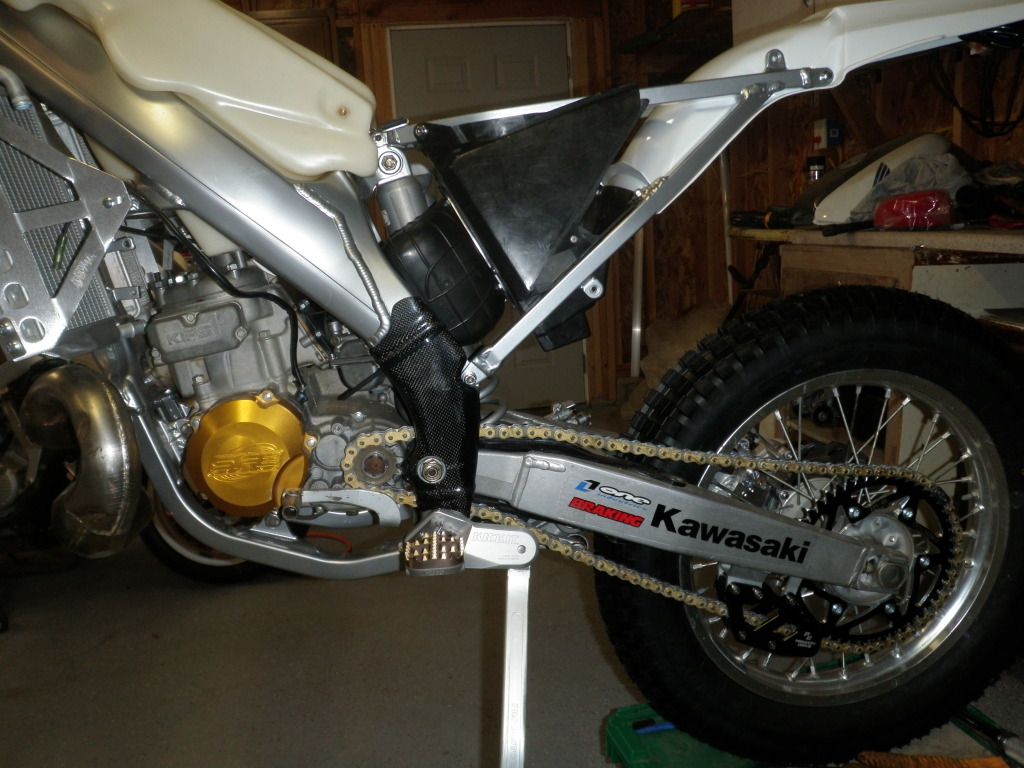
The KDX filter holder has plenty of room in the CR airbox.
I'm going to have to take about 3/4" off the H series kicker, but at least it fits into the space available, the E series wasn't even close.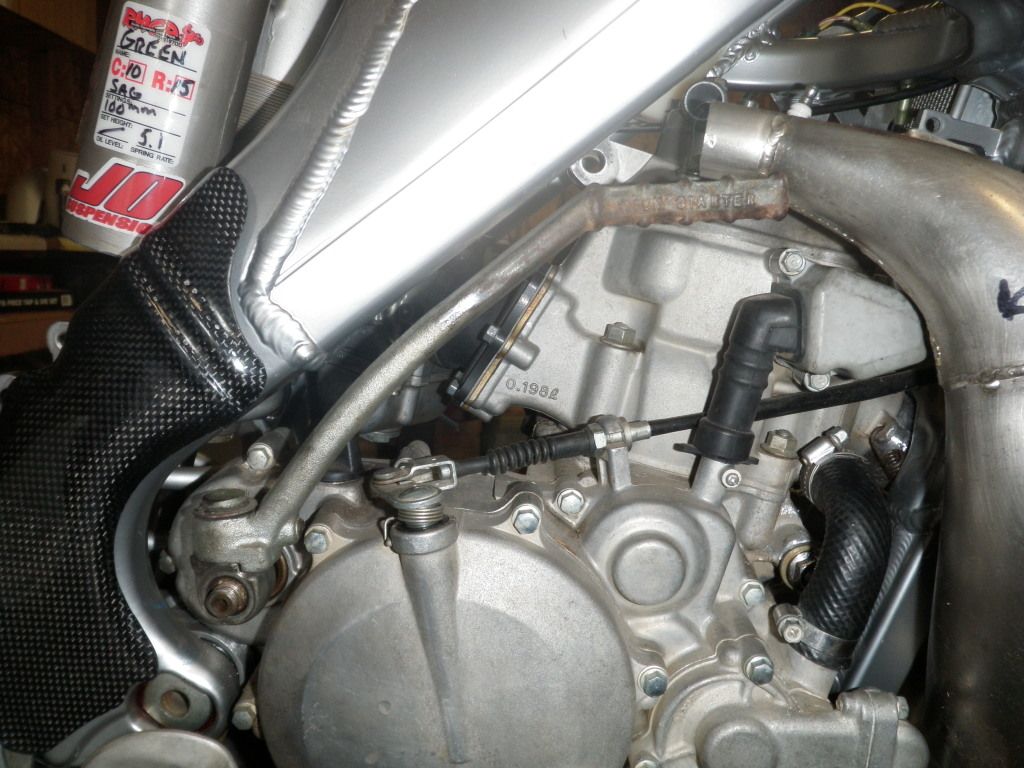
Everythings starting to come together, getting a little anxious. I bought an H series wiring loom off ebay for $15, since it's made for a perimeter type frame i'm thinking there will be a little less trim work then on the E-series one.
I finally got the airbox adapter sealed, assembled and mounted. The boot lined up perfectly.
The KDX filter holder has plenty of room in the CR airbox.
I'm going to have to take about 3/4" off the H series kicker, but at least it fits into the space available, the E series wasn't even close.
Everythings starting to come together, getting a little anxious. I bought an H series wiring loom off ebay for $15, since it's made for a perimeter type frame i'm thinking there will be a little less trim work then on the E-series one.
-
marrk_us
- Supporting Member I
- Posts: 141
- Joined: 02:18 am Nov 06 2007
- Country:
- Location: fountain, Colorado
winter project - hybrid #2 2003 cr125/E-series
RADIATOR HOSE ROUTING
Finally sorting the hose routing. Other posts weren't real clear so i'll try to muddle through it with pics.

Typical 02-07 Cr125 radiators. Note: If you plan on using devol radiator guards make sure your radiators are not tweaked. The guards are very heavy duty and almost completely encase the rads so they need to be straight. I now have an extra set of radiators because they were tweaked and wouldn't fit into the guards.
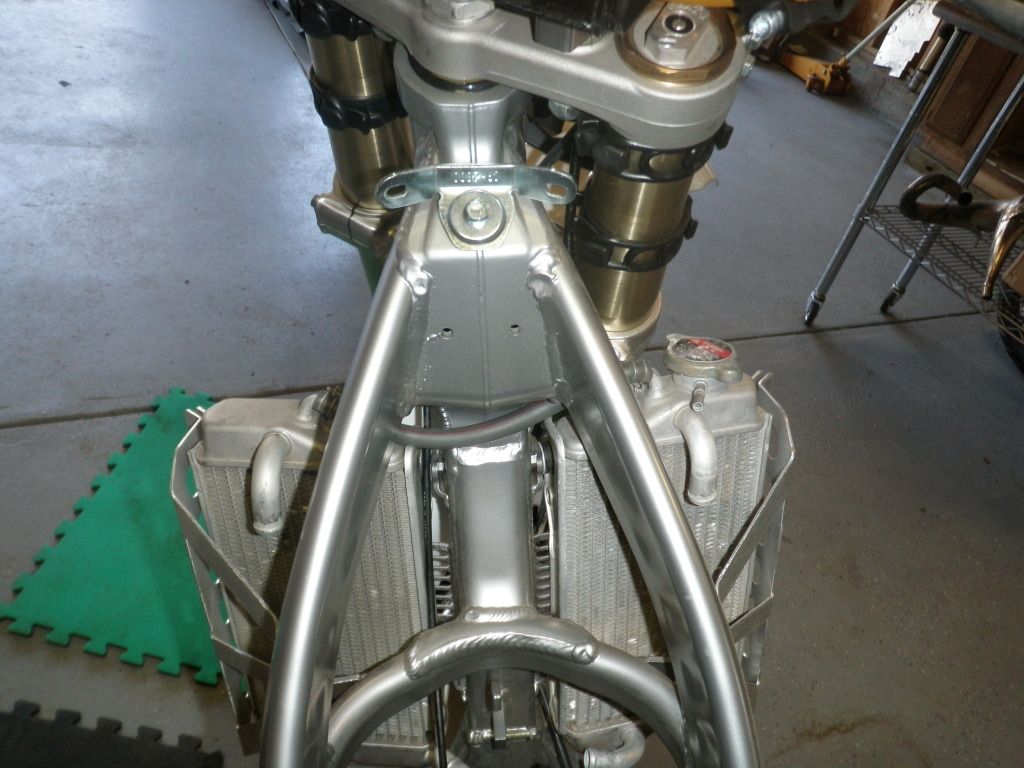
Rads mounted in the guards and bolted on. Top cr small hose mounted. Working top to bottom.
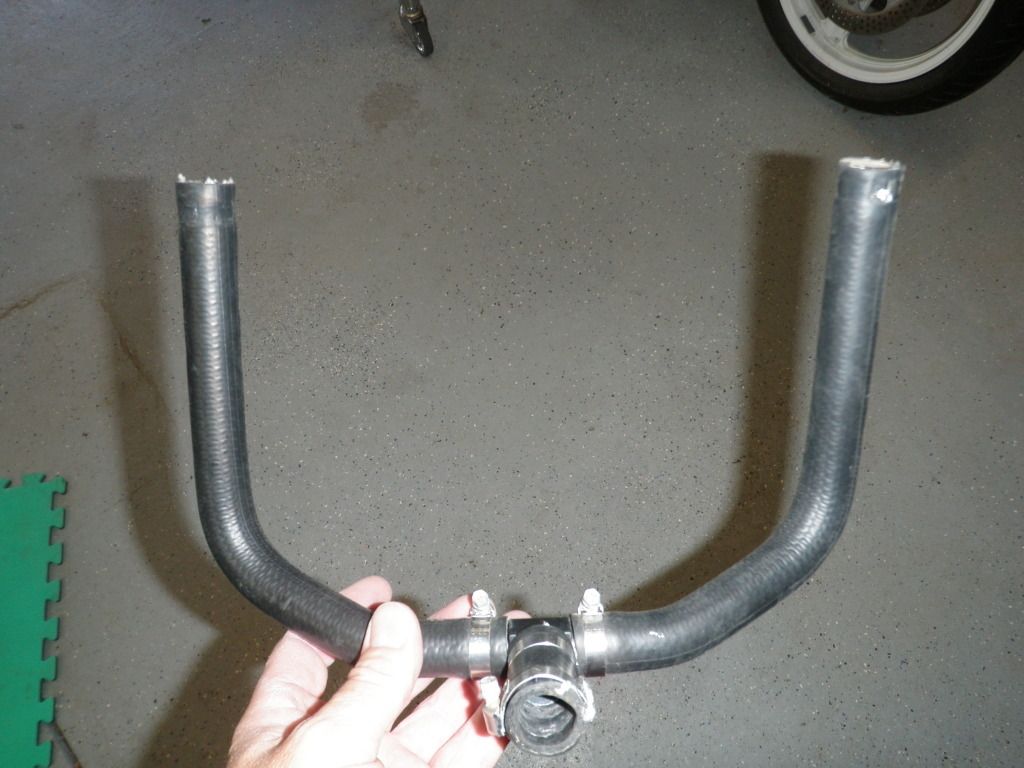
I bought a pair of 05 rads and they came with these upper hoses and t-fitting. Obviously not working.
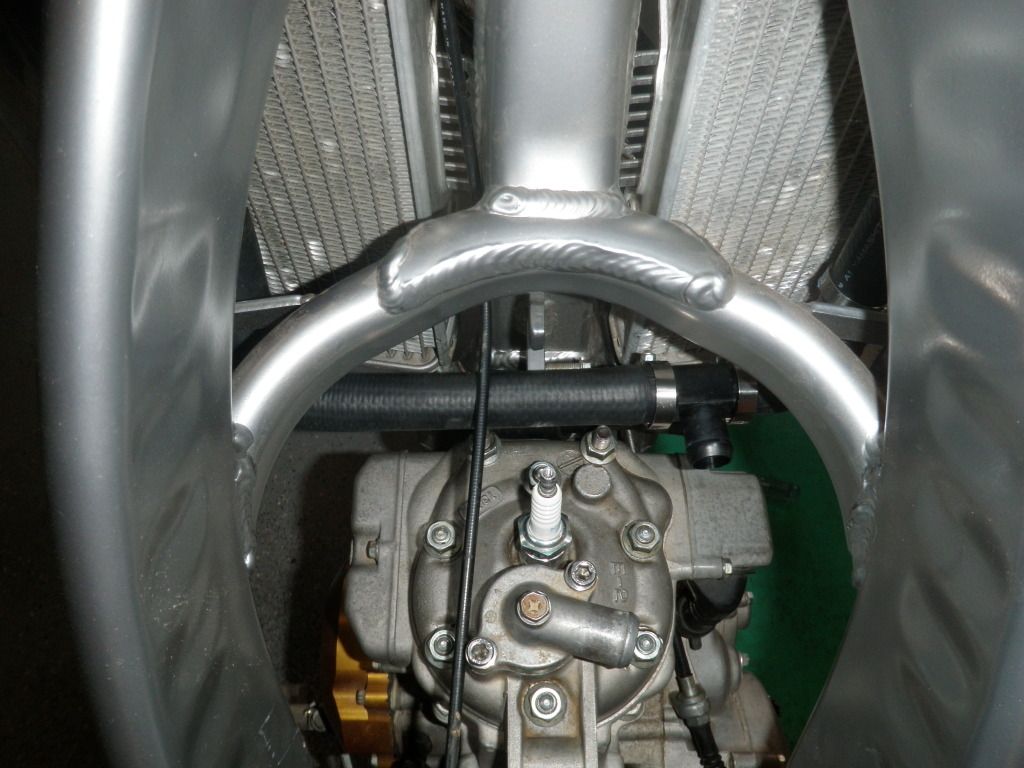
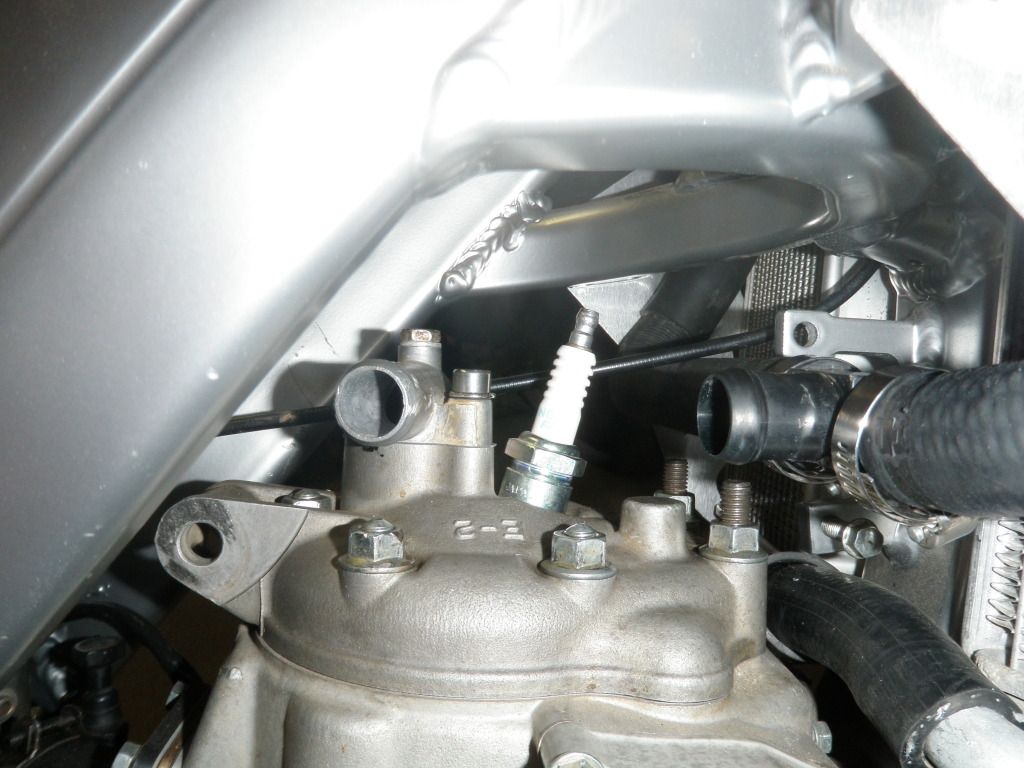
Same hoses from an 03 cr125 are going to be almost perfect. Since I had 1/4" milled of the water outlet for tank clearance they line up almost perfectly (dumb luck there).


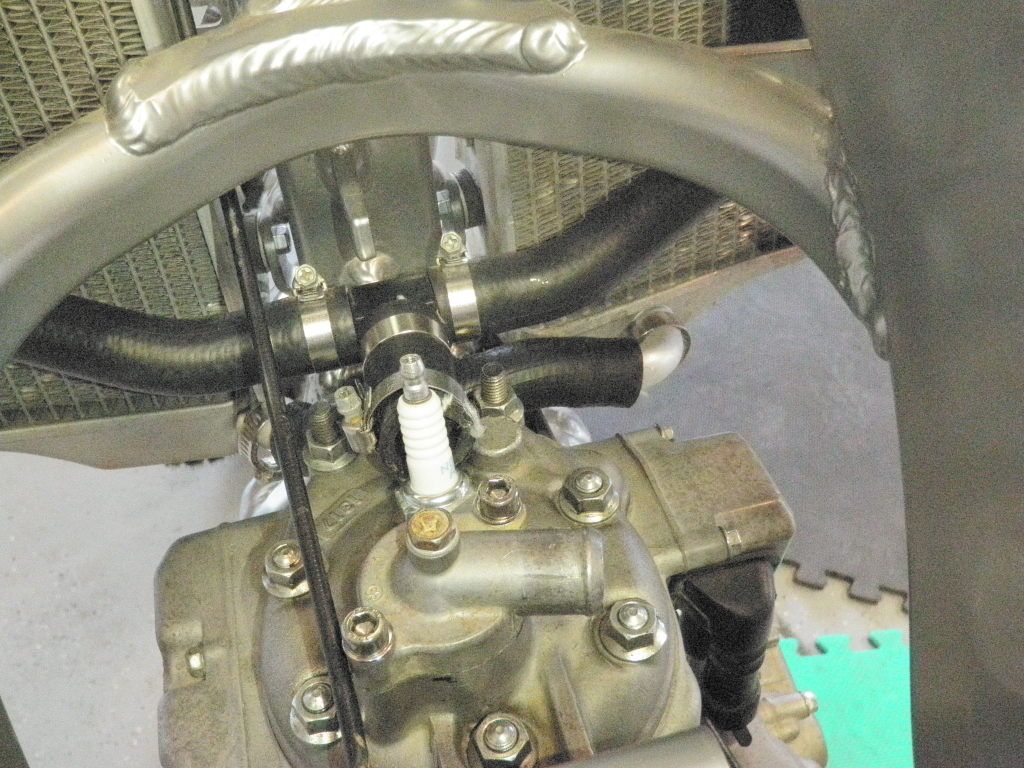
Took this KDX hose, made a cut and fits nicely.
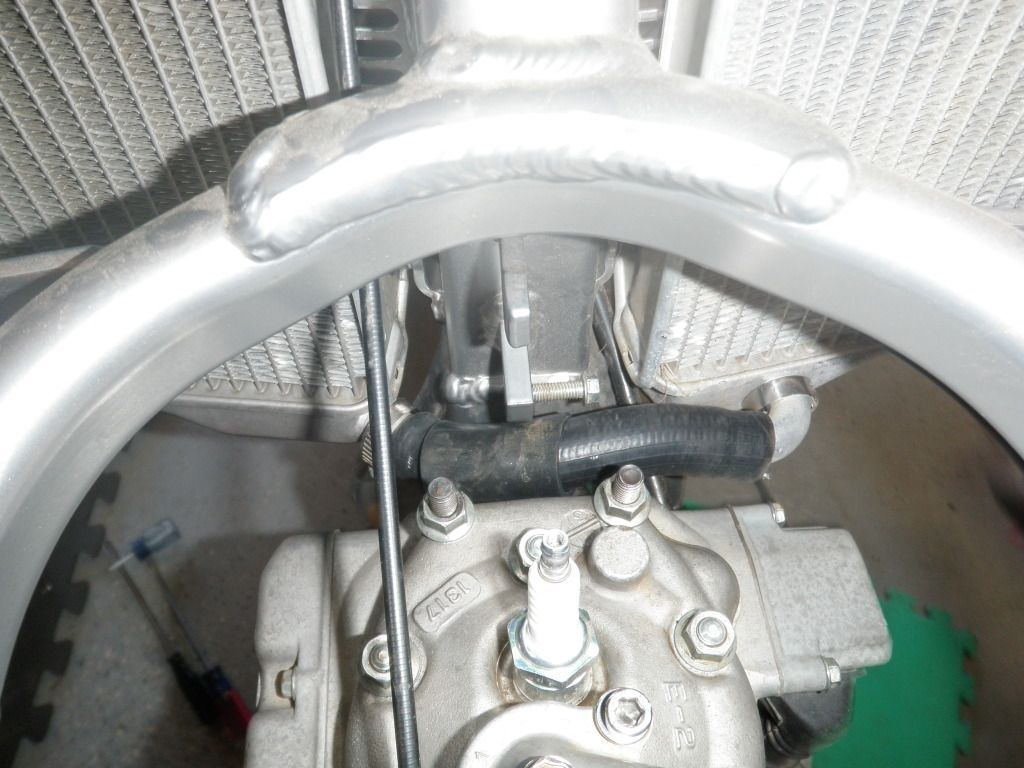
Standard cr125 lower side to side hose. Close fit.

Leftover KDX hose looks like a good candidate with a little trimming. Need to finish the pipe (coming along slooowly) before fitting. Have to arrange to always have a second set of hands around when cutting and tack welding on the pipe. Other then that and a new radiator cap the cooling system is done.
Been working with CEET and Decal Works on the graphics. Still waiting on the blue seat cover. So far this is the early look at 2 possibilities for the graphics kit. The guys at Decal Works are working on the KDX200AF in the faded pink lettering that will go where "your text" is on the shrouds. This seems to be morphing into a year long instead of a winter project.


OR


going on this (9-10-12 seat cover arrived)
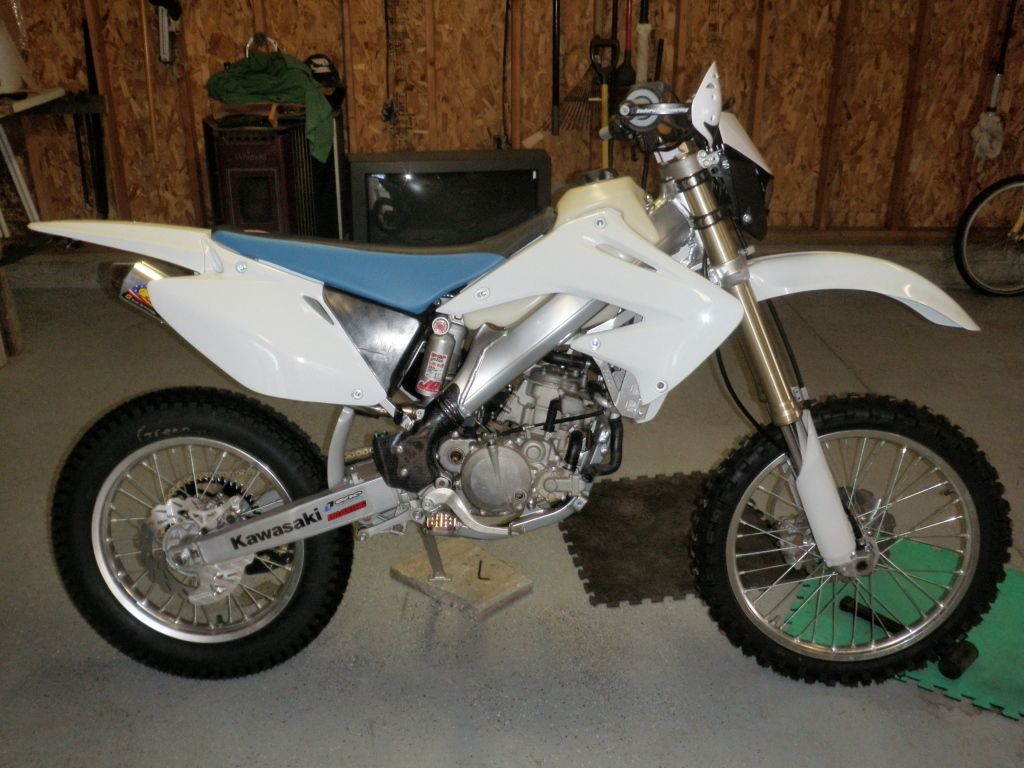

as and updated version of this
Assuming the grim reaper doesn't come for me first. I like to be thorough but the last bits are taking a while....... opinions?
Finally sorting the hose routing. Other posts weren't real clear so i'll try to muddle through it with pics.
Typical 02-07 Cr125 radiators. Note: If you plan on using devol radiator guards make sure your radiators are not tweaked. The guards are very heavy duty and almost completely encase the rads so they need to be straight. I now have an extra set of radiators because they were tweaked and wouldn't fit into the guards.
Rads mounted in the guards and bolted on. Top cr small hose mounted. Working top to bottom.
I bought a pair of 05 rads and they came with these upper hoses and t-fitting. Obviously not working.
Same hoses from an 03 cr125 are going to be almost perfect. Since I had 1/4" milled of the water outlet for tank clearance they line up almost perfectly (dumb luck there).
Took this KDX hose, made a cut and fits nicely.
Standard cr125 lower side to side hose. Close fit.
Leftover KDX hose looks like a good candidate with a little trimming. Need to finish the pipe (coming along slooowly) before fitting. Have to arrange to always have a second set of hands around when cutting and tack welding on the pipe. Other then that and a new radiator cap the cooling system is done.
Been working with CEET and Decal Works on the graphics. Still waiting on the blue seat cover. So far this is the early look at 2 possibilities for the graphics kit. The guys at Decal Works are working on the KDX200AF in the faded pink lettering that will go where "your text" is on the shrouds. This seems to be morphing into a year long instead of a winter project.
OR
going on this (9-10-12 seat cover arrived)
as and updated version of this
Assuming the grim reaper doesn't come for me first. I like to be thorough but the last bits are taking a while....... opinions?
Last edited by marrk_us on 02:34 pm Sep 11 2012, edited 1 time in total.
-
kdxtreme
- Supporting Member I
- Posts: 269
- Joined: 11:45 pm Oct 27 2010
- Country:
- Location: Bothell Wa
winter project - hybrid #2 2003 cr125/E-series
The bikes coming out really clean nice work. 
Did I say riding?
-
dfeckel
- Platinum Member

- Posts: 644
- Joined: 07:46 am Nov 09 2009
- Country:
-
FRECNDY
- Member
- Posts: 17
- Joined: 01:24 pm Apr 30 2011
- Country:
- Location: LBC
winter project - hybrid #2 2003 cr125/E-series
When I think white bikes, I think Yamahas. With red seats and gold rims.
-
BBR
- Member
- Posts: 17
- Joined: 09:21 am Aug 11 2011
- Country:
- Location: Amarillo, Tx.
Re: winter project - hybrid #2 2003 cr125/E-series
Sooooo did this bike ever get finished?
-
kawabunga
- Supporting Member II
- Posts: 63
- Joined: 12:13 am Oct 14 2011
- Country:
- Location: Beavercreek, OR
Re: winter project - hybrid #2 2003 cr125/E-series
Yeah, I been waiting patiently to se how that pipe goes on .As far as I can tell, the easiest way would be to fit
a large LS radiator and eliminate the right.
That E-series KIPS forces the pipe to hang way out. If the RS radiator were eliminated, the pipe could go high
and tuck in real nicely.
I've been stalled on mine due to extreme busyness.
Pulled it out for a look see yesterday, and this revelation hit me like a brick.
The "H" motor has the KIPS moved forward, and out of the way for modern style pipe routing.
My 2001 yz 250 has a LS radiator has nearly the core volume of the KDX radiators combined.
One would only need to have a filler neck installed, a re-fab the mounts.
As for the pipe I'm thinking about using an existing KDX header section and doing some cones in the middle.
Markus O Markus where art thou?
reviving old war-horse.
-
marrk_us
- Supporting Member I
- Posts: 141
- Joined: 02:18 am Nov 06 2007
- Country:
- Location: fountain, Colorado
Re: winter project - hybrid #2 2003 cr125/E-series
I'm still kickin'. Life kinda got in the way of play this year. I only managed to get out and ride my klx a couple of times :(. The postal service has me busy 6 days 12 hours until after the holidays. After that i'll get back in the garage. The pipe hasn't been bad to do and is almost finished. I'll get pics posted right after new years. and already have 4 weeks of vacation during the summer to do nothing but ride and hike. Kawabunga, I was able to use the stock cr125 radiators. I cut the first few inches from an extra kdx pipe and added to my pipe and it reaches the cylinder fine. other than that I cut the expansion chamber in 2 places, rotated the pieces slightly and rewelded to route it around the kips and dip under the right radiator. I'll get the pics posted next month and it will seem pretty simple. I used longer exhaust springs to attach to the cylinder, i'll post the part numbers too when I get some free time.
-
sandlvr69
- Member
- Posts: 1
- Joined: 05:52 pm Mar 08 2014
- Country:
Re: winter project - hybrid #2 2003 cr125/E-series
Just read through the build and had to comment, this is my first post on the forums! I picked up a beautiful and nearly new 2003 CR125 about five years ago and haven't done much other than prettifying her.With that pipey 125 power she's nearly worthless in the mountains where I ride. My woods modified CRF250 and 450R work well there.
This weekend I was perusing CL and came across a long stored, not running, low hour 99 KDX 220SR and picked it up for a song. New fuel and she fired up first kick. Now I have my victims in place!
This thread is like solid gold to me.
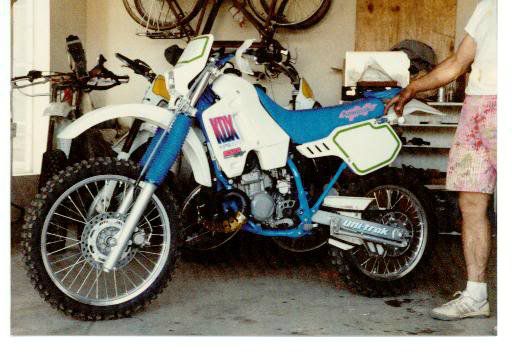
I think she's gonna look good with a real engine in her:

This weekend I was perusing CL and came across a long stored, not running, low hour 99 KDX 220SR and picked it up for a song. New fuel and she fired up first kick. Now I have my victims in place!
This thread is like solid gold to me.
I think she's gonna look good with a real engine in her:
-
marrk_us
- Supporting Member I
- Posts: 141
- Joined: 02:18 am Nov 06 2007
- Country:
- Location: fountain, Colorado
Re: winter project - hybrid #2 2003 cr125/E-series
The build really hasn't been too bad at all, even the pipe build (which I need to finish posting). The hardest part being life and work getting in the way of my garage time. I believe if you're using the newer kdx engine that the newer pipe requires a lot less work. I'll keep an eye out for your build! Don't forget to put that motor on ebay, the karters will snatch it right up and you'll have more cash for the build.
Last edited by marrk_us on 05:19 pm Apr 25 2014, edited 1 time in total.
-
marrk_us
- Supporting Member I
- Posts: 141
- Joined: 02:18 am Nov 06 2007
- Country:
- Location: fountain, Colorado
winter project - hybrid #2 2003 cr125/E-series
.
Last edited by marrk_us on 07:45 am Jul 11 2014, edited 1 time in total.