There is a circlip that snaps onto the stem before it is pressed into the lower clamp. That clip determines to what depth the stem is pressed to.
If the clip was not used, the stem could be pressed 'in' too far.
I wouldn't use a tree if the stem did NOT have that clip.
IF the clip is in place (you can look at the bottom of the clamp and easily see it if the fender is off), it is more important that the stem be pressed TO the clip than that the bearing be snug to the bottom clamp.
Sez me.
The latter being true, wherever the seal ends up is where it ends up. I'd just prefer it sitting on top of the bottom clamp.
You're not over 10ft/lbs on the bottom triple clamp bolts, right?
How far up are the tubes in the top clamp? Look to be over 1/2"?
I've noted this before..but the time to check level of the bike is before you take it apart. Sitting on a level surface (or at least use the same spot both times), actually SET a level on the seat/tank. Make a mark to denote where the level sits. Raise the KX forks in the clamps after they are installed to achieve the same relative positioning.
That way, regardles of how it 'feels', it WILL be at the same attitude as it started.
The axle tubes will not be 'pinched' if you followed SOP. That being, after you tighten the axle nut, you loosen the fork axle pinch bolts and center the wheel.
Right?
My bike by the numbers, pre-mod
-
canyncarvr

- Gold Member

- Posts: 6943
- Joined: 01:07 pm Nov 05 2004
- Country: US
- Location: The Mythical State of Jefferson
Consider the source
Using a perceived level of knowledge to boost my self worth.
Non impediti ratione cogitationis
bike profile: !clicky!
-
AZRickD
- Member
- Posts: 524
- Joined: 08:51 am Jun 29 2006
- Country:
There was no clip visible on the old KDX stem/KDX TT set up. I didn't see one on the new KDX stem/KX TT set up. I wasn't present when the pressing was done (shop rules).There is a circlip that snaps onto the stem before it is pressed into the lower clamp. That clip determines to what depth the stem is pressed to.
If the clip was not used, the stem could be pressed 'in' too far.
If anything, given the 1/10th gap, the stem was not pushed in far enough.
I'm at zero foot-pounds.You're not over 10ft/lbs on the bottom triple clamp bolts, right?
I just went to measure it. It is 11/16th of an inch above the TT. That is, the very top of the tube, including the cap, but not including the li'l hex nut thingy. They won't go any farther up, and I *may* end up lowering them down to 1/2-inch, if needed. I'm not going to take final measurements and do major adjustments until the rear spring is in and I can get my buddy to help me check sag. He loves doing sag. Really.How far up are the tubes in the top clamp? Look to be over 1/2"?
I've noted this before..but the time to check level of the bike is before you take it apart.
You did read my first post, the one with all the numbers, as in, "My bike by the numbers?"
That would have been good advice... last week.SET a level on the seat/tank.
CC, I'm a neophyte. If I knew 100% (or even 90/80/70%) of what I was doing, I wouldn't need the fine people at KDXRider.The axle tubes will not be 'pinched' if you followed SOP. That being, after you tighten the axle nut, you loosen the fork axle pinch bolts and center the wheel.
Anyway, I'm unaware of what standard operating procedure is for that particular operation. I'm asking what the SOP for this is.
However...
...I was refering to the *fork* tubes (not the axle tube), as if, by moving (bending) the fork tubes in at the axle would cause the fork tubes to bind when they move up and down. But it appears your technique will solve that problem as well. I just want to make sure that when I have taken up the slop in the axle spacers, that I don't bind the fork tubes.
Oh heck, I'm back on square one.
Rick
I done KX-ed QuailChaser's KDX220R
-
m0rie

- Supporting Member I

- Posts: 2220
- Joined: 10:25 pm Nov 29 2004
- Country:
- Location: Crescent City, CA
You might try loosening the axle pinch bolts and spinning the wheel a few times while braking. That should center the disc in the caliper.
1989 KDX 200
2007 TTR-50E
2007 TTR-50E
-
Indawoods

- Creator and Founder

- Posts: 9951
- Joined: 09:59 am Jun 12 2003
- Country:
- Location: Midwest
Got pics???? 
*** Administrator //***
****'95 KDX 200/****
"People ate cows a thousand years ago for the same reason we eat them now. Cause they are easy to catch.We're not savages,we're just lazy. A cheetah could taste like chocolate heroin. But will never know. Those bastards are fast!!! "
****'95 KDX 200/****
"People ate cows a thousand years ago for the same reason we eat them now. Cause they are easy to catch.We're not savages,we're just lazy. A cheetah could taste like chocolate heroin. But will never know. Those bastards are fast!!! "
-
AZRickD
- Member
- Posts: 524
- Joined: 08:51 am Jun 29 2006
- Country:
The disk was rubbing on the inside brake pad pretty soundly. My solution was to put .088" washers as spacers in between the fork mounting bracket and the caliper housing. Now it rubs equally on both sides. 
Upon testing the front brake lever I'm of the opinion that I need to invest about $25 for a master cylinder rebuild kit. The hand lever goes all the way in with a not particularly impressive grip on the rotor.
Lastly, I was a very bad boy this evening. I torqued down all the bolts, put on my helmet and did a night-time, lightless, low-speed ride around the neighborhood. I just couldn't help myself. I jumped up and down to test the stiction, I swerved and turned, hit the brakes to see if I'd tangle my brake lines upon fork compression, I ran over some curbs to see how "woods-ready" the forks are.
Okay, actually, my ride didn't prove a thing. But I had to fire it up.
Forgive me?
Rick
I done KX-ed QuailChaser's KDX220R
-
krazyinski

- Member
- Posts: 461
- Joined: 12:26 pm Mar 10 2006
- Country:
- Location: San Antonio Texas
Rick look at your old emails . I sent you an email one with a picture of my front axel and one with instructions on how to bolt up/tighten the front end.
you should have three spacers with the 98 axel two with dust covers that are the same size, one that is threaded inside smooth on one side and hex on the other . the long spacer screws on the axel with the hex end towards the wheel and other spacer.
you should have three spacers with the 98 axel two with dust covers that are the same size, one that is threaded inside smooth on one side and hex on the other . the long spacer screws on the axel with the hex end towards the wheel and other spacer.
The step for getting the front forks lined up is simple. After every thing is assembled snug not tight. Tighten just the rotor side axel clamp then put the bike on the ground apply the front brake and push the front end down a couple of times then tighten the lower triple to 14 ftlbs then the right axel then every thing else. This will take care of any fork bind.
2000 KDX220 FRP Ported,plated cylinder,milled head, FRP bored carb, V force 3 reeds, FMF desert pipe, 10oz FWW, 98 KX forks and oem shock re valved by Pro Action, hyd clutch, fastway pegs, tall seat foam, gripper cover, 29" CRhigh mini bars, Cycra brush gaurds.
-
AZRickD
- Member
- Posts: 524
- Joined: 08:51 am Jun 29 2006
- Country:
I dutifully reset the axle and forks to Krazy's specs. All this before BradF's shim stock arrives (is it in the mail yet, Brad?) and I have to pull it all apart again. 
Also, I was going to pull apart my back end to get at the shock (unbolt the swing-arm, dog bones, etc). That would allow me to get in an lube the bearing/bushings. Problem is, the nuts are on so tight that my hand tools won't budge them. I'll likely have to borrow or buy some air tools to get them off.
I found that Kawasaki doesn't make a true rebuild kit for the front master cylinder. One has to piece it together from four individual parts. The piston ($30+), and three other pieces (washer, gasket and circlip). He didn't know if the washer was a metal one which wouldn't need replacement or whether it was rubber, which would need replacement. Since he has to order it, (3-7 biz days), I elected not to chance it and purchased those parts (at $3.99 each) for total of $48.
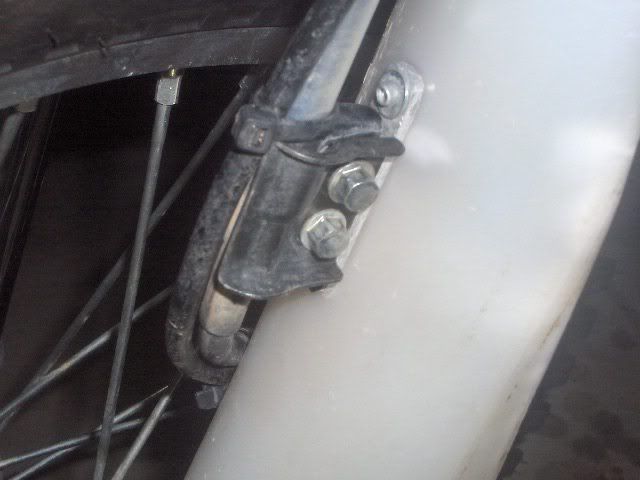
On a happier note, QuailChaser gave me his fabbed fork guards he was going to use to route his brake line.
Pretty simple. He took some .5 x .5 aluminum angle stock and hacksawed and filed it down to shape. Drilled some holes to fit the KDX brakeline retainer clamp and pop-riveted it to his KX guards. In case you're wondering about scratches from the rivets on the back side... no worries. He put a smear coat of plastic glue which covered up the jaggies quite nicely... almost like he meant to do it that way.
This is what it looks like...
Also, I was going to pull apart my back end to get at the shock (unbolt the swing-arm, dog bones, etc). That would allow me to get in an lube the bearing/bushings. Problem is, the nuts are on so tight that my hand tools won't budge them. I'll likely have to borrow or buy some air tools to get them off.
I found that Kawasaki doesn't make a true rebuild kit for the front master cylinder. One has to piece it together from four individual parts. The piston ($30+), and three other pieces (washer, gasket and circlip). He didn't know if the washer was a metal one which wouldn't need replacement or whether it was rubber, which would need replacement. Since he has to order it, (3-7 biz days), I elected not to chance it and purchased those parts (at $3.99 each) for total of $48.
On a happier note, QuailChaser gave me his fabbed fork guards he was going to use to route his brake line.
Pretty simple. He took some .5 x .5 aluminum angle stock and hacksawed and filed it down to shape. Drilled some holes to fit the KDX brakeline retainer clamp and pop-riveted it to his KX guards. In case you're wondering about scratches from the rivets on the back side... no worries. He put a smear coat of plastic glue which covered up the jaggies quite nicely... almost like he meant to do it that way.
This is what it looks like...
Last edited by AZRickD on 09:22 am Oct 26 2006, edited 1 time in total.
I done KX-ed QuailChaser's KDX220R

-
krazyinski
- Member
- Posts: 461
- Joined: 12:26 pm Mar 10 2006
- Country:
- Location: San Antonio Texas
Rick you don't have to pull the swing arm to remove the shock. just unbolt the left side subframe,pull the airbox,seat and the rear fender,unbolt the dog bone ( link) then unbolt top and bottom of shock and thats it.
2000 KDX220 FRP Ported,plated cylinder,milled head, FRP bored carb, V force 3 reeds, FMF desert pipe, 10oz FWW, 98 KX forks and oem shock re valved by Pro Action, hyd clutch, fastway pegs, tall seat foam, gripper cover, 29" CRhigh mini bars, Cycra brush gaurds.
-
Indawoods
- Creator and Founder
- Posts: 9951
- Joined: 09:59 am Jun 12 2003
- Country:
- Location: Midwest
Ya'll CRAZY!
Unbolt and pull out through the right side where the reserve sits. DONE!
Unbolt and pull out through the right side where the reserve sits. DONE!
*** Administrator //***
****'95 KDX 200/****
"People ate cows a thousand years ago for the same reason we eat them now. Cause they are easy to catch.We're not savages,we're just lazy. A cheetah could taste like chocolate heroin. But will never know. Those bastards are fast!!! "
****'95 KDX 200/****
"People ate cows a thousand years ago for the same reason we eat them now. Cause they are easy to catch.We're not savages,we're just lazy. A cheetah could taste like chocolate heroin. But will never know. Those bastards are fast!!! "
-
AZRickD
- Member
- Posts: 524
- Joined: 08:51 am Jun 29 2006
- Country:
-
Colorado Mike

- Gold Member
- Posts: 1921
- Joined: 11:42 am Feb 25 2005
- Country:
- Location: Colorado
I remember one of the shock bolts being way over tightened from the factory. I hit it with I think just my little air ratchet, which can only do 50 ft-lbs, and it popped free. the hammer action makes all the difference. Surely you must have a freind that has air tools. Cleaning and re-lubing the linkage and swing arm bearings is not to be discounted though. I believe you bought this bike from someone that knows that, but just so you know, Kawy ships the bikes with nearly no lube in there. If you neglect them, the cost of replacement is a lesson for sure!
Mike
Life's tough, it's even tougher if you're stupid.
'04 KDX220
Life's tough, it's even tougher if you're stupid.
'04 KDX220
-
AZRickD
- Member
- Posts: 524
- Joined: 08:51 am Jun 29 2006
- Country:
QuailChaser was the guy who alerted me to the lubelessness. He greased the KDX some time prior to selling it to me. He suggested that they should be done every six months (no longer than a year).
I have numerous sources for air tools, but _almost_ everyone I know is at the dunes this weekend.
Rick
I have numerous sources for air tools, but _almost_ everyone I know is at the dunes this weekend.
Rick
I done KX-ed QuailChaser's KDX220R
-
AZRickD
- Member
- Posts: 524
- Joined: 08:51 am Jun 29 2006
- Country:
Sideways wouldn't get the shock out. Too much stuff to bind into and block off. I decided to remove the airbox and pull it out from the top. No small feat. I think removing the whole front end was less of an event.
For "air tools" I used an old-fashioned 19th century impact wrench (3-pound sledge on a box-end wrench) to get both shock bolts and both right-side dogbone nuts off. The shock is about to be placed in a bench vise (with great-metal-crushing-pressure, of course) to tap off the lock rings.
--Edit-- The old spring is off, the new spring is in need of some compression to get the retaining plate back on. Perhaps I'll head over to the local bike shop to have them do it instead. --Edit--
--Edit2-- No need for compression. It slides right on. I thought the rubber baby bumper was part of the mechanism and I had to slip the plate underneath it. Turns out the bumper slides out of the way. --Edit2--
I hope I can find all of the parts I just disconnected.
I think I need to be medicated.
Rick
Last edited by AZRickD on 02:13 pm Oct 27 2006, edited 2 times in total.
I done KX-ed QuailChaser's KDX220R
-
m0rie
- Supporting Member I
- Posts: 2220
- Joined: 10:25 pm Nov 29 2004
- Country:
- Location: Crescent City, CA
I often find that need by friday...AZRickD wrote: I think I need to be medicated.
1989 KDX 200
2007 TTR-50E
2007 TTR-50E
-
Colorado Mike
- Gold Member
- Posts: 1921
- Joined: 11:42 am Feb 25 2005
- Country:
- Location: Colorado
come to think of it, I remember taking that airbox out for no real good reason. Getting it back in made me wonder what ancient secrets the little gymnastic Japanesey ladies on the assembly line use in order to build one of these bikes in less than a week.
Hmm,, Maybe that's why they don't make KDX's anymore. all the airbox ladies became Grand Master Red belts with dragons, and were put on as Sensei , teaching the Chinese prison labor how to pack Barbie doll accessories so that they're impossible to remove from the packaging without damaging the toy, or lacerating yourself.
Another mystery solved.
Mike
Life's tough, it's even tougher if you're stupid.
'04 KDX220
Life's tough, it's even tougher if you're stupid.
'04 KDX220
-
AZRickD
- Member
- Posts: 524
- Joined: 08:51 am Jun 29 2006
- Country:
Let's review the old numbers...
Static sag = 1.5"
Race sag = 3"
Distance axle to axle = 56.5"
Rake = 65-ish degrees
Trail = 7 (from in front of the fork) or 5" (from behind the fork)
Radiator shrouds = 25" - left, 26" - right
I'm off to the hobby shop to buy some shim stock. I'll install that and do the light and Trail Tech Vapor computer tonite. Tomorrow we'll do a fairly calm, C-minus ride.
Rick
New numbers...Static Sag: ~ 1.9 to 2.0 inches
Race Sag: ~ 5.5 inches
(I bought the bike set up for 150-pound QuailChaser).
The following measurements will help me figure out if the geometry is similar both pre and post mod. Hopefully this will help me avoid, or dial out, any skittish handling problems that might crop up:
Distance center of rear axle to center of front axle= 56.75"
Rake = 65-ish degrees (measured with a crappy carpenter guage)
Trail = 7-inches (measured from the axle); or 4.5" (from the rear of the fork).
I've also measured from a point on the radiator shrouds as well ( 25-left, 26-right).
Static sag = 1.5"
Race sag = 3"
Distance axle to axle = 56.5"
Rake = 65-ish degrees
Trail = 7 (from in front of the fork) or 5" (from behind the fork)
Radiator shrouds = 25" - left, 26" - right
I'm off to the hobby shop to buy some shim stock. I'll install that and do the light and Trail Tech Vapor computer tonite. Tomorrow we'll do a fairly calm, C-minus ride.
Rick
I done KX-ed QuailChaser's KDX220R
-
AZRickD
- Member
- Posts: 524
- Joined: 08:51 am Jun 29 2006
- Country:
I finally found my calipers and was able to get a measurement of the difference in size of the 98 KX upper TT hole and the 2003 KDX stem.
KX TT hole = .978"
KDS stem = .926"
Shim size needed <= . 052"
Looks like a doubling up of my brass .025 shim stock will work just fine.
Rick
KX TT hole = .978"
KDS stem = .926"
Shim size needed <= . 052"
Looks like a doubling up of my brass .025 shim stock will work just fine.
Rick
Last edited by AZRickD on 11:59 pm Oct 27 2006, edited 1 time in total.
I done KX-ed QuailChaser's KDX220R
-
AZRickD
- Member
- Posts: 524
- Joined: 08:51 am Jun 29 2006
- Country:
Screw it.
I couldn't get them both in -- it was difficult to get two layers of shim to behave when the stem came into contact with them.
So I'm riding with just the one. Maybe I'll try a .032 or .048 next.
Has anyone detailed how best to afix the KDX light & plastic to the KX forks?
Rick
I couldn't get them both in -- it was difficult to get two layers of shim to behave when the stem came into contact with them.
So I'm riding with just the one. Maybe I'll try a .032 or .048 next.
Has anyone detailed how best to afix the KDX light & plastic to the KX forks?
Rick
I done KX-ed QuailChaser's KDX220R